
Meta/Facebook ads setup guide
To start running ads on Meta there's a series of setup steps shown below. If you've run ads before it's likely you've already done some of these but please check each step as our product won't work without them all completed.
Facebook page
Before starting you'll need a Facebook page for your business. Most gyms already have one of these but if you don't you can create one here
Business manager account
In Meta you can run Ads under your personal profile or under a business profile. To run Ads via WodBoard you need to be setup as a Business. This also makes a lot more sense if you ever sell the business as you'll need handover access so it's worth getting it setup regardless. There's a few possibilities here:
i) You've already got a business manager account setup
ii) You've not got a business manager account setup but have been running ads under an ads account associated with your profile not the business manager
iii) You've not used meta ads before and need to setup from scratch.
Follow these steps to get setup:
1) Open Meta Business Manager by clicking this link If the page loads and you are not prompted to create a Business Manager account then you are already setup. You can skip the rest of this section and jump to the Ads Account section below.
2) If Meta prompts you to create an account then you don't currently have a Business Manager account and should follow the prompts. Make sure you add your Facebook Page when prompted. If you've run ads before it'll ask if you want to move your existing ads account over to the business. Say yes to this. If you don't get that option because you've not run ads before then we'll create an ads account in the next section.
Ads account
To run ads on Meta you're going to need an ads account! Let's walk through the steps
1) Head to the ads account page in business manager here
2) If an ad account is shown there (highlight in red in middle column in the screenshot below) you're all good no action is required.
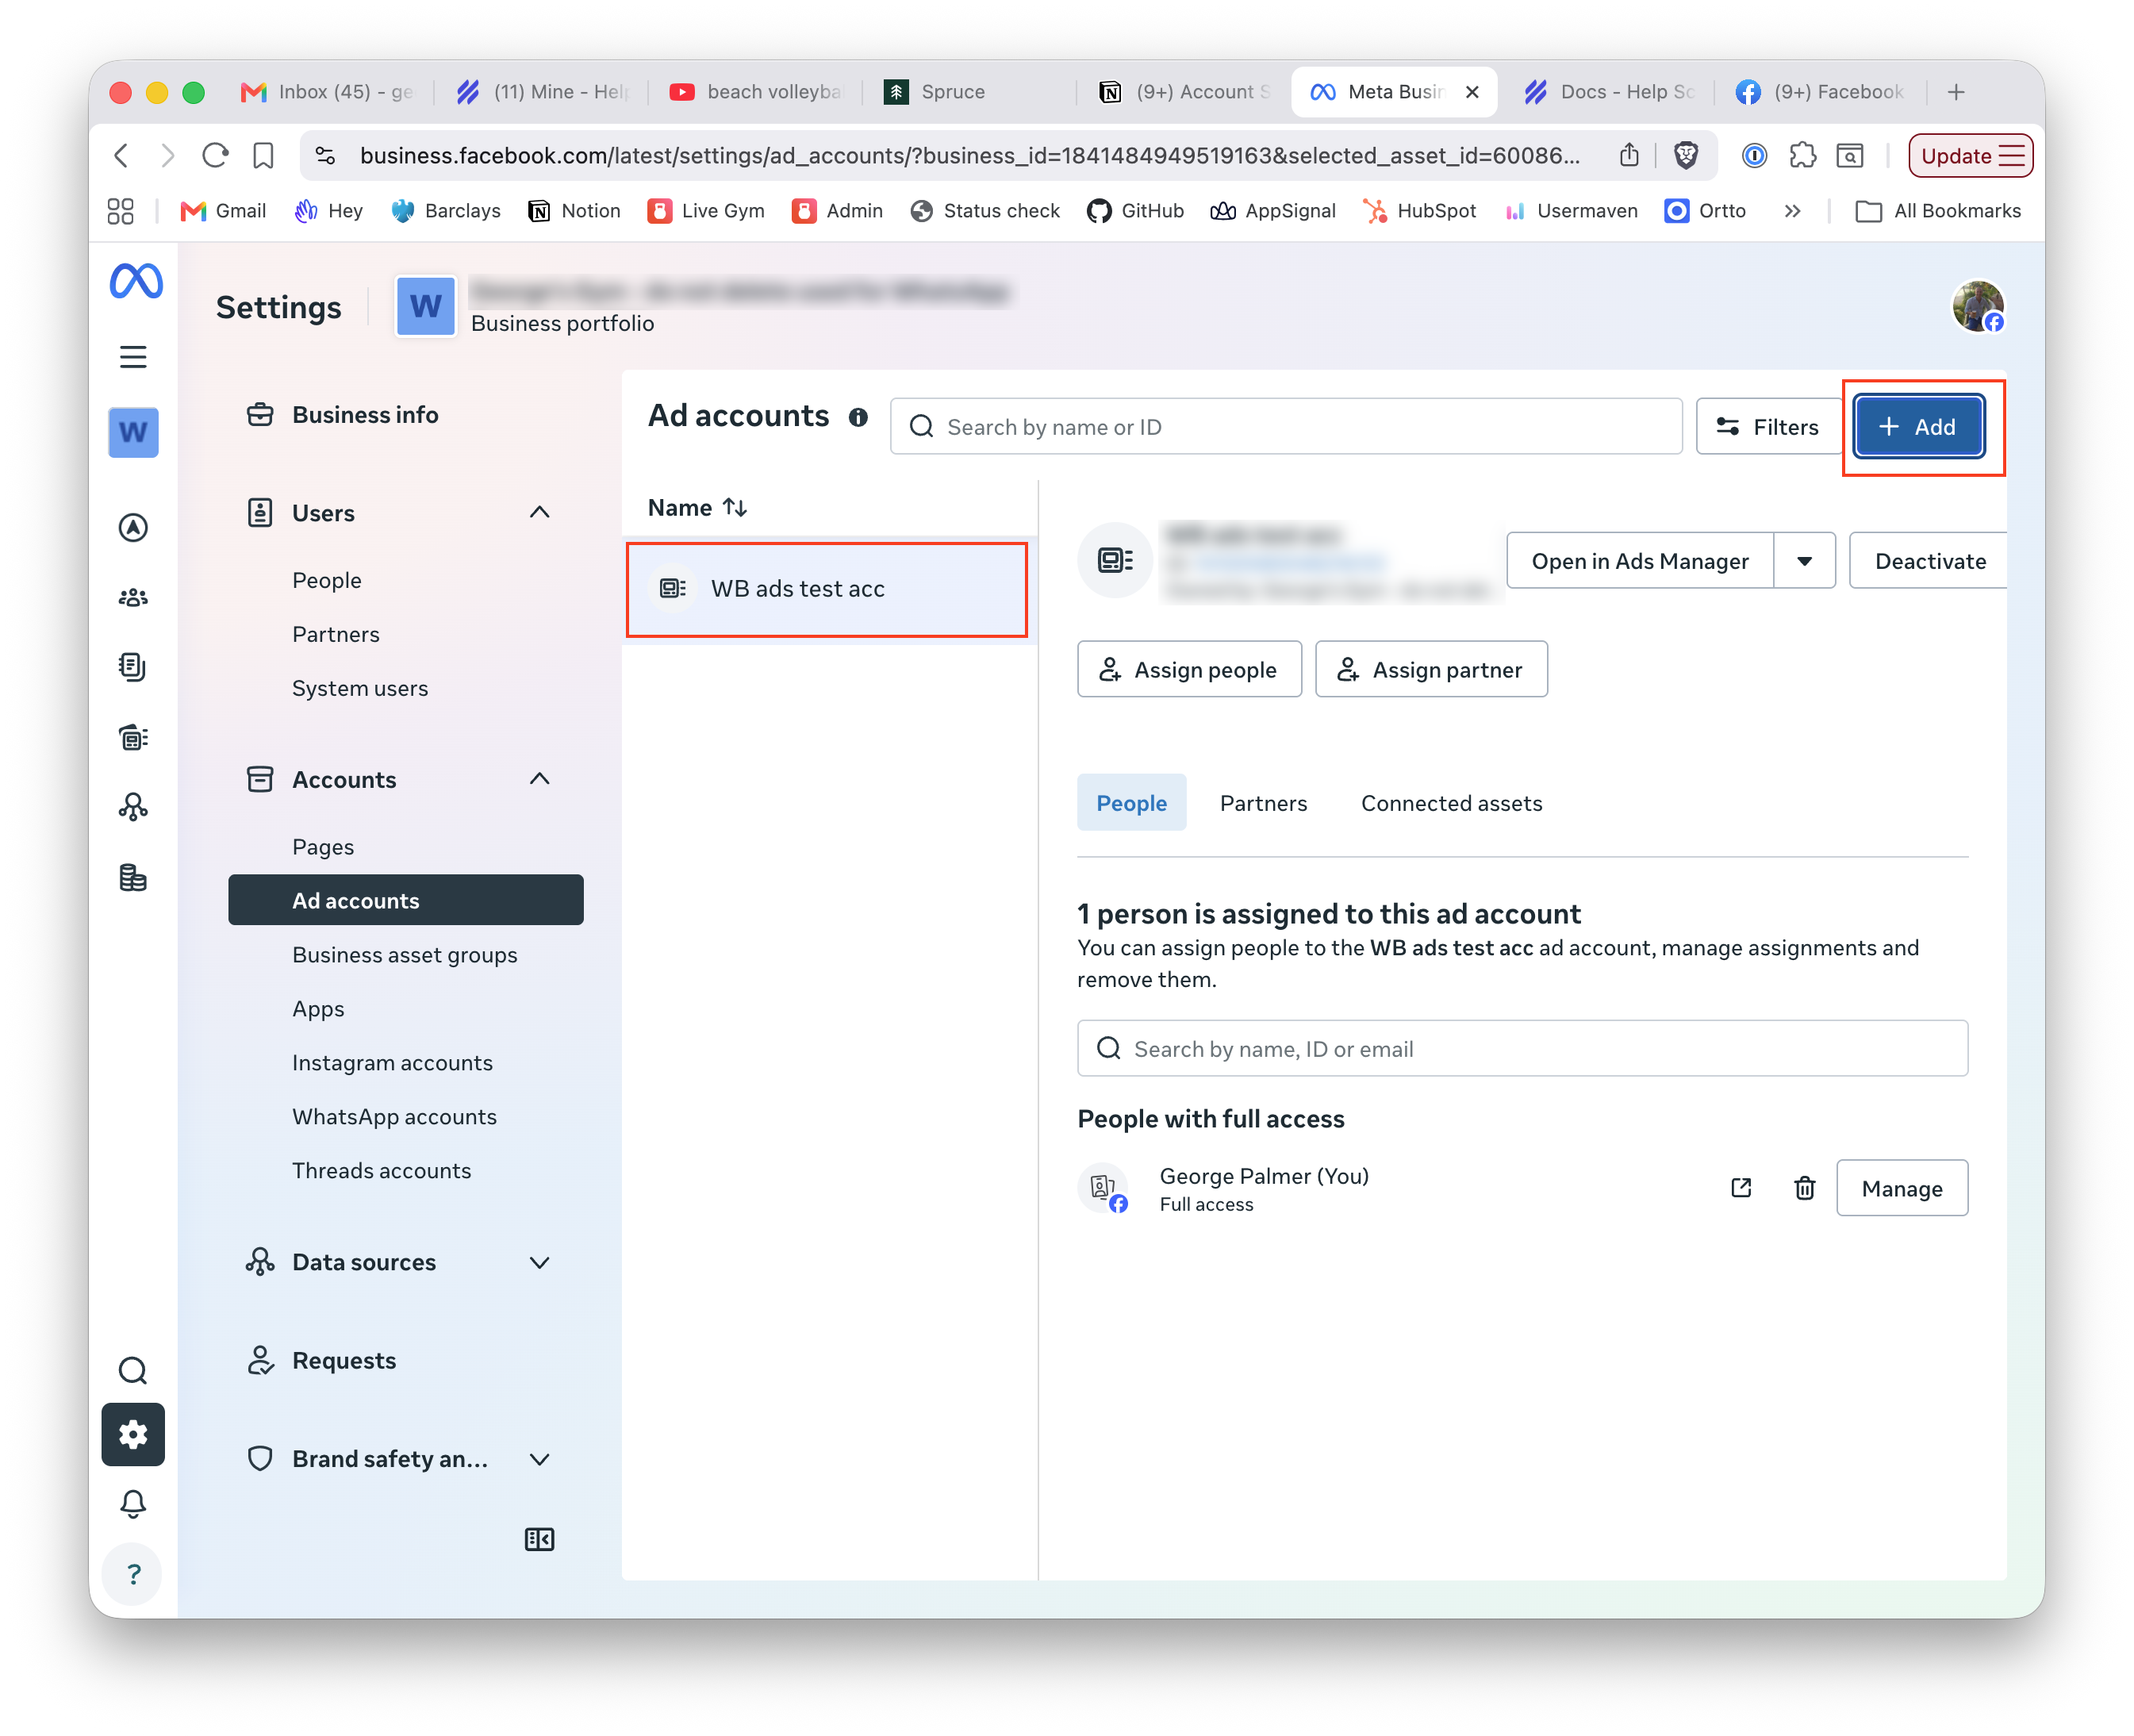
3) If no account is shown then click the Add button. Here you can either a) create a new ads account or b) associate an ads account you've used before personally for your business before. If you have an ads account you've used before we recommend you use that so go with that option. If you're not sure you can click the add existing account option and see if any are listed. If not you can always backtrack and choose the Create New Aaccount option instead.
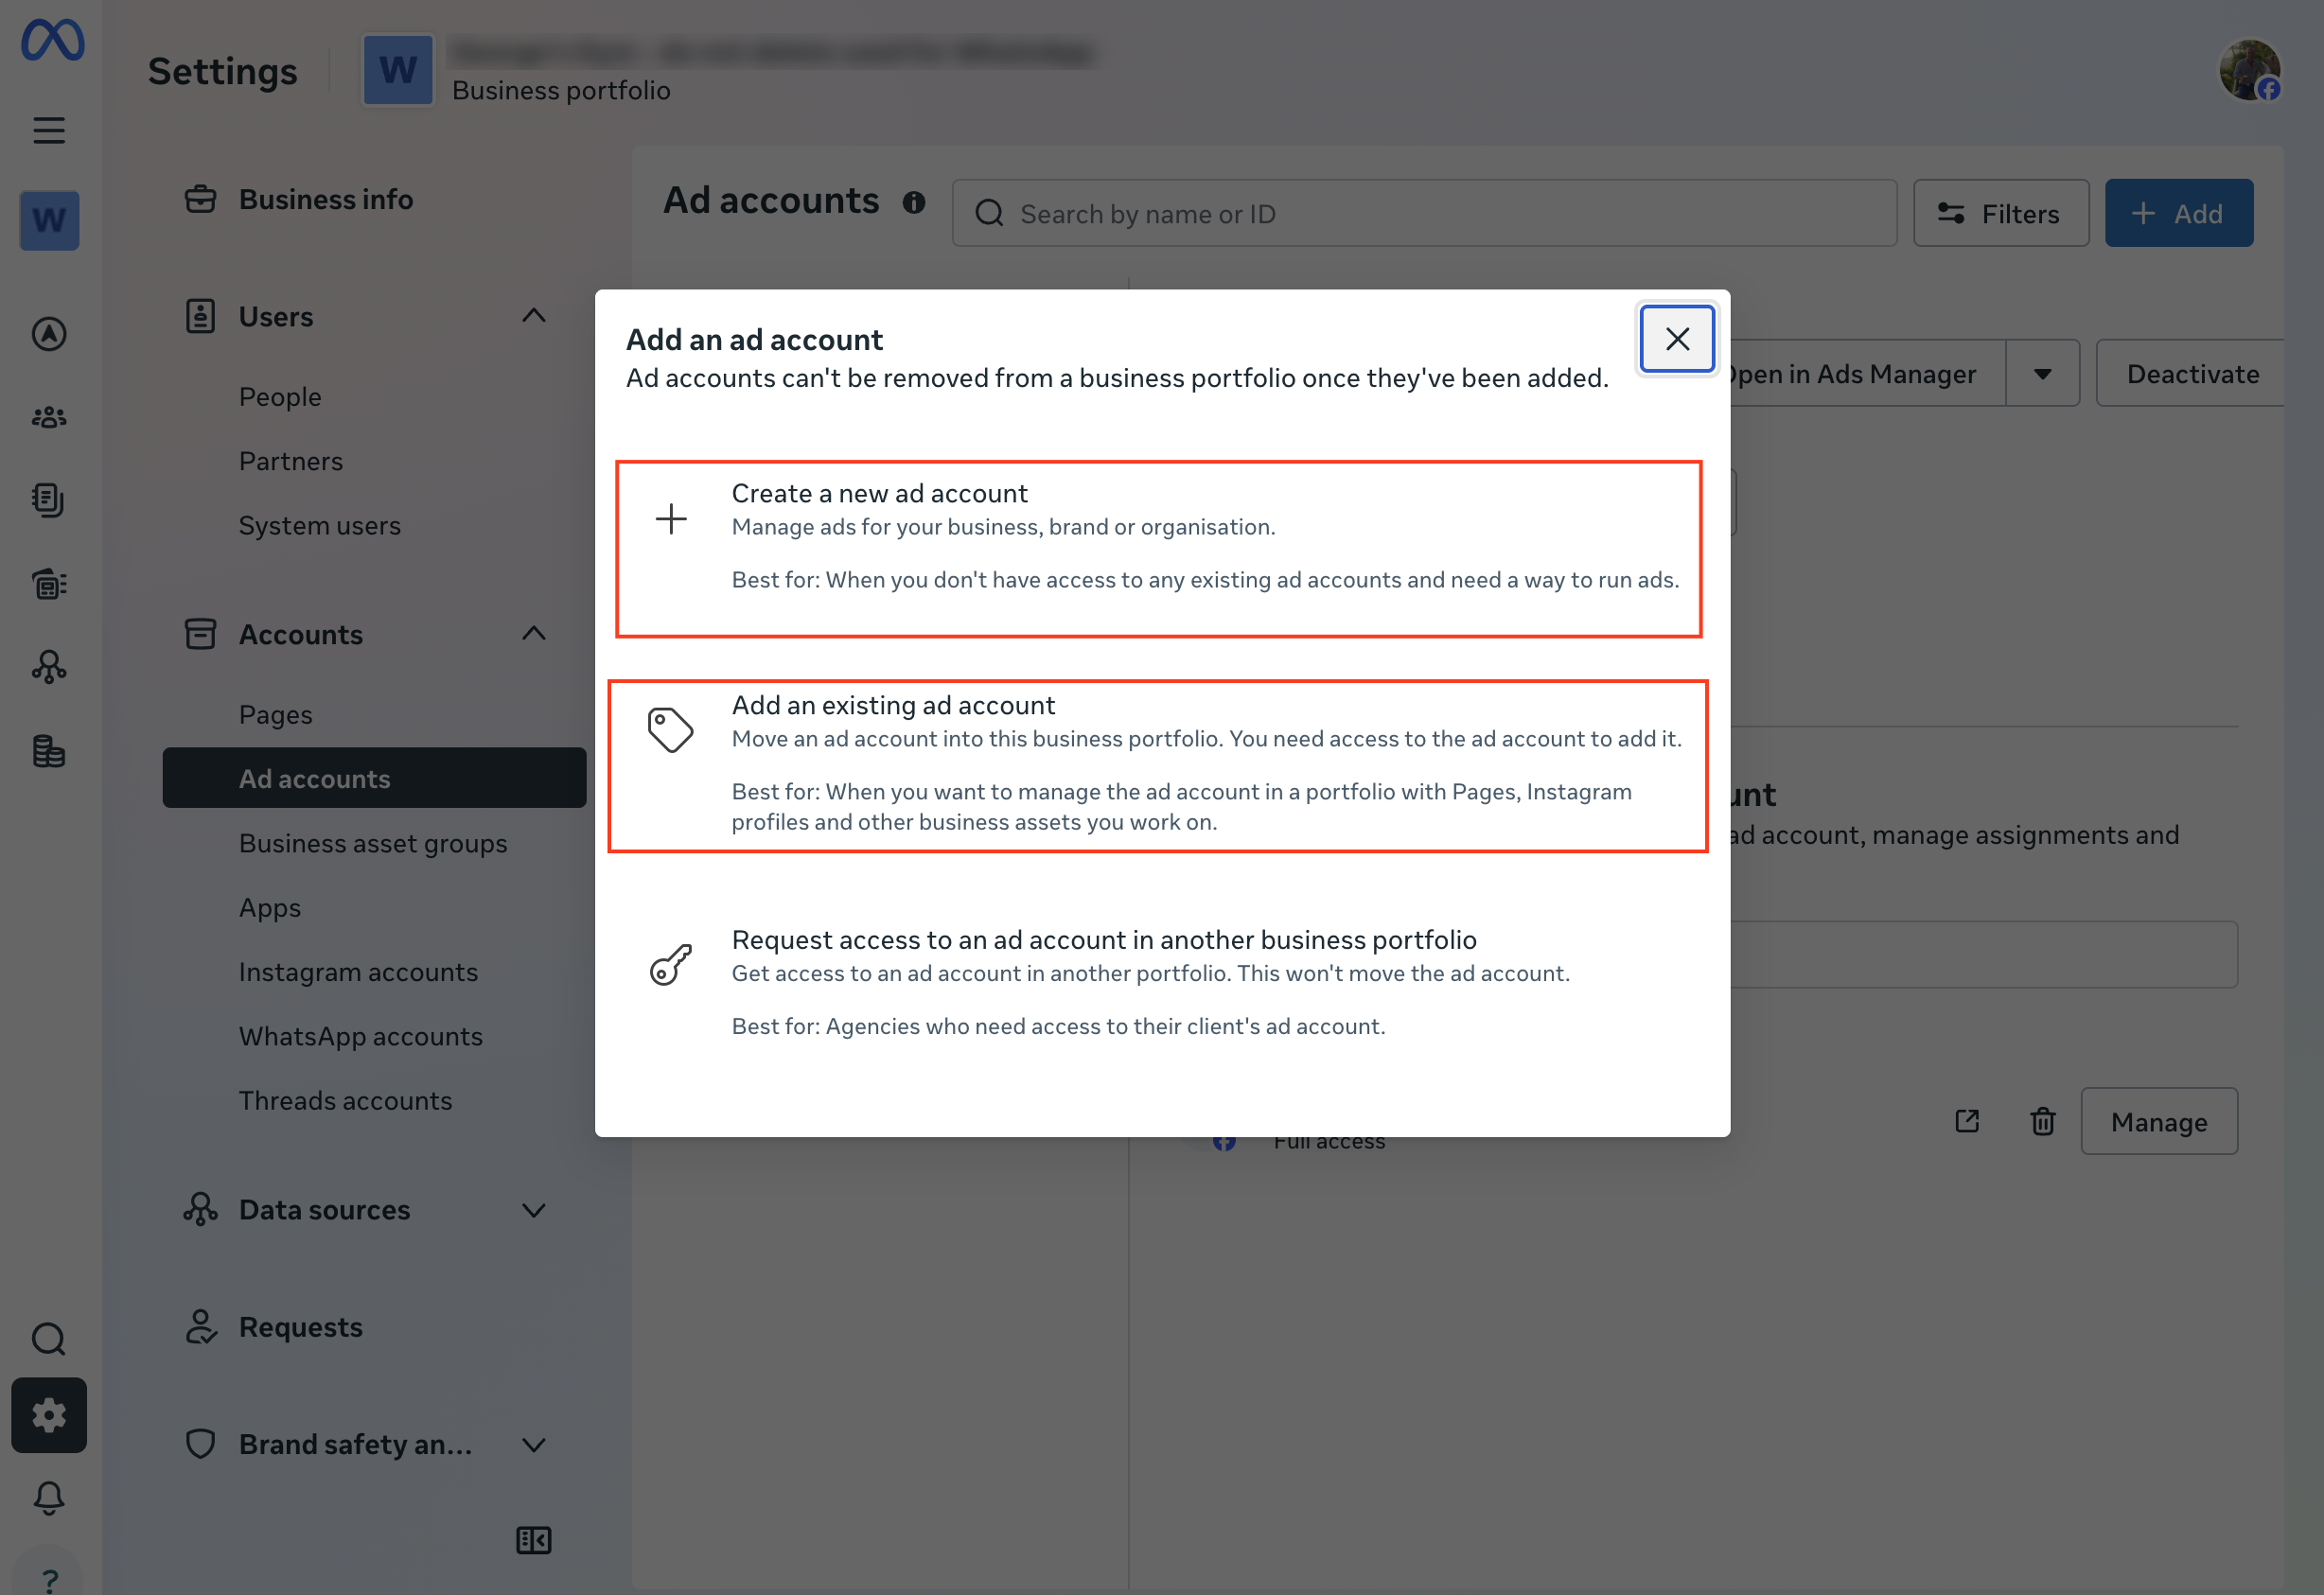
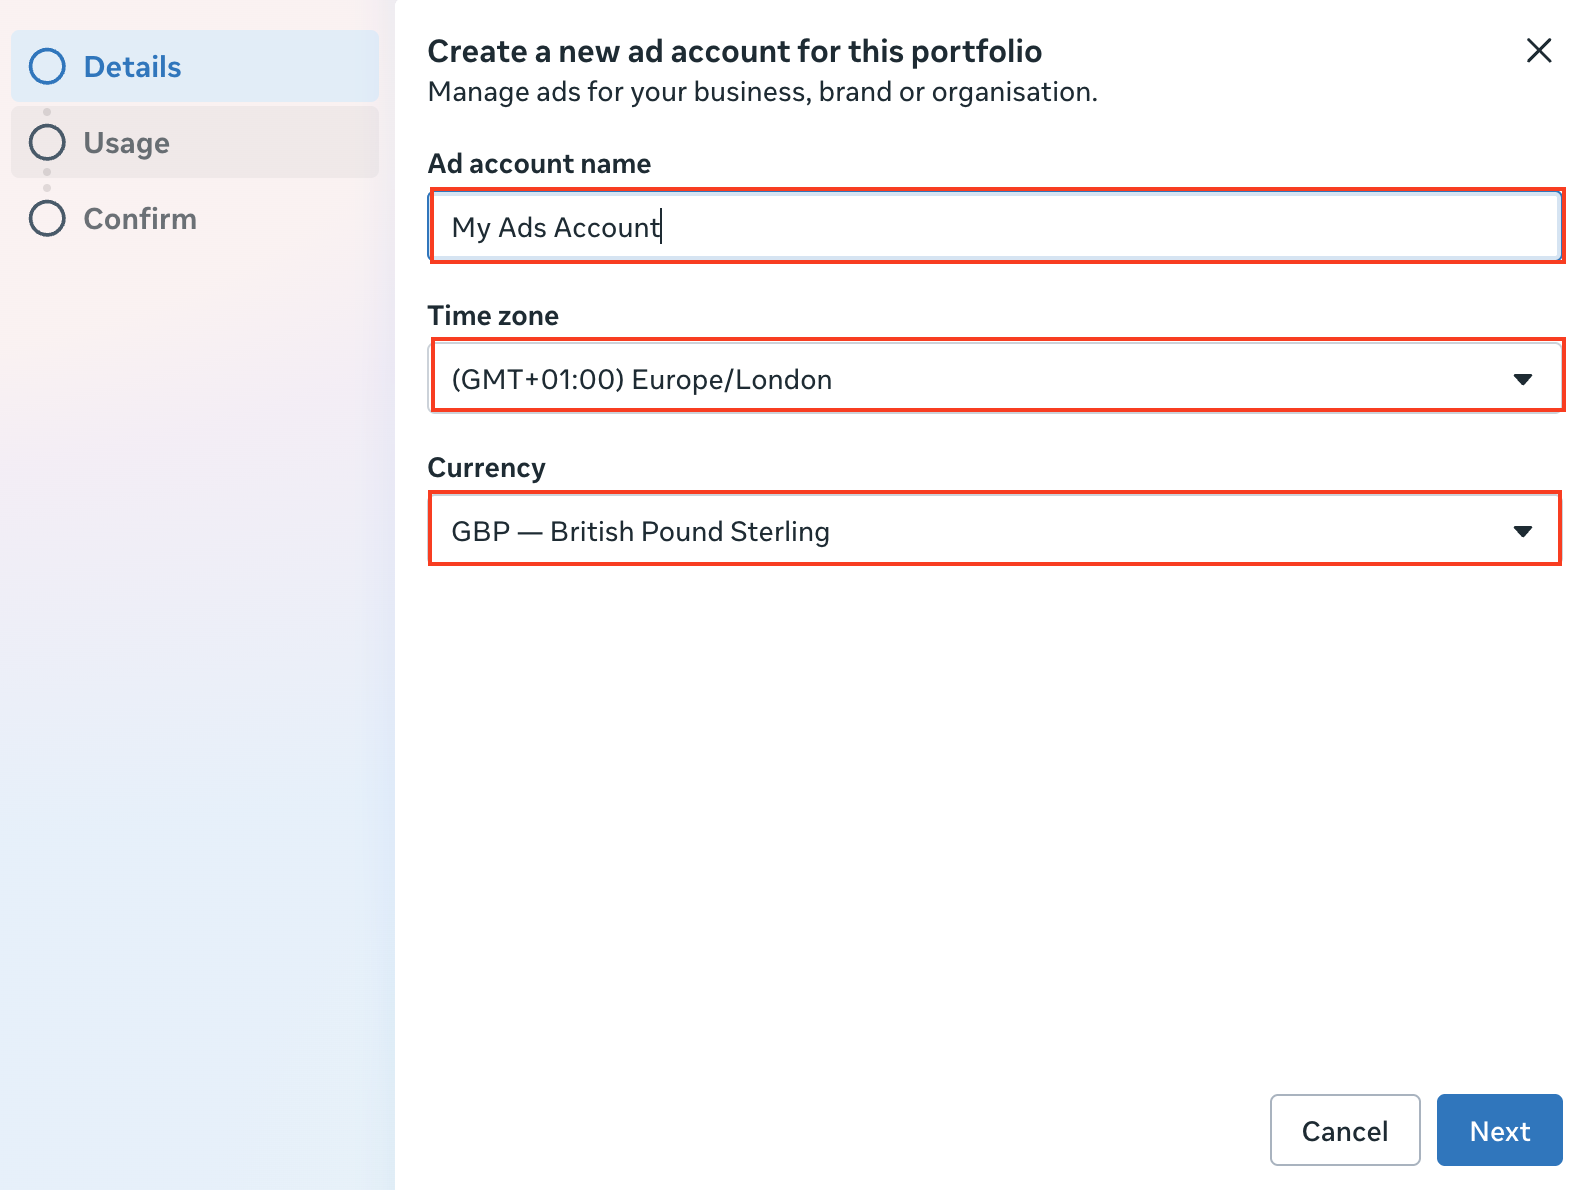
4) If you need to create a new account enter a name, timezone and currency. Make sure you get these correct as they're hard to change later.
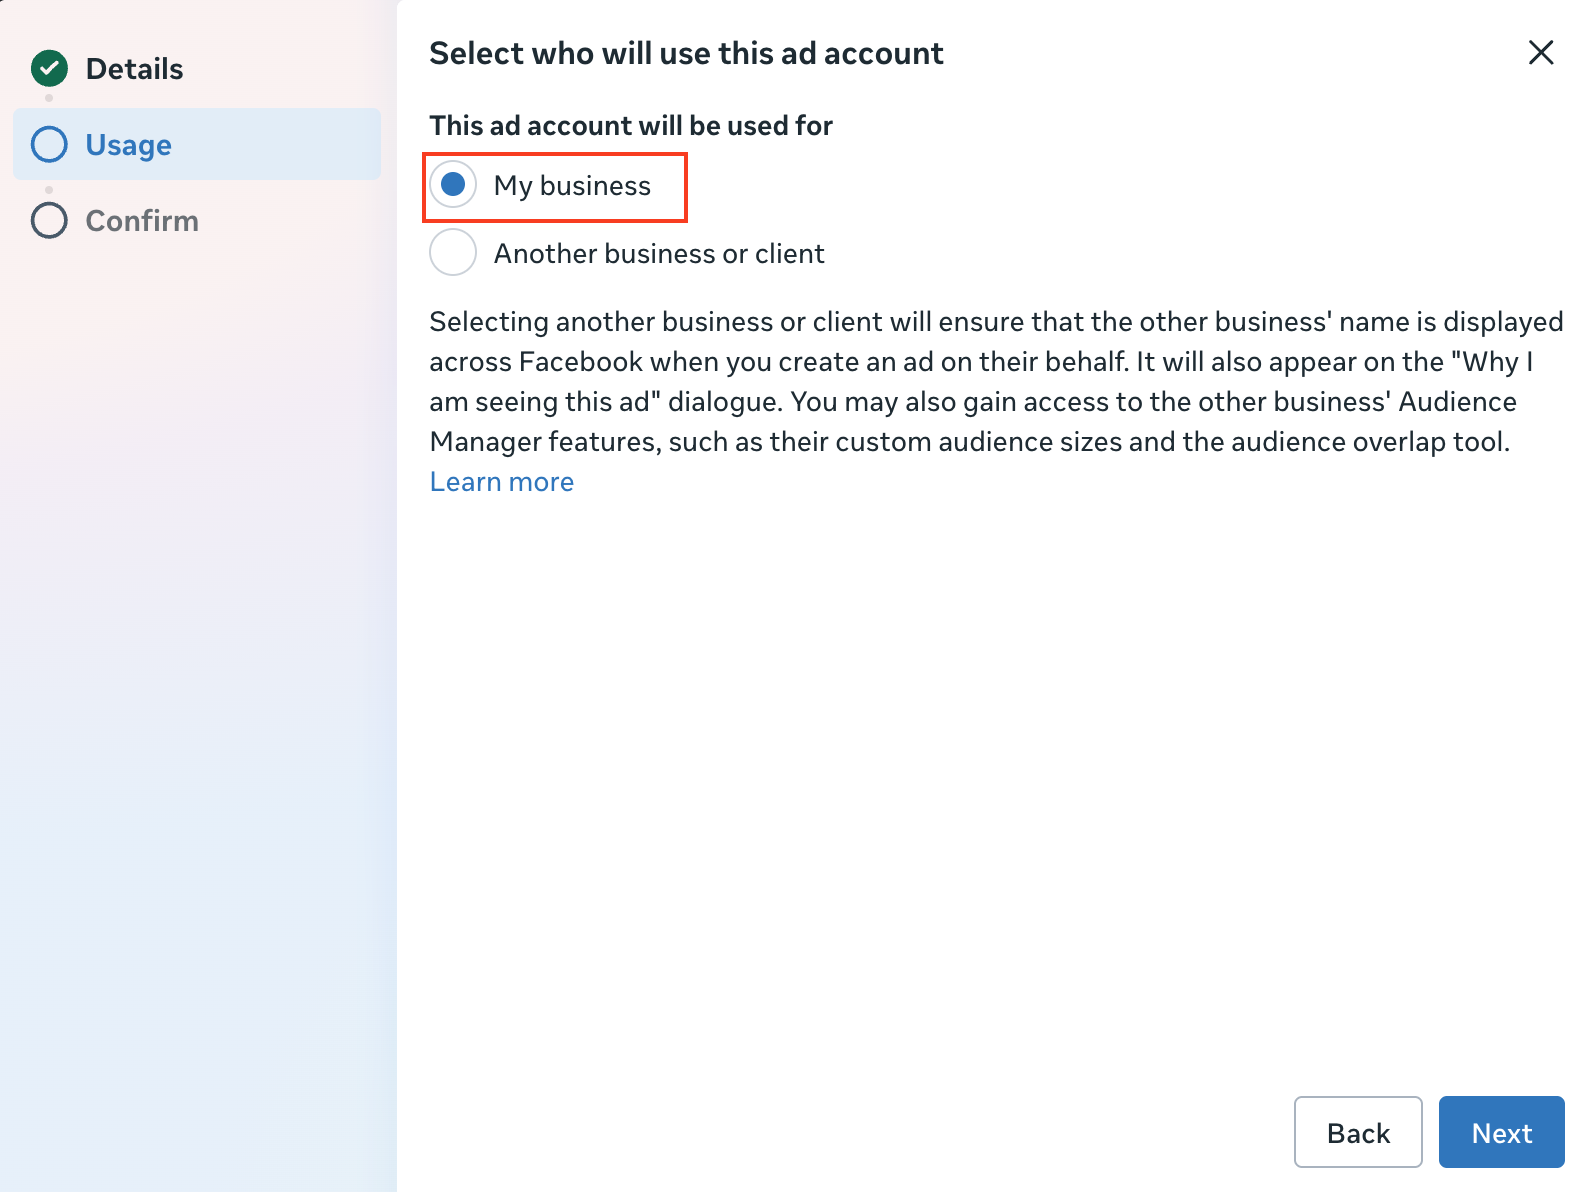
5) On the next screen choose the "My Business option"
6) Finally complete the creation of the account by accepting Meta terms
Ads pixel
To run ads on Meta you'll also need a Pixel. You sometimes get this automatically with your ads account and other times you have to create it yourself. To do this:
1) Head to the Meta Business Manager which can be found here
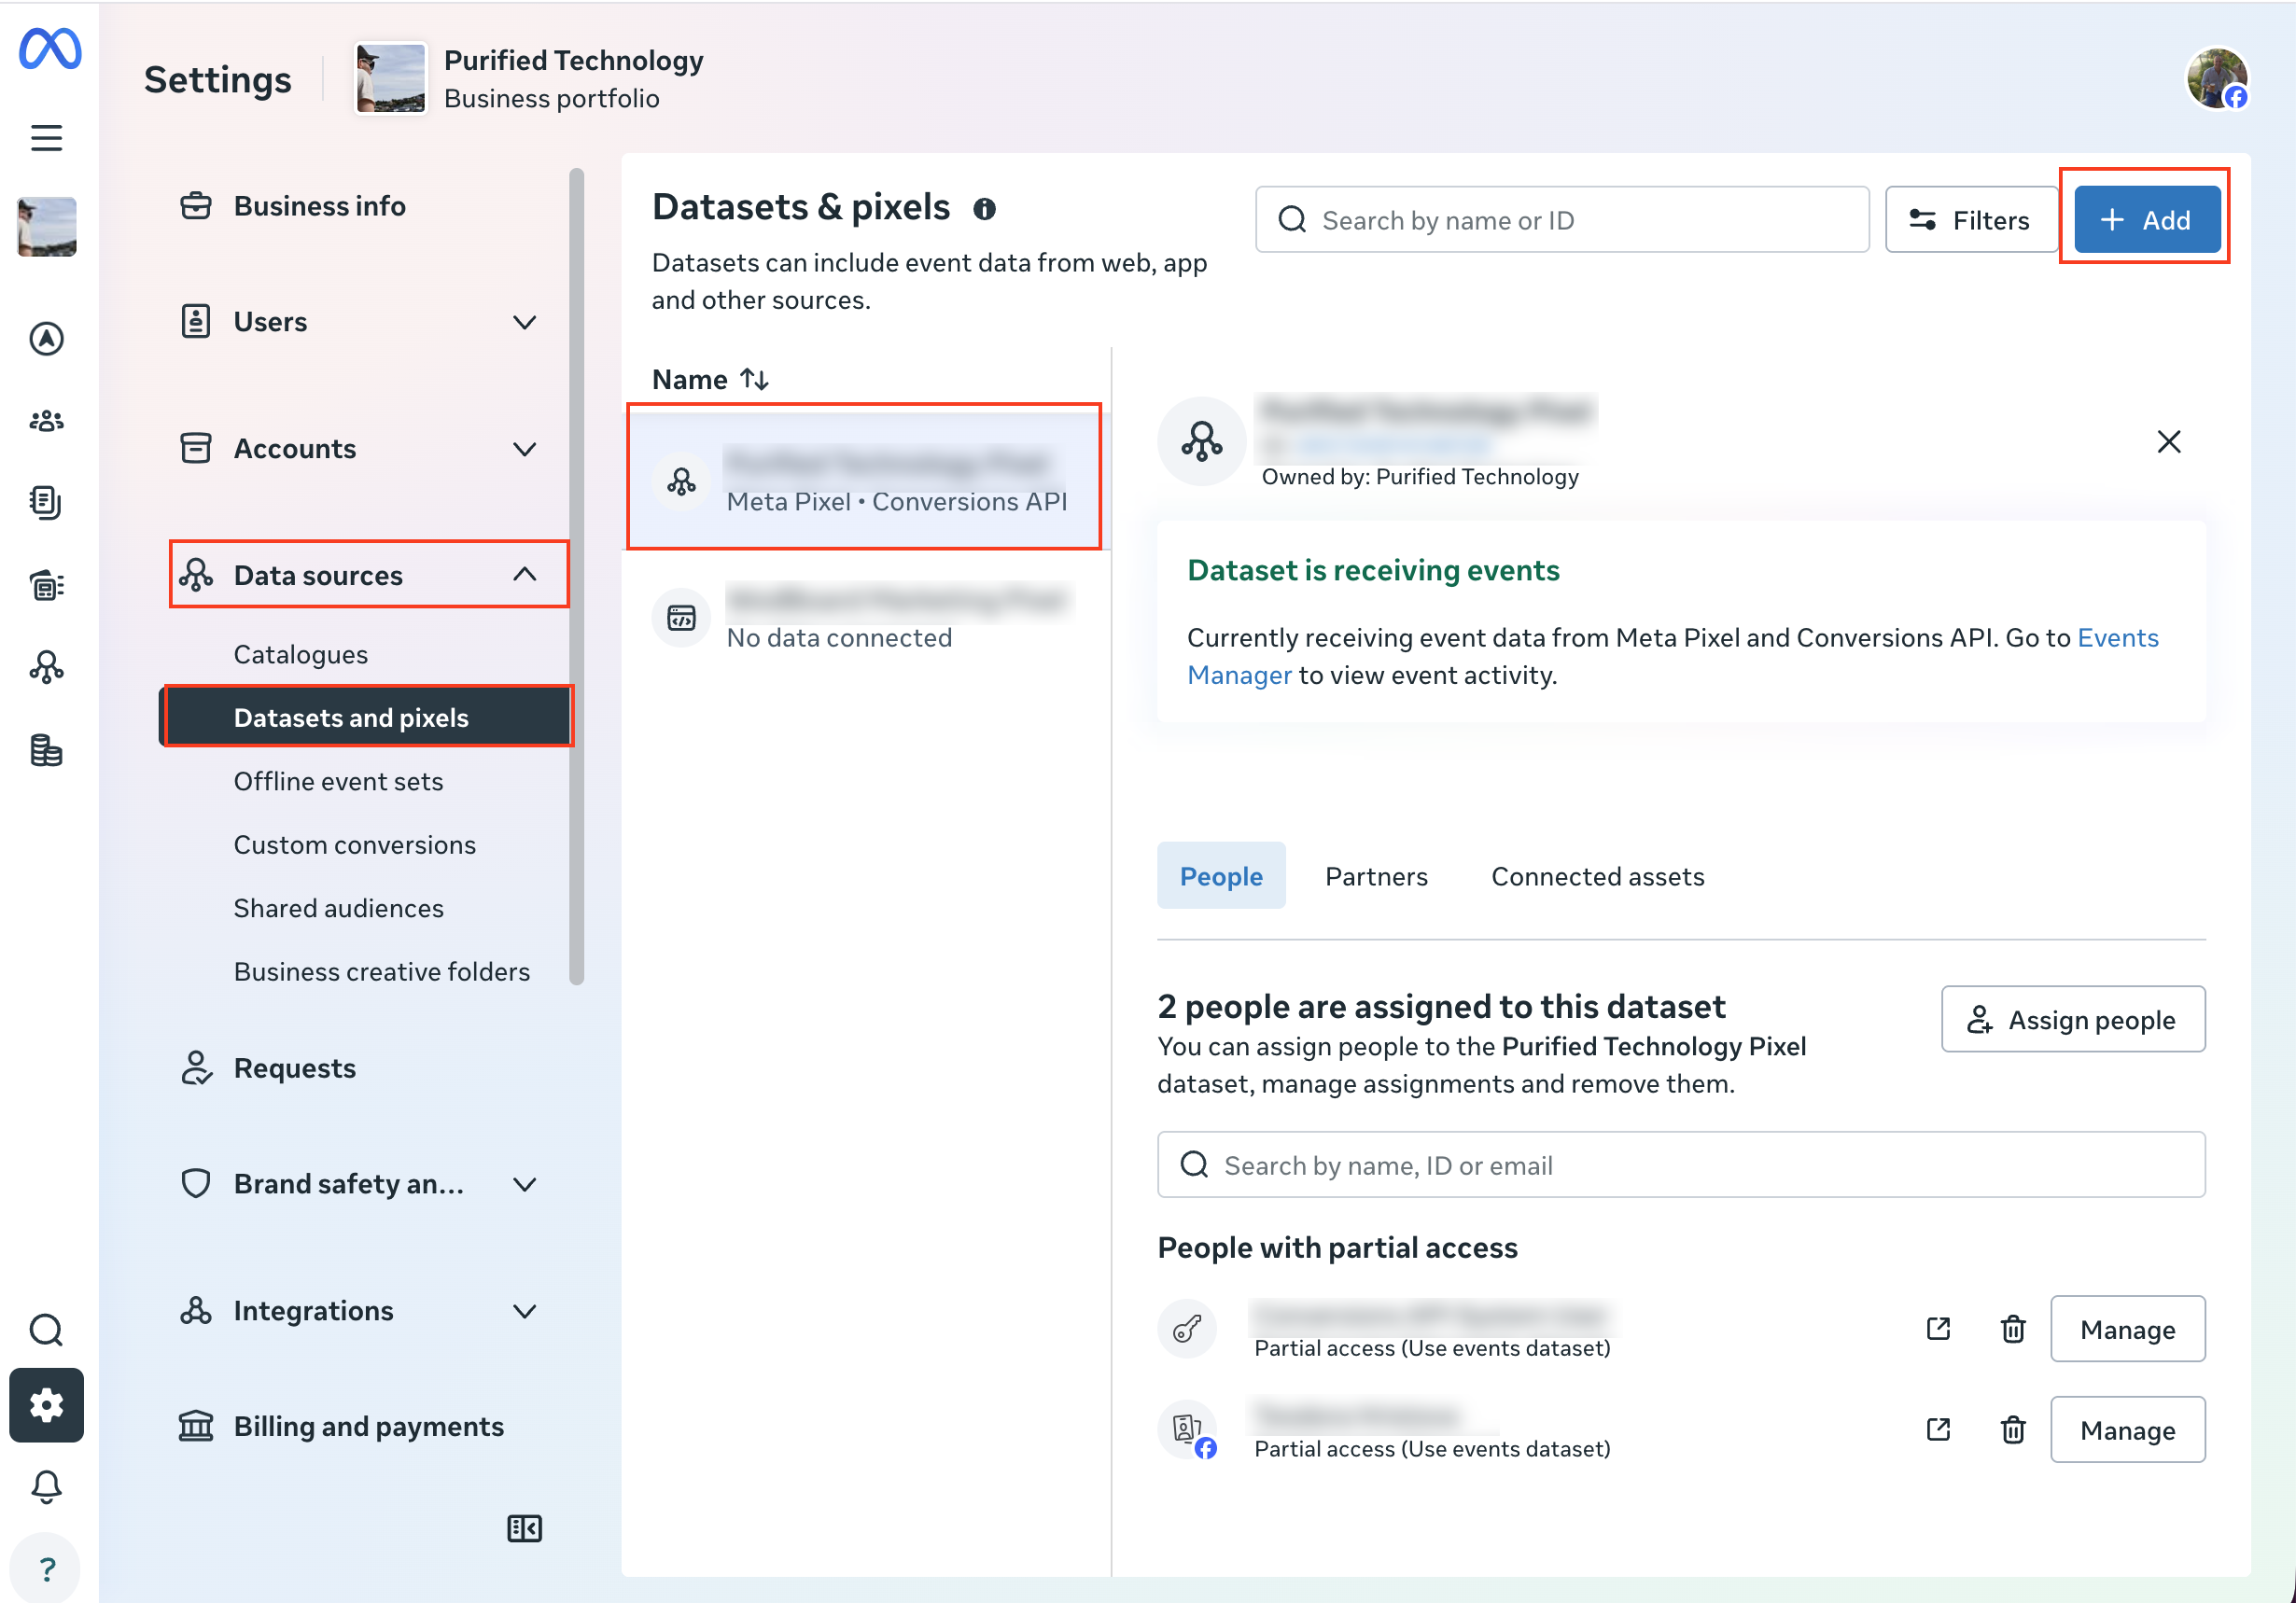
2) In the sidebar click the "Dataset and Pixels" option under "Data sources"
3) See if there's an existing pixel in the middle column (highlighted red in the screenshot below). If there is no further action is required
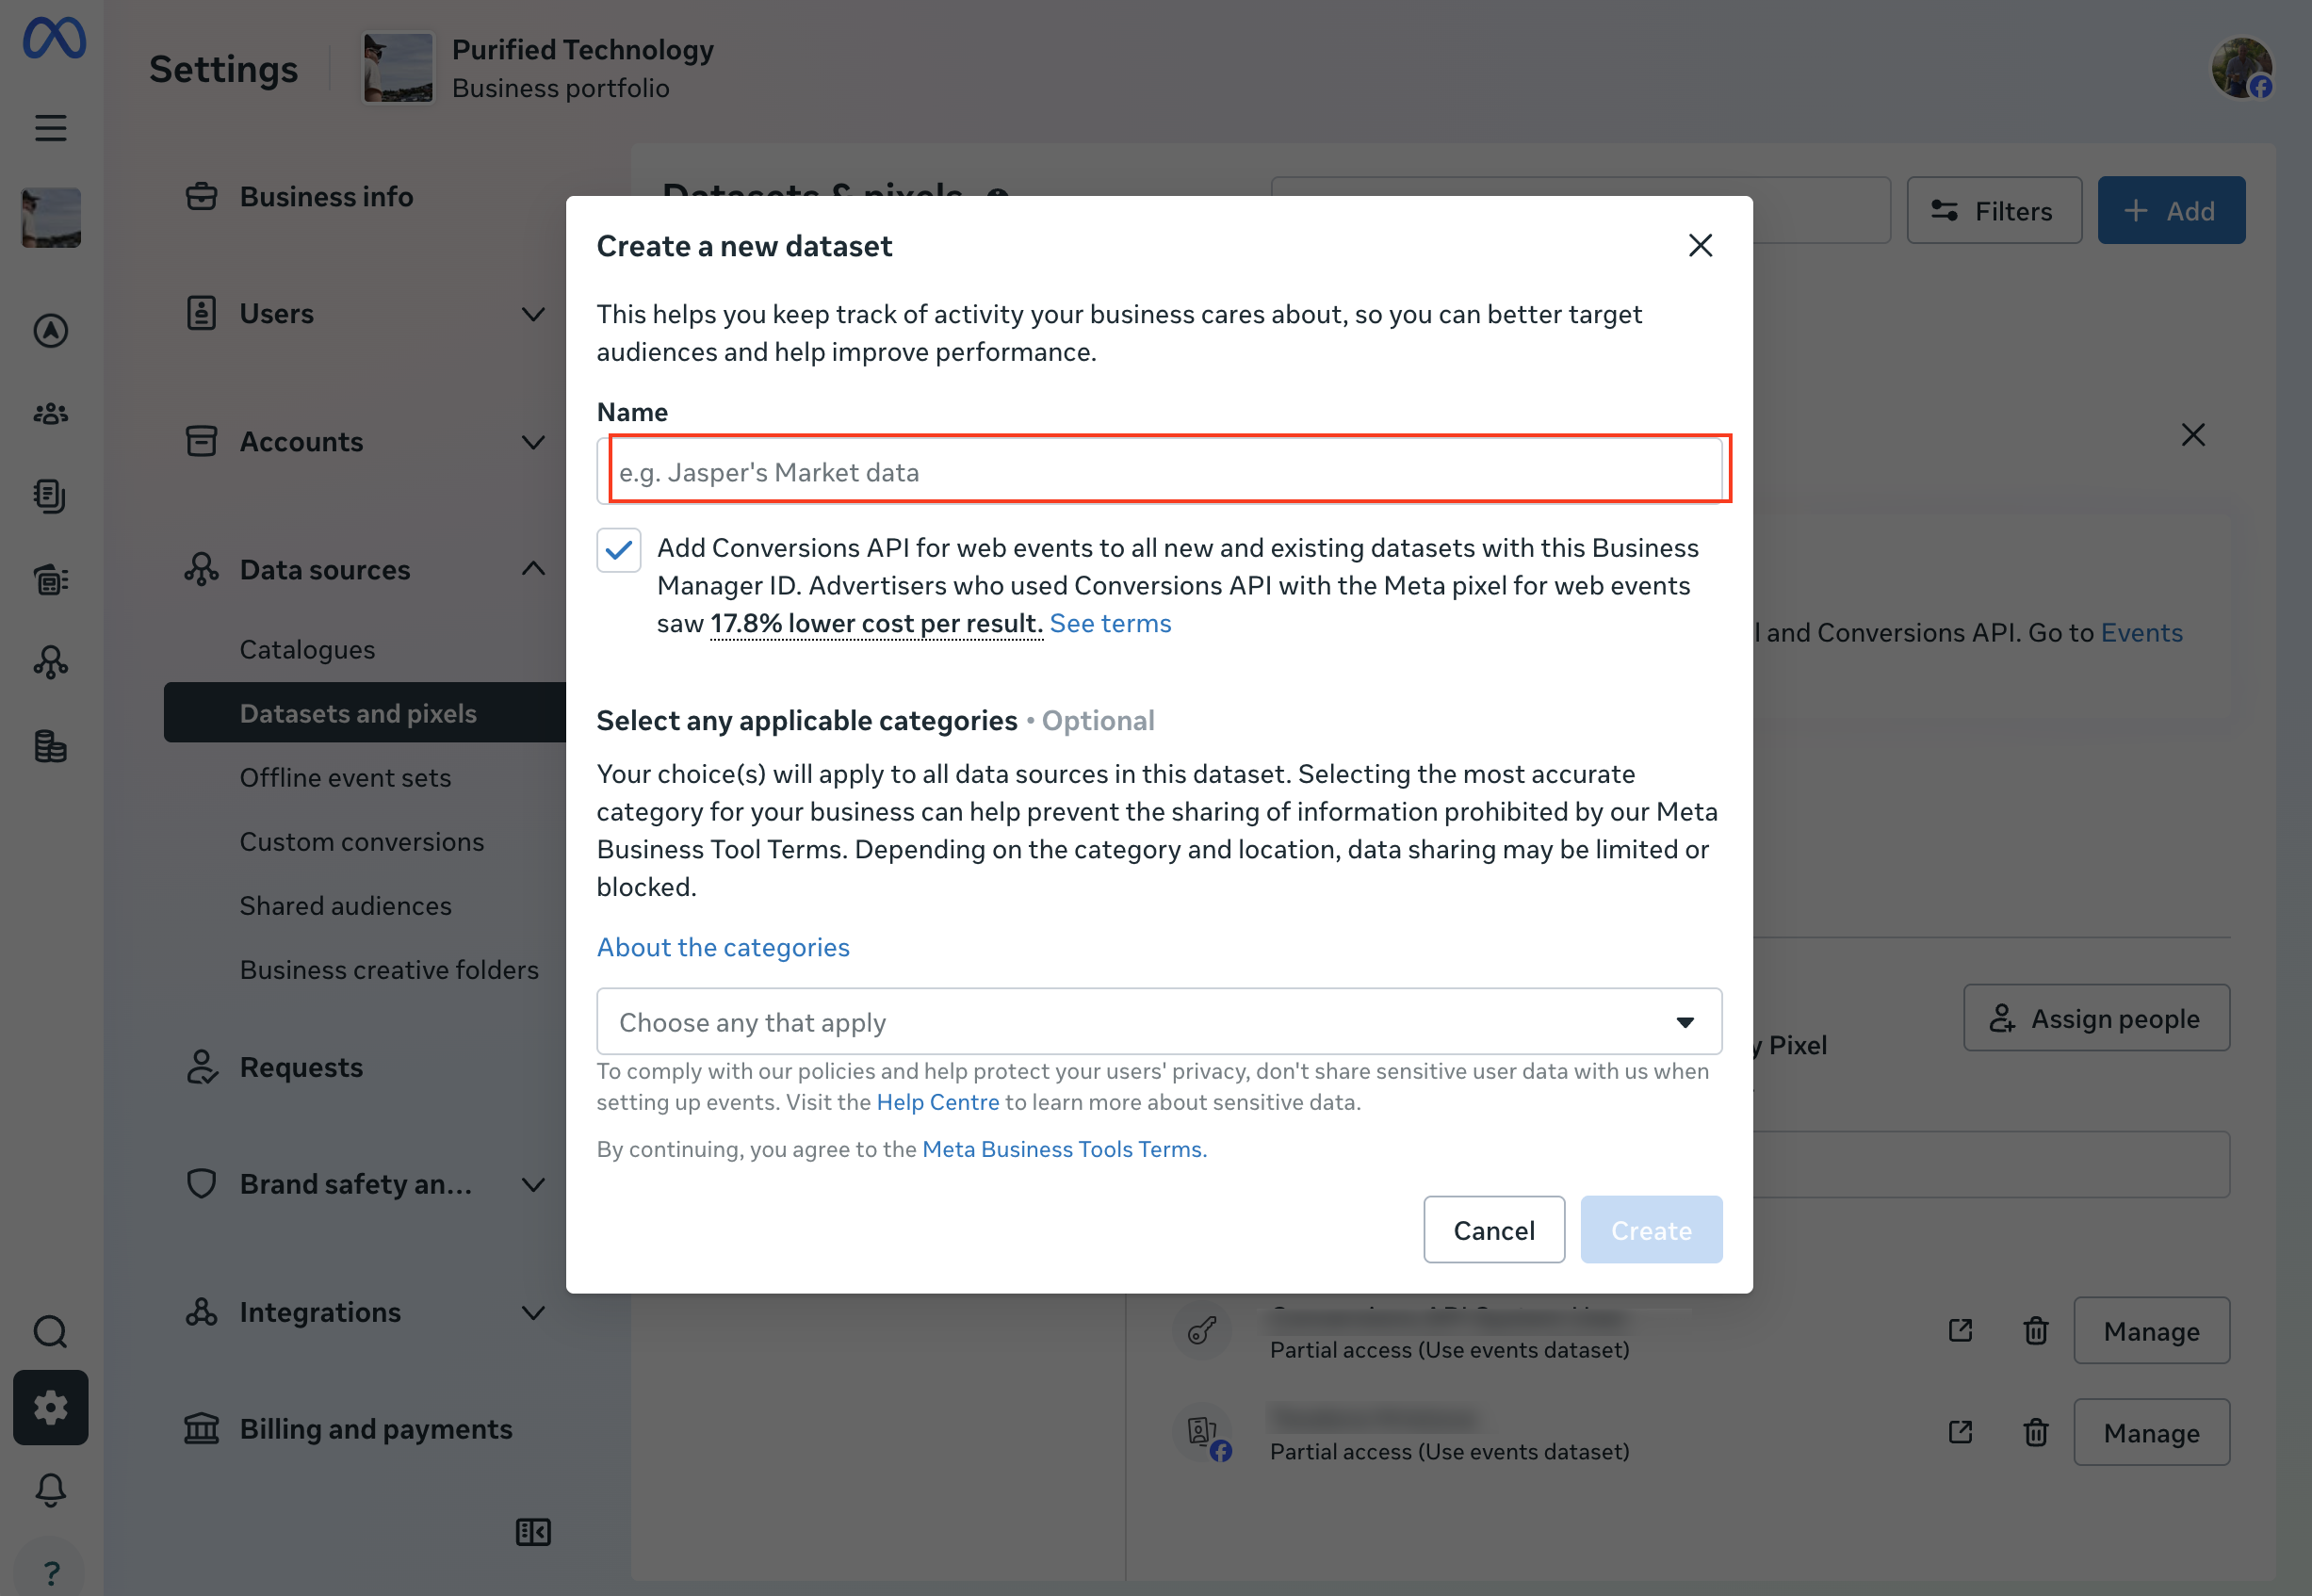
4) If there's not a pixel then create one by clicking the Add button. Only a name is required on the popup - the other options can be left as default
Payment details
The costs of your ads are paid through Facebook.not WodBoard. For this to happen you need to add payment details to Facebook. To get setup:
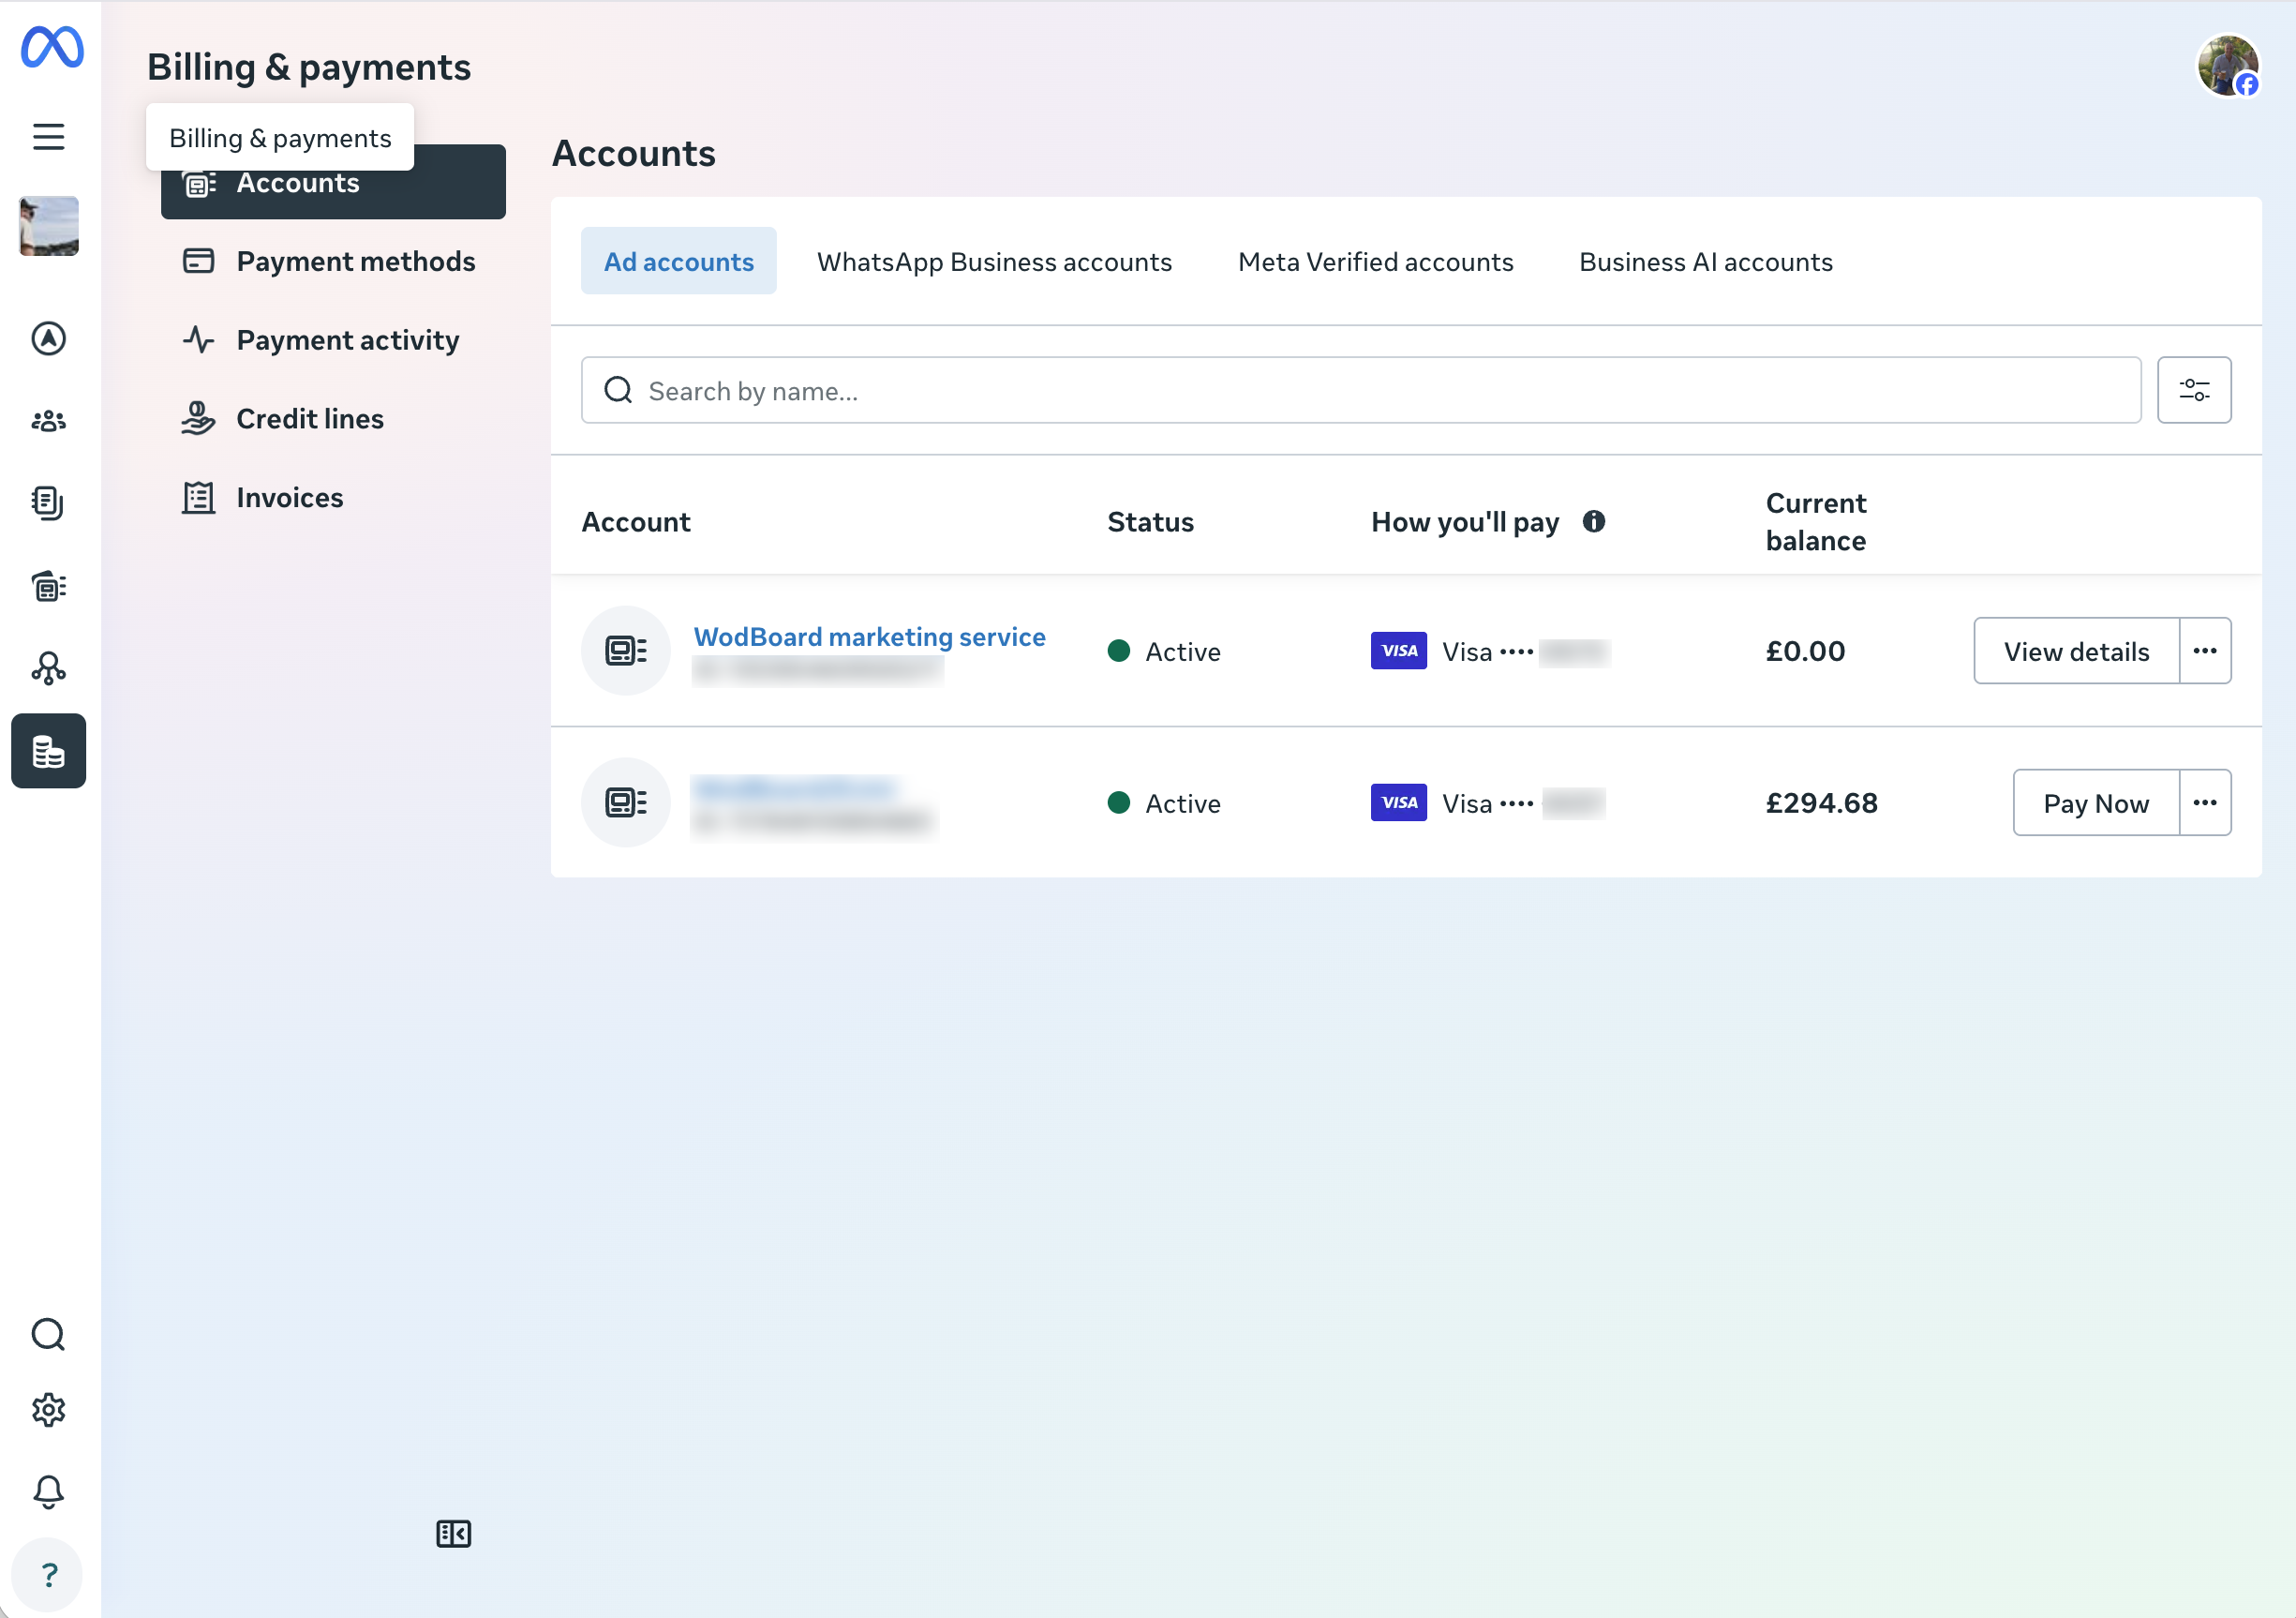
1) Head to the billing page on Meta here
2) Click into the Ad account in question
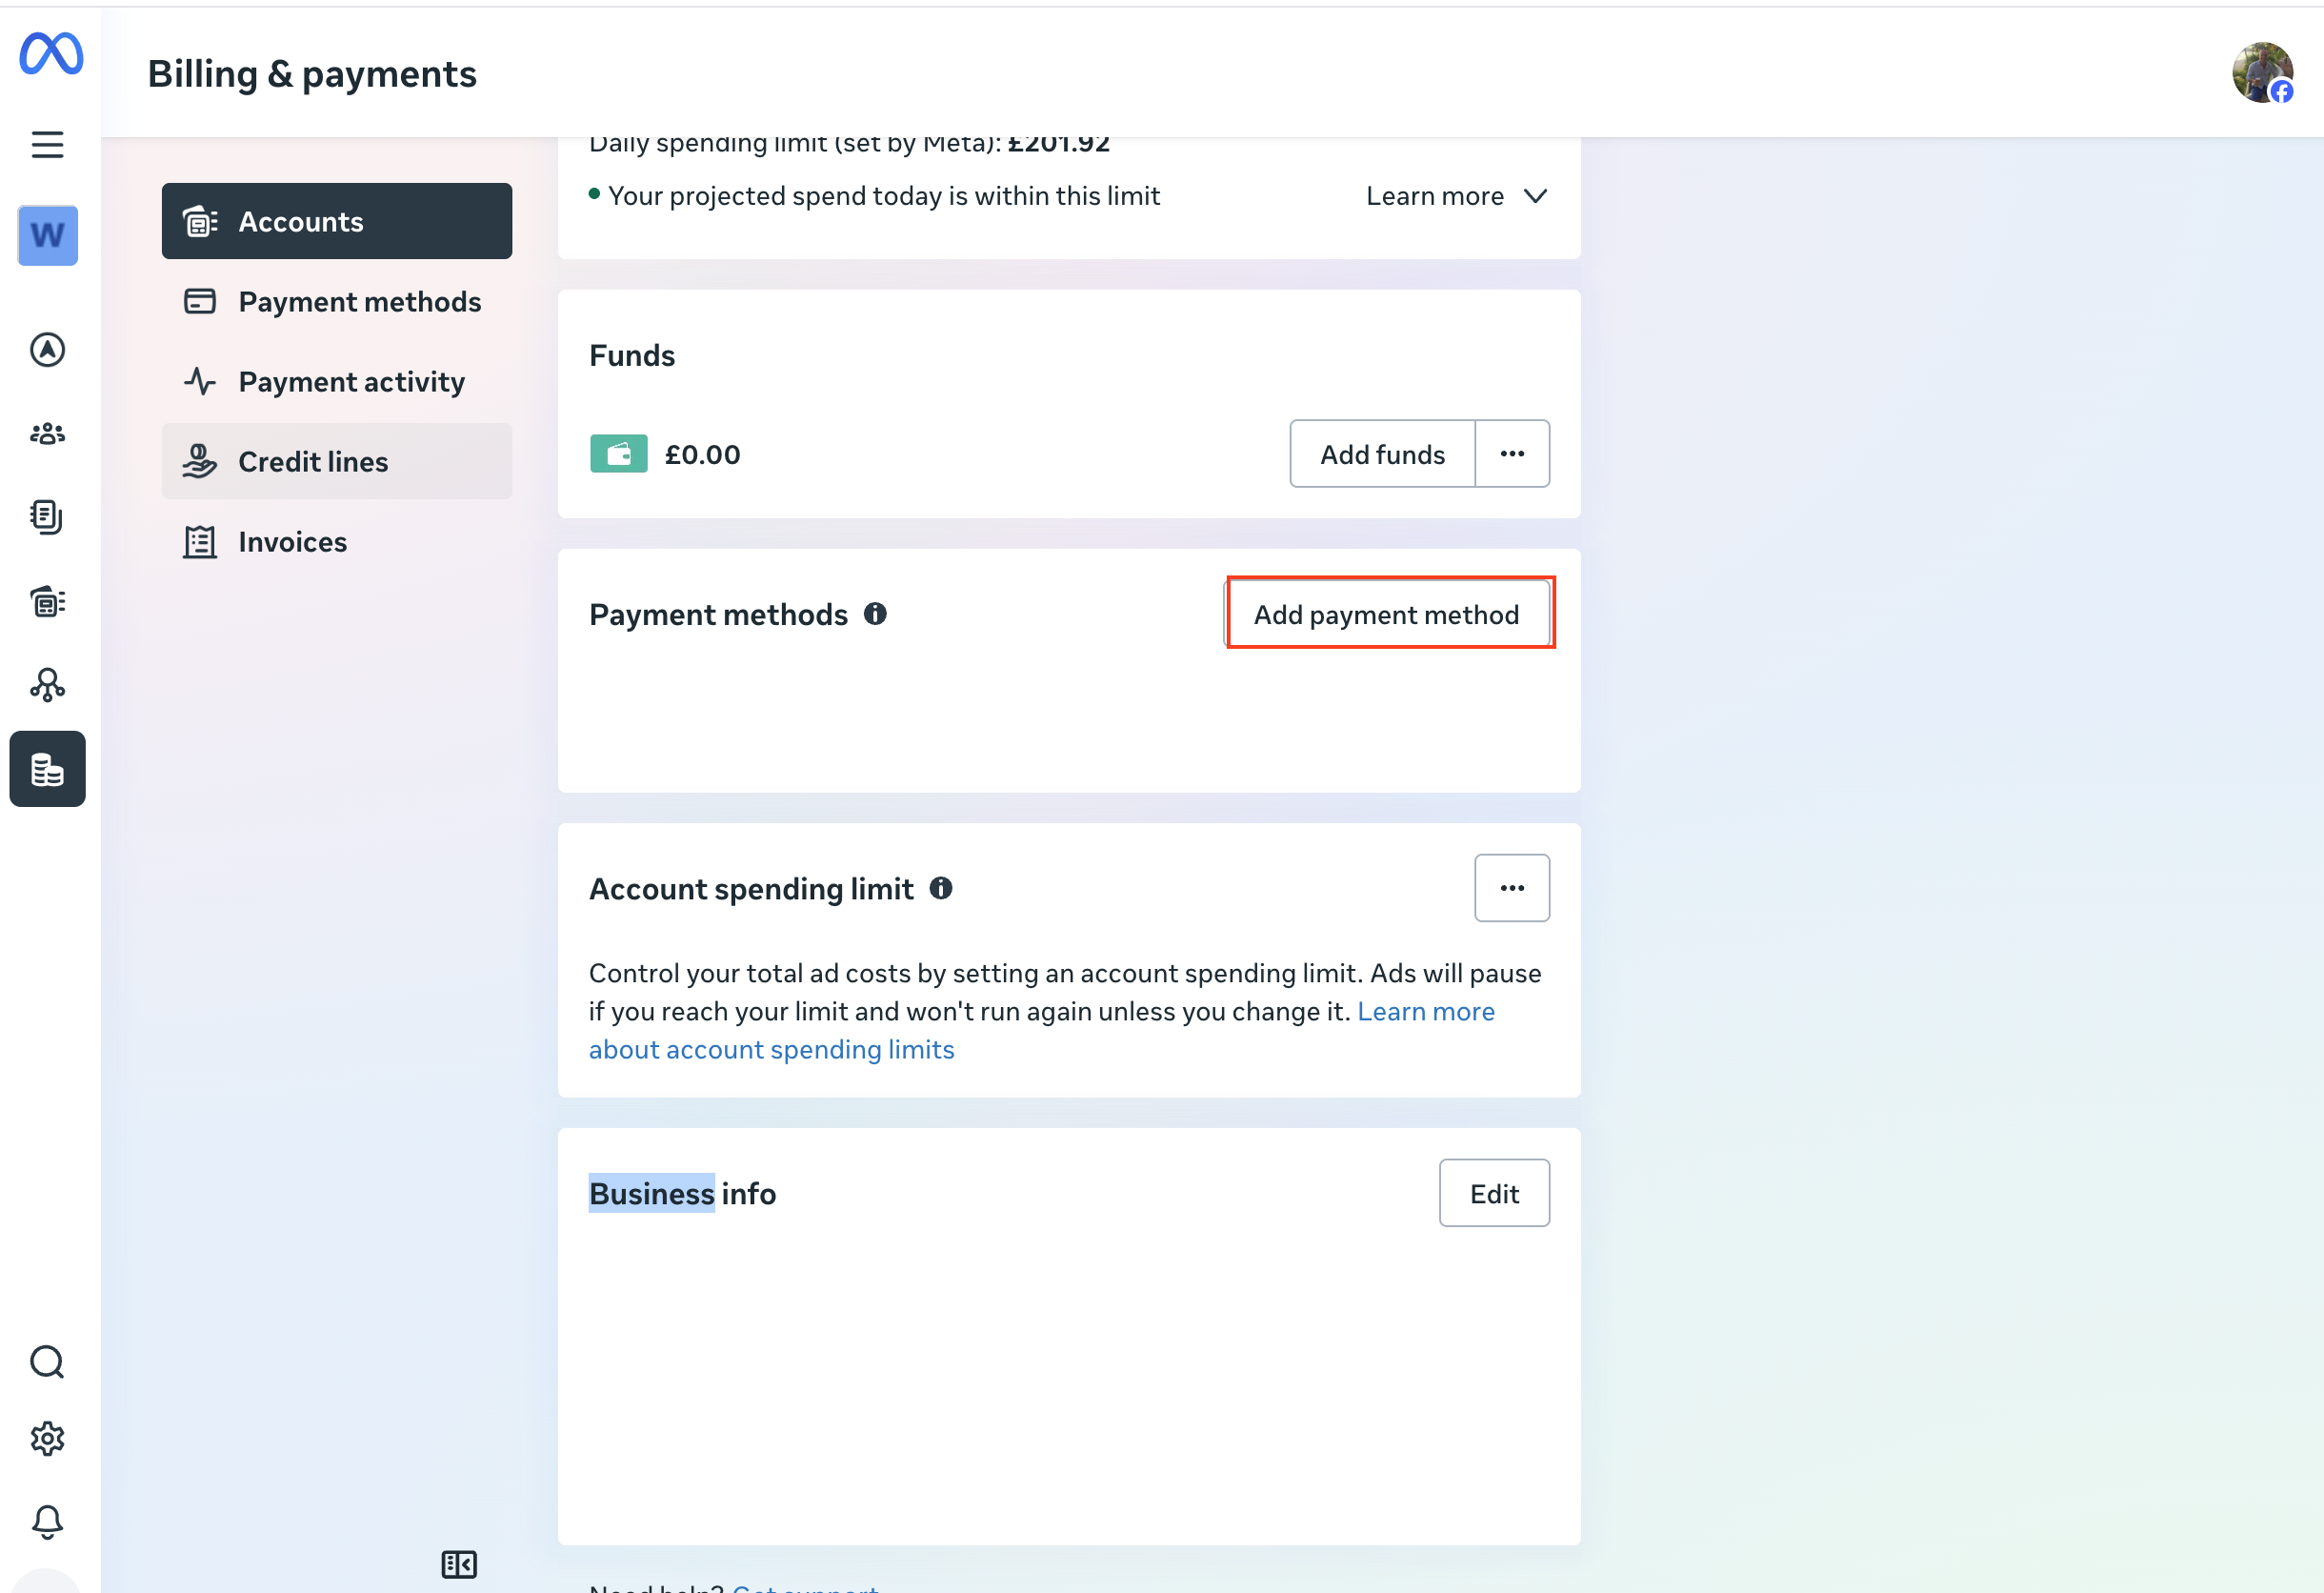
3) Add a payment method by clicking the Add Payment Method button
Facebook/Instagram link
To run Instagram ads we need your Facebook Page and Instagram profile connected. To do this:
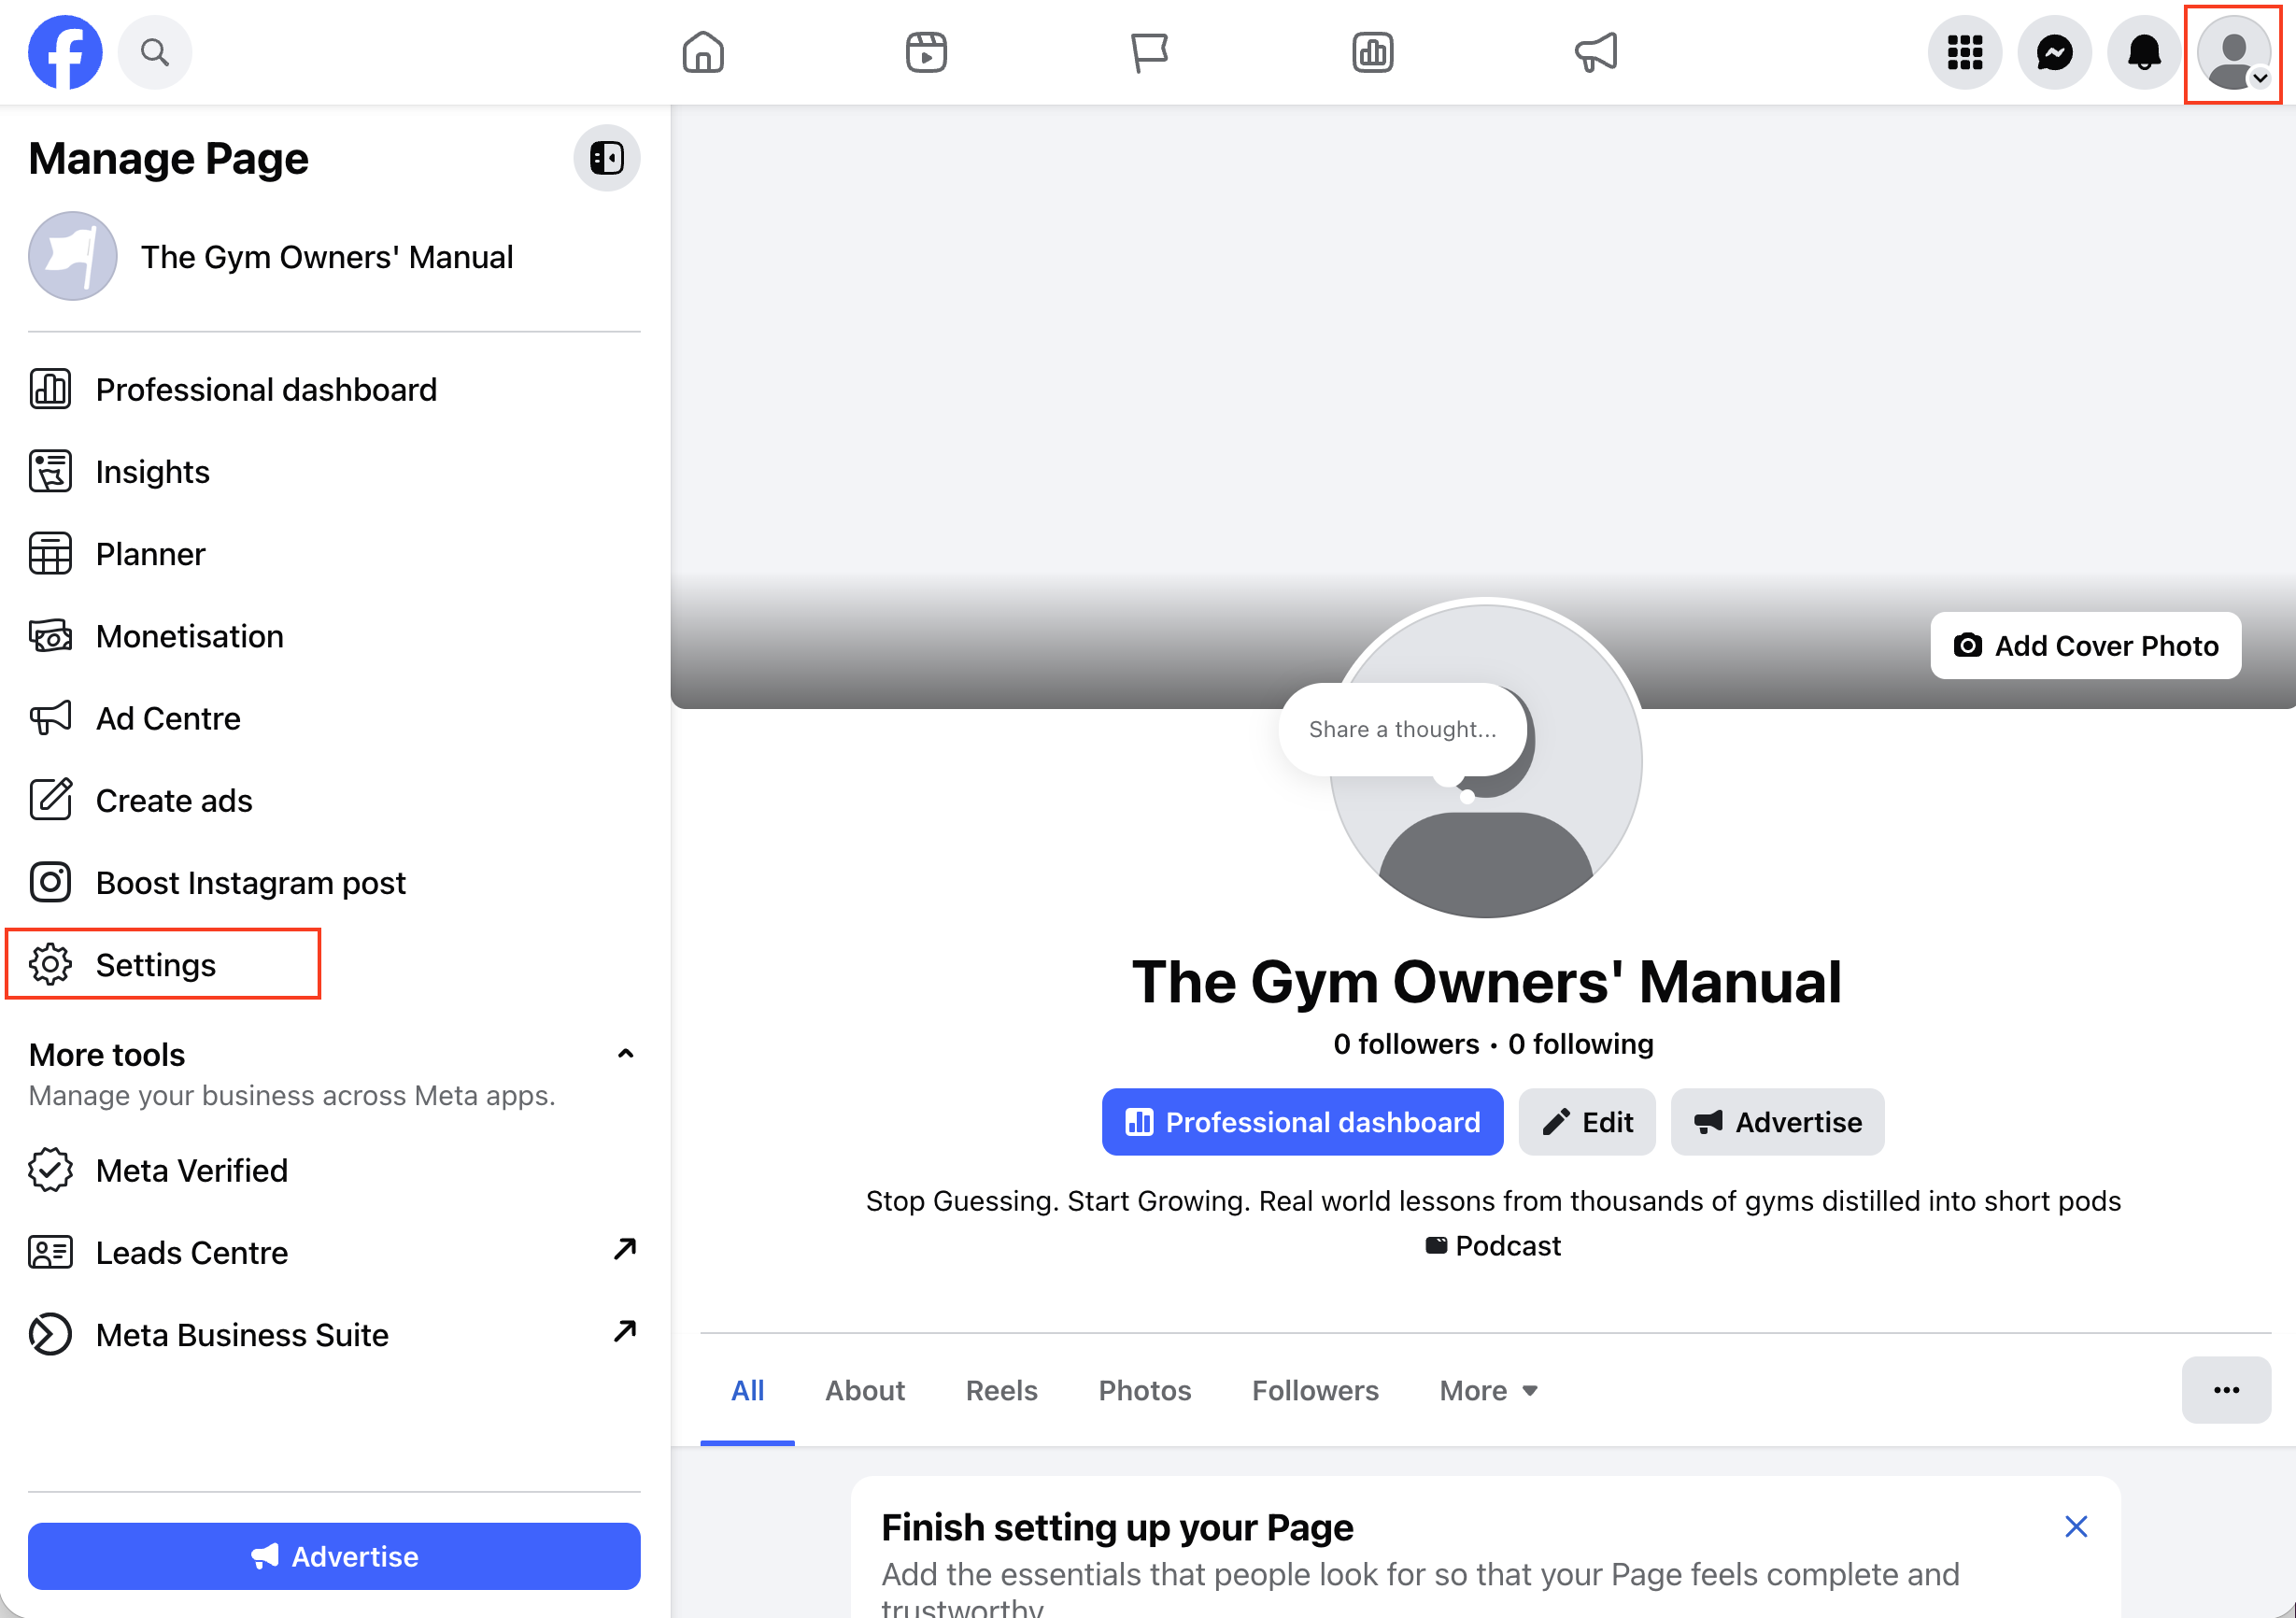
1) Head to your page in Facebook
2) Click Settings in the sidebar. If that option is faded out you will need to switch the profile you're logged in as. Facebook has a concept of "you as a user", but also "your page as a user". If you click on your profile picture in the top right corner it'll allow you to switch to your page profile. After doing that you'll be able to click the Settings link in the sidebar
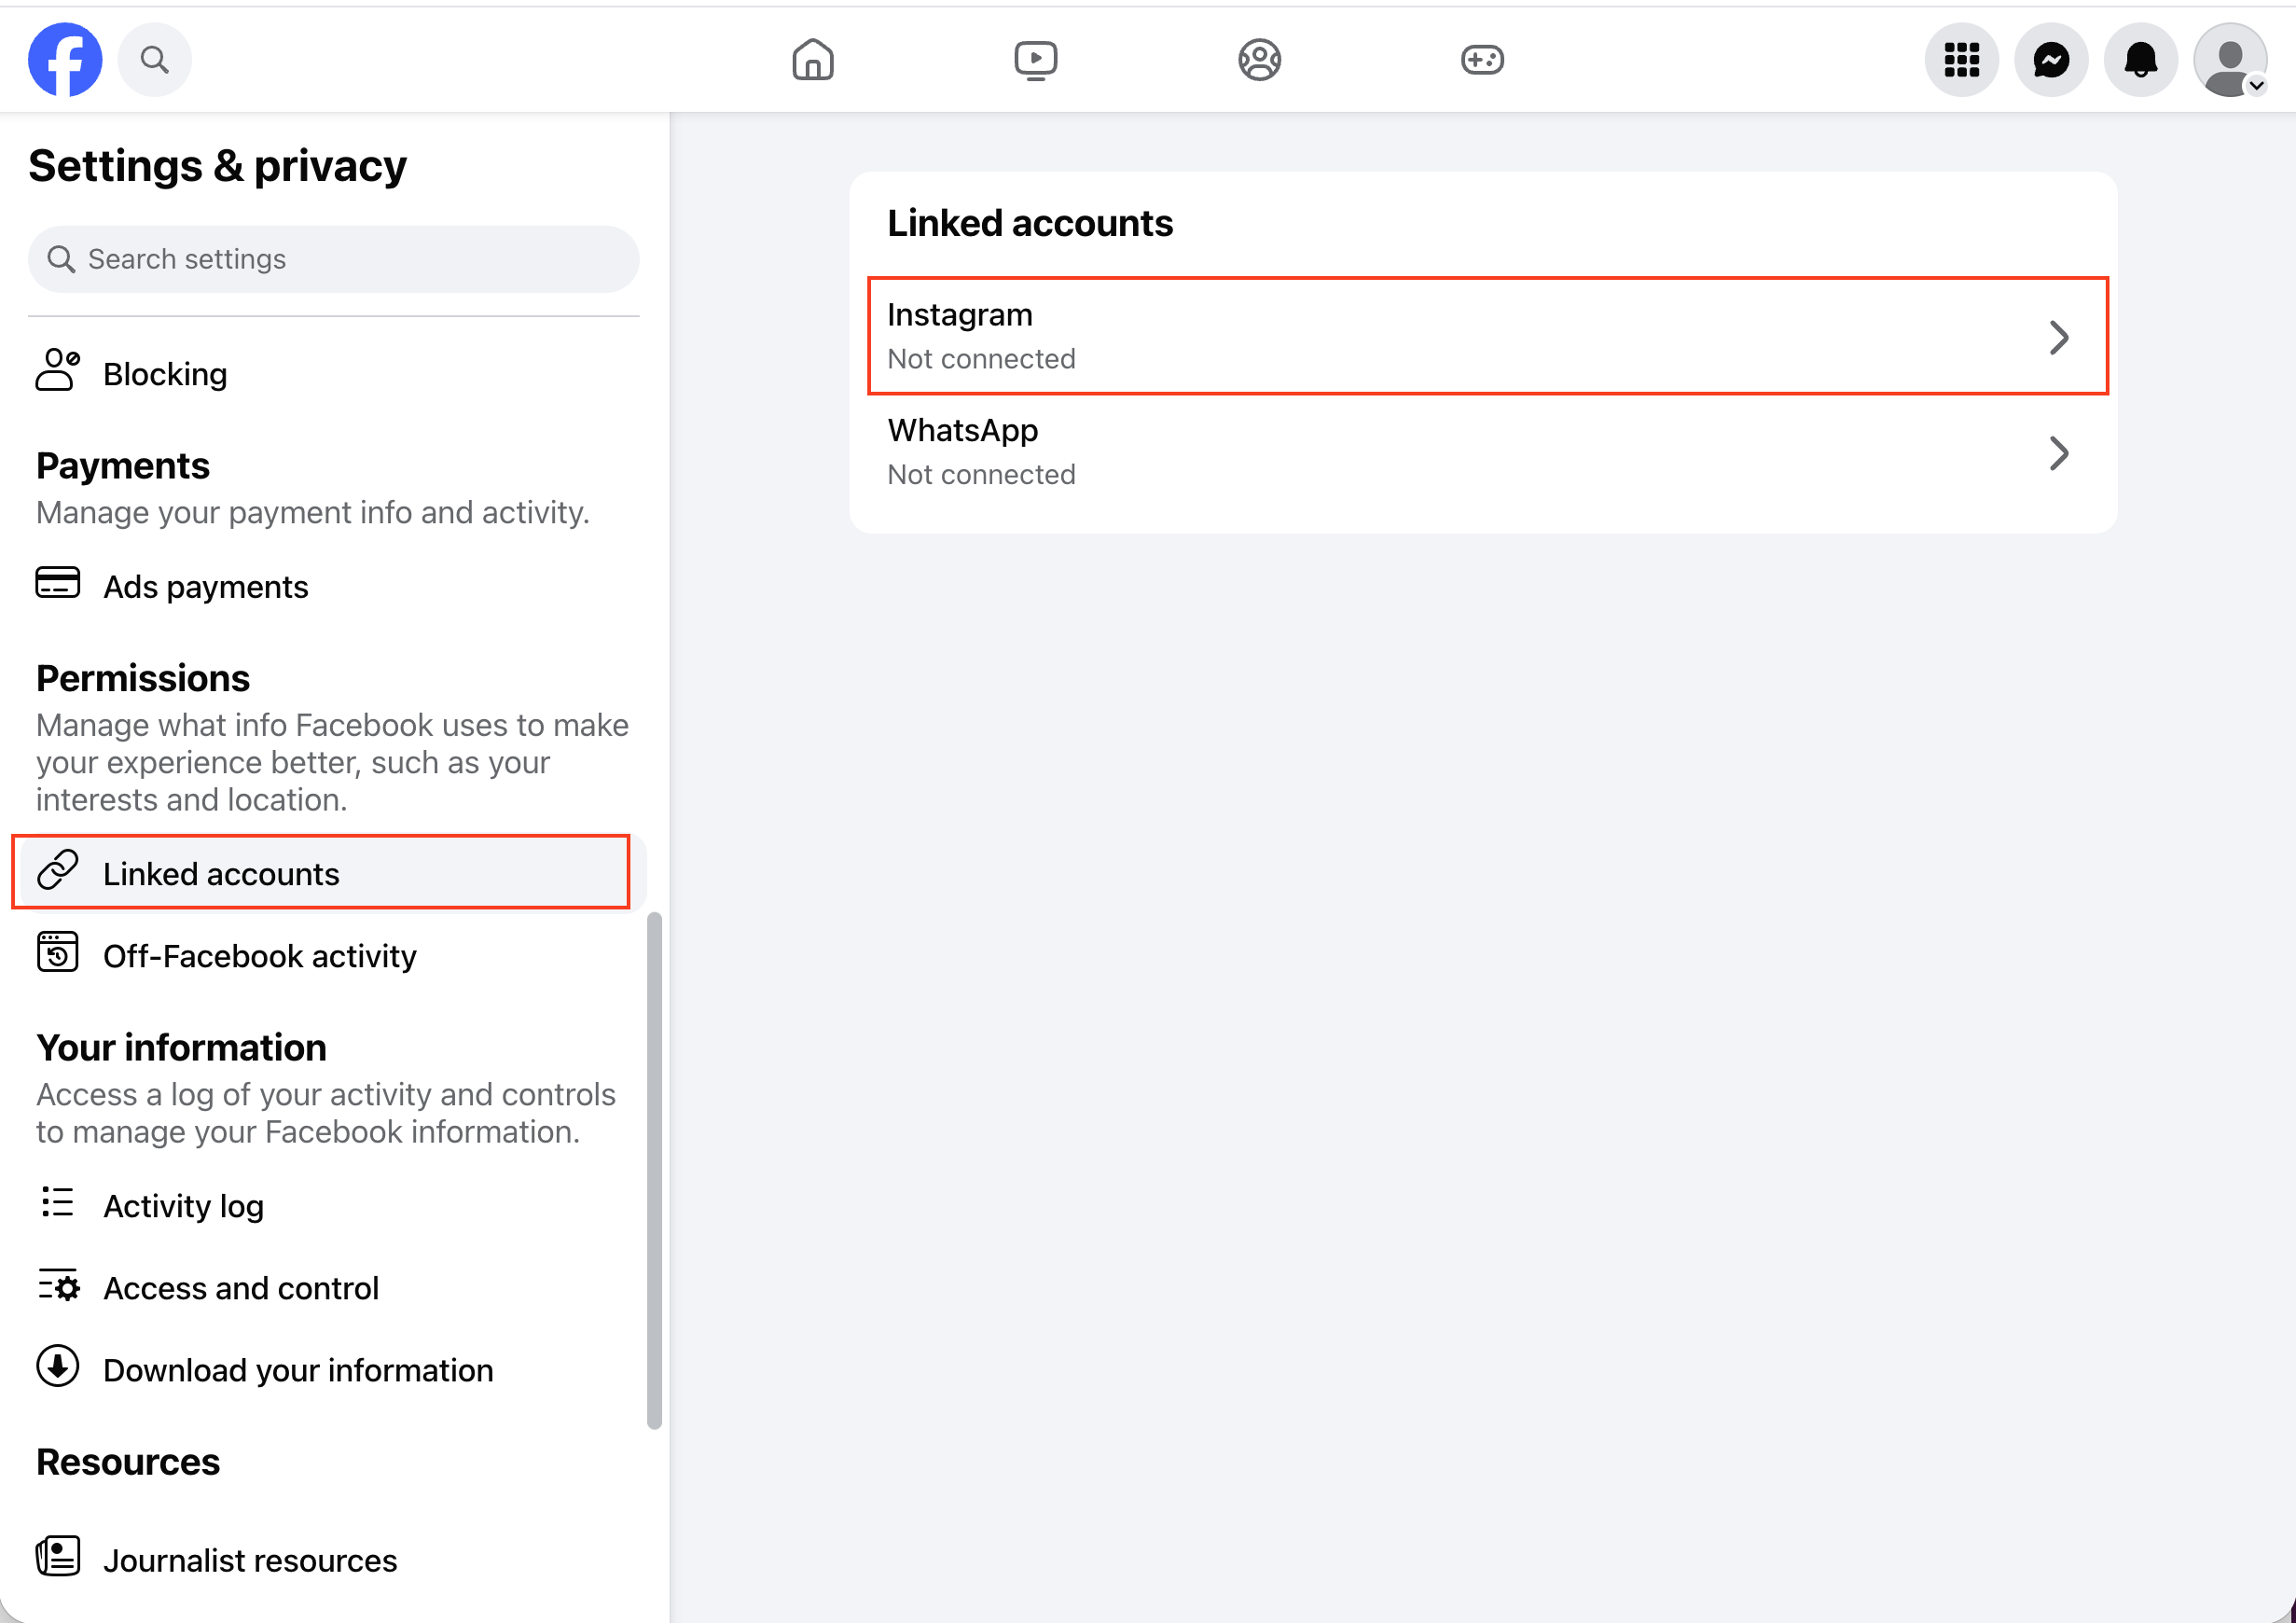
3) Find the Linked Accounts option in the sidebar on the page that loads and choose the Instagram option. If your account is already linked then no further action is required.
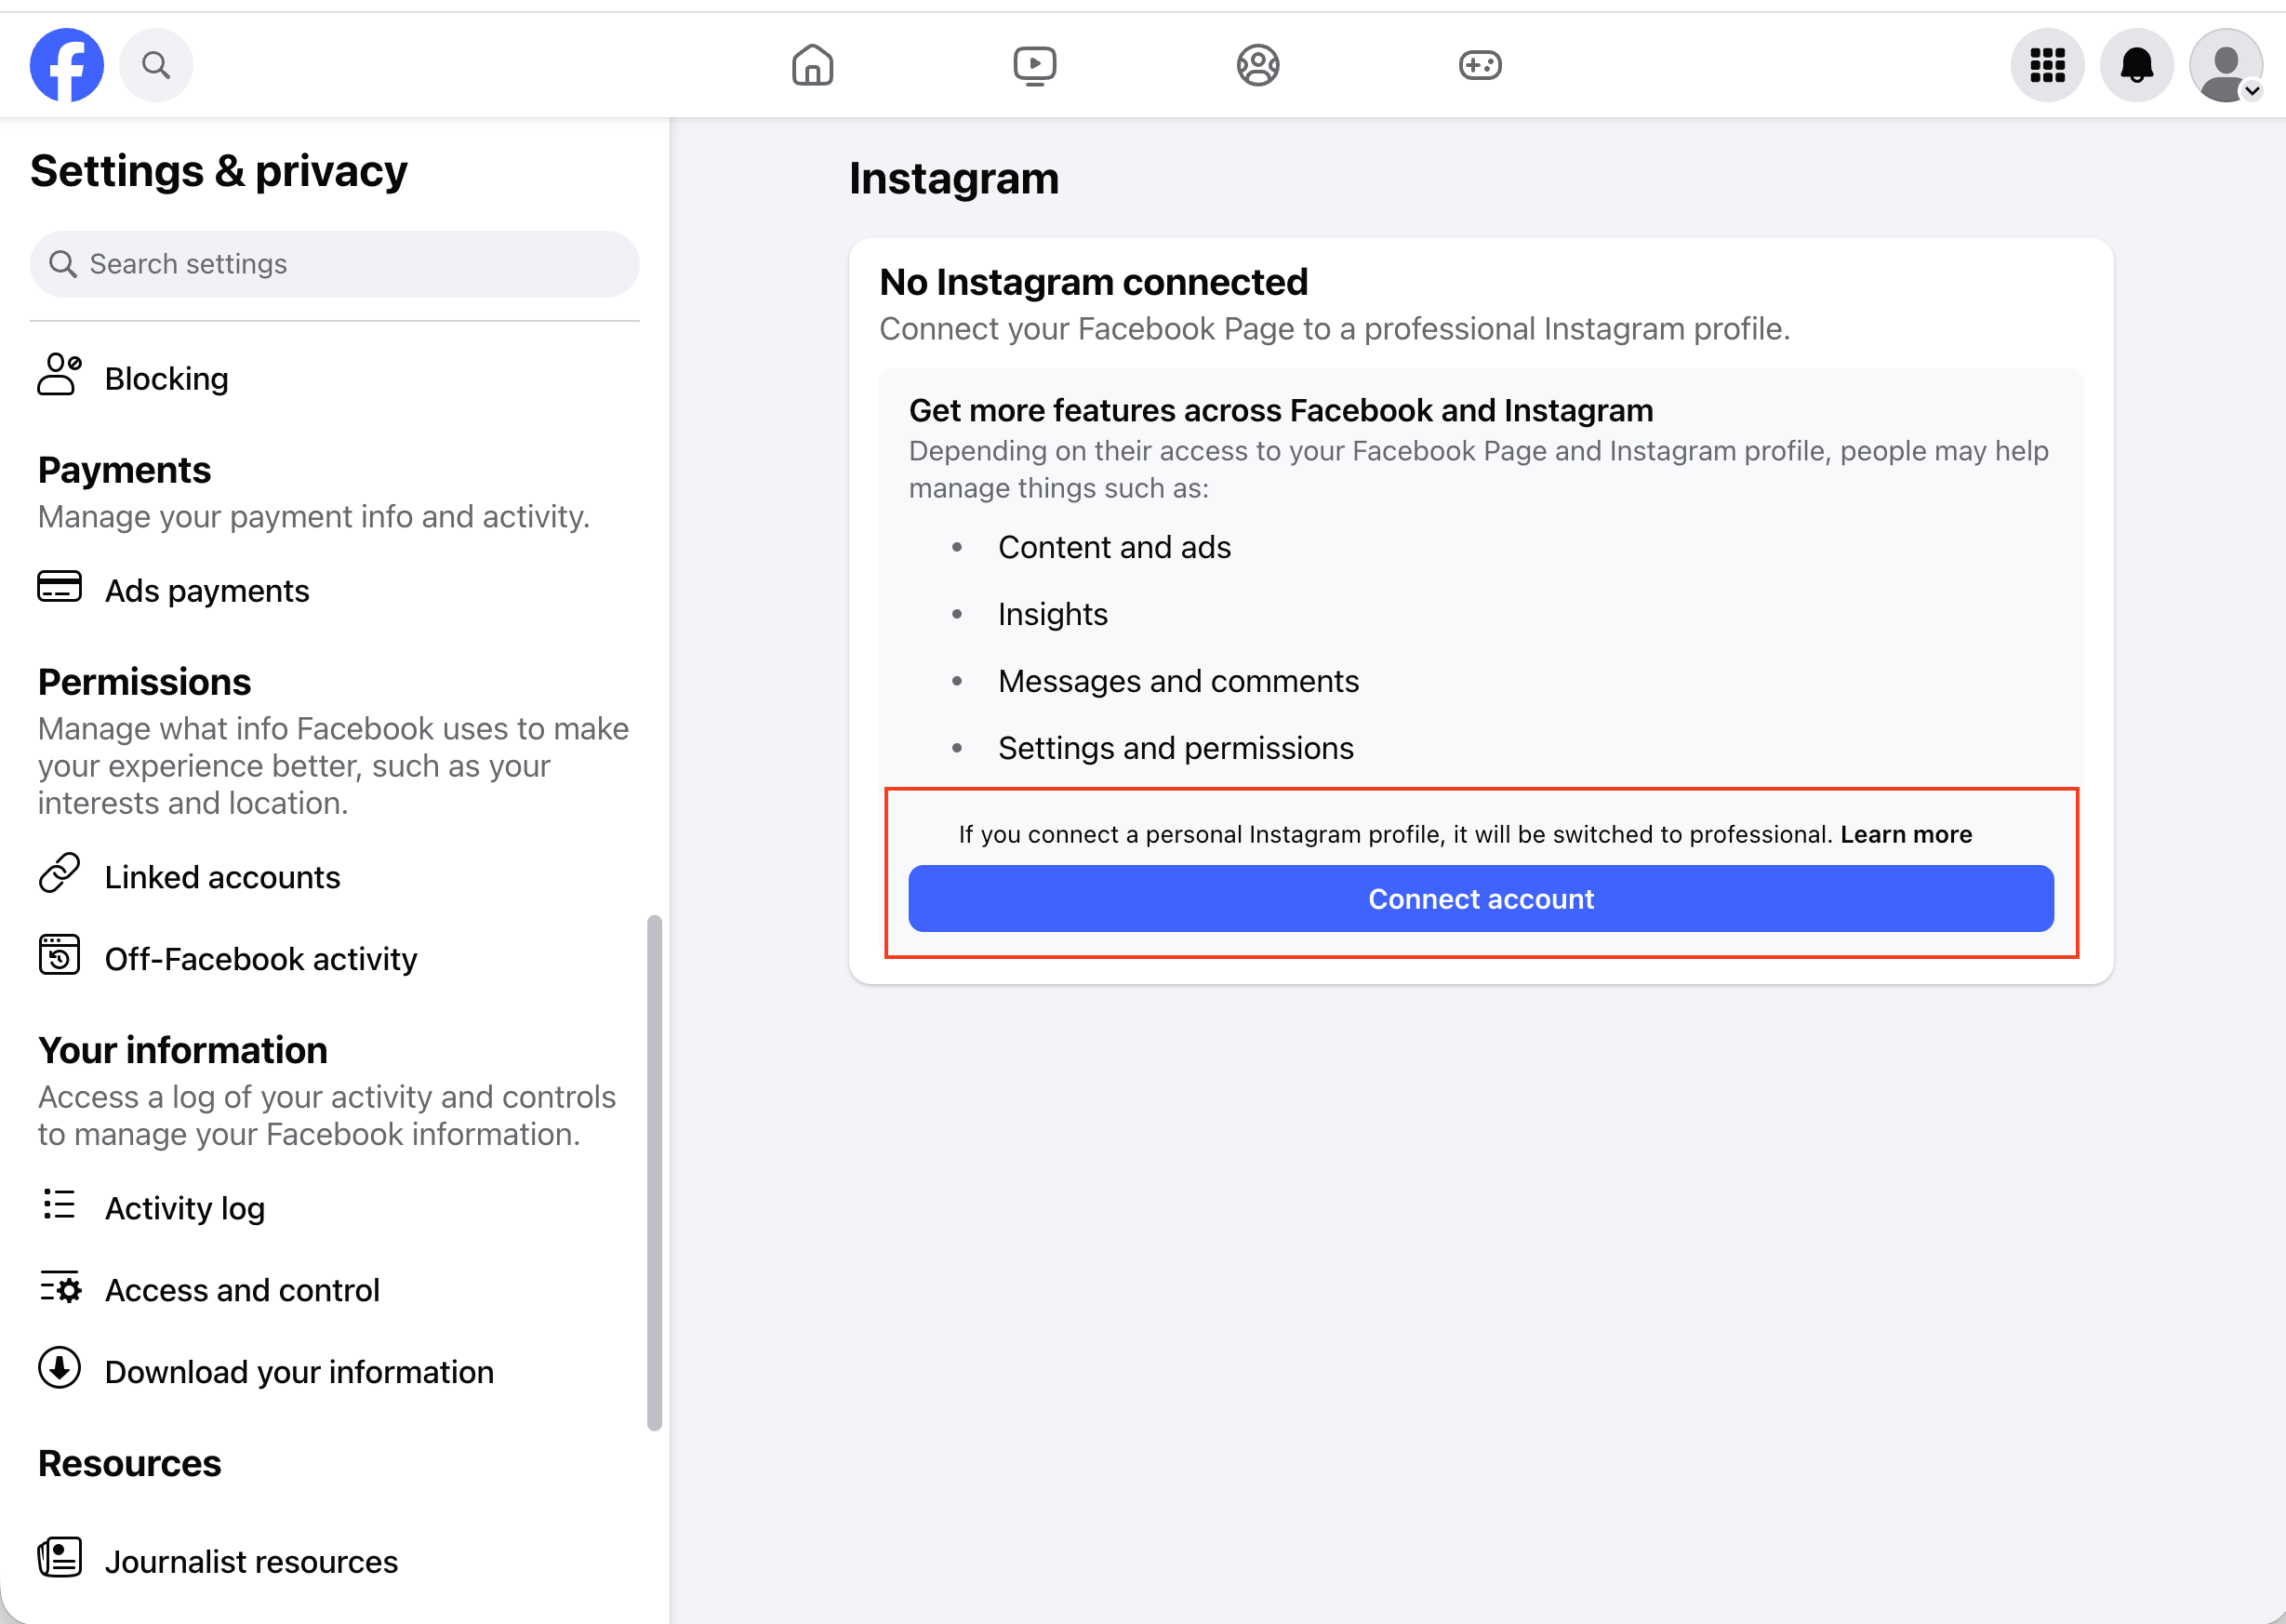
4) Click the Connect button and follow the on screen prompts to connect your Instagram account
Automatic price adjustments
You may have run ads before with automatic price adjustments (or have a new account with this defaulted on). As WodBoard controls bidding you do not want this option switched on.
- Head to the Automated rules page here
-
Click the button that says "See automatic adjustments"
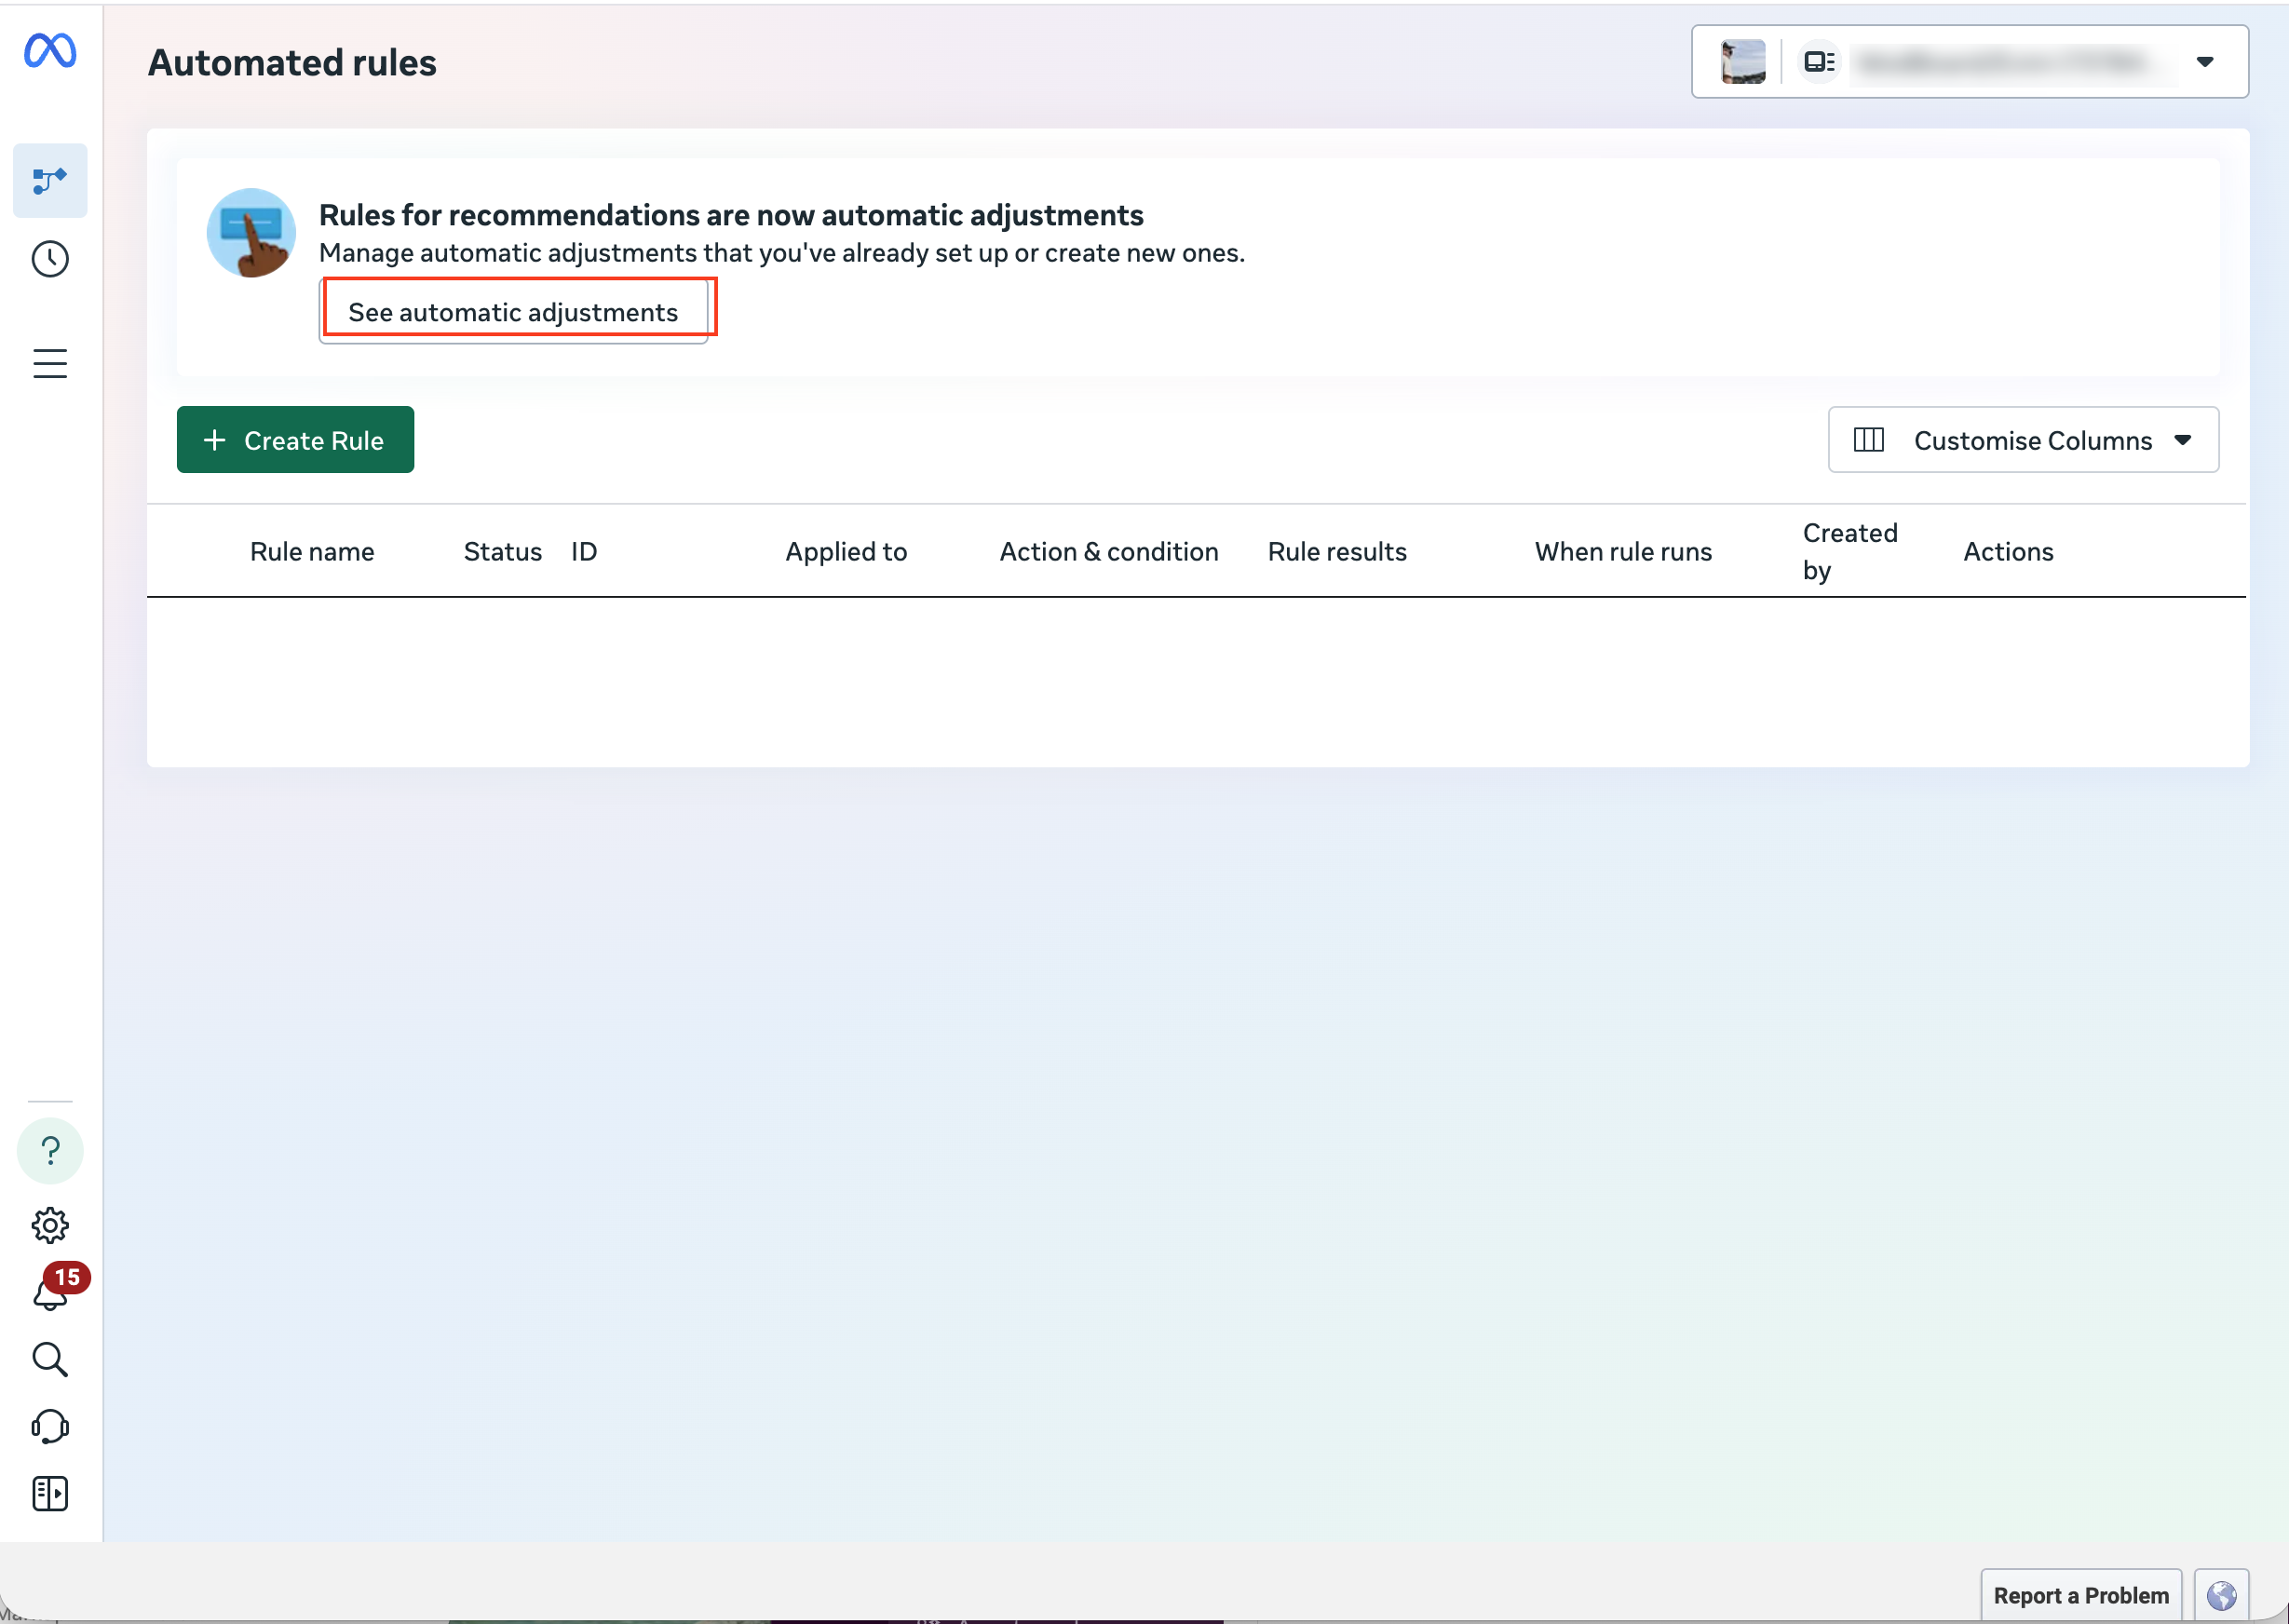
- Ensure the automatic adjustments toggle is off
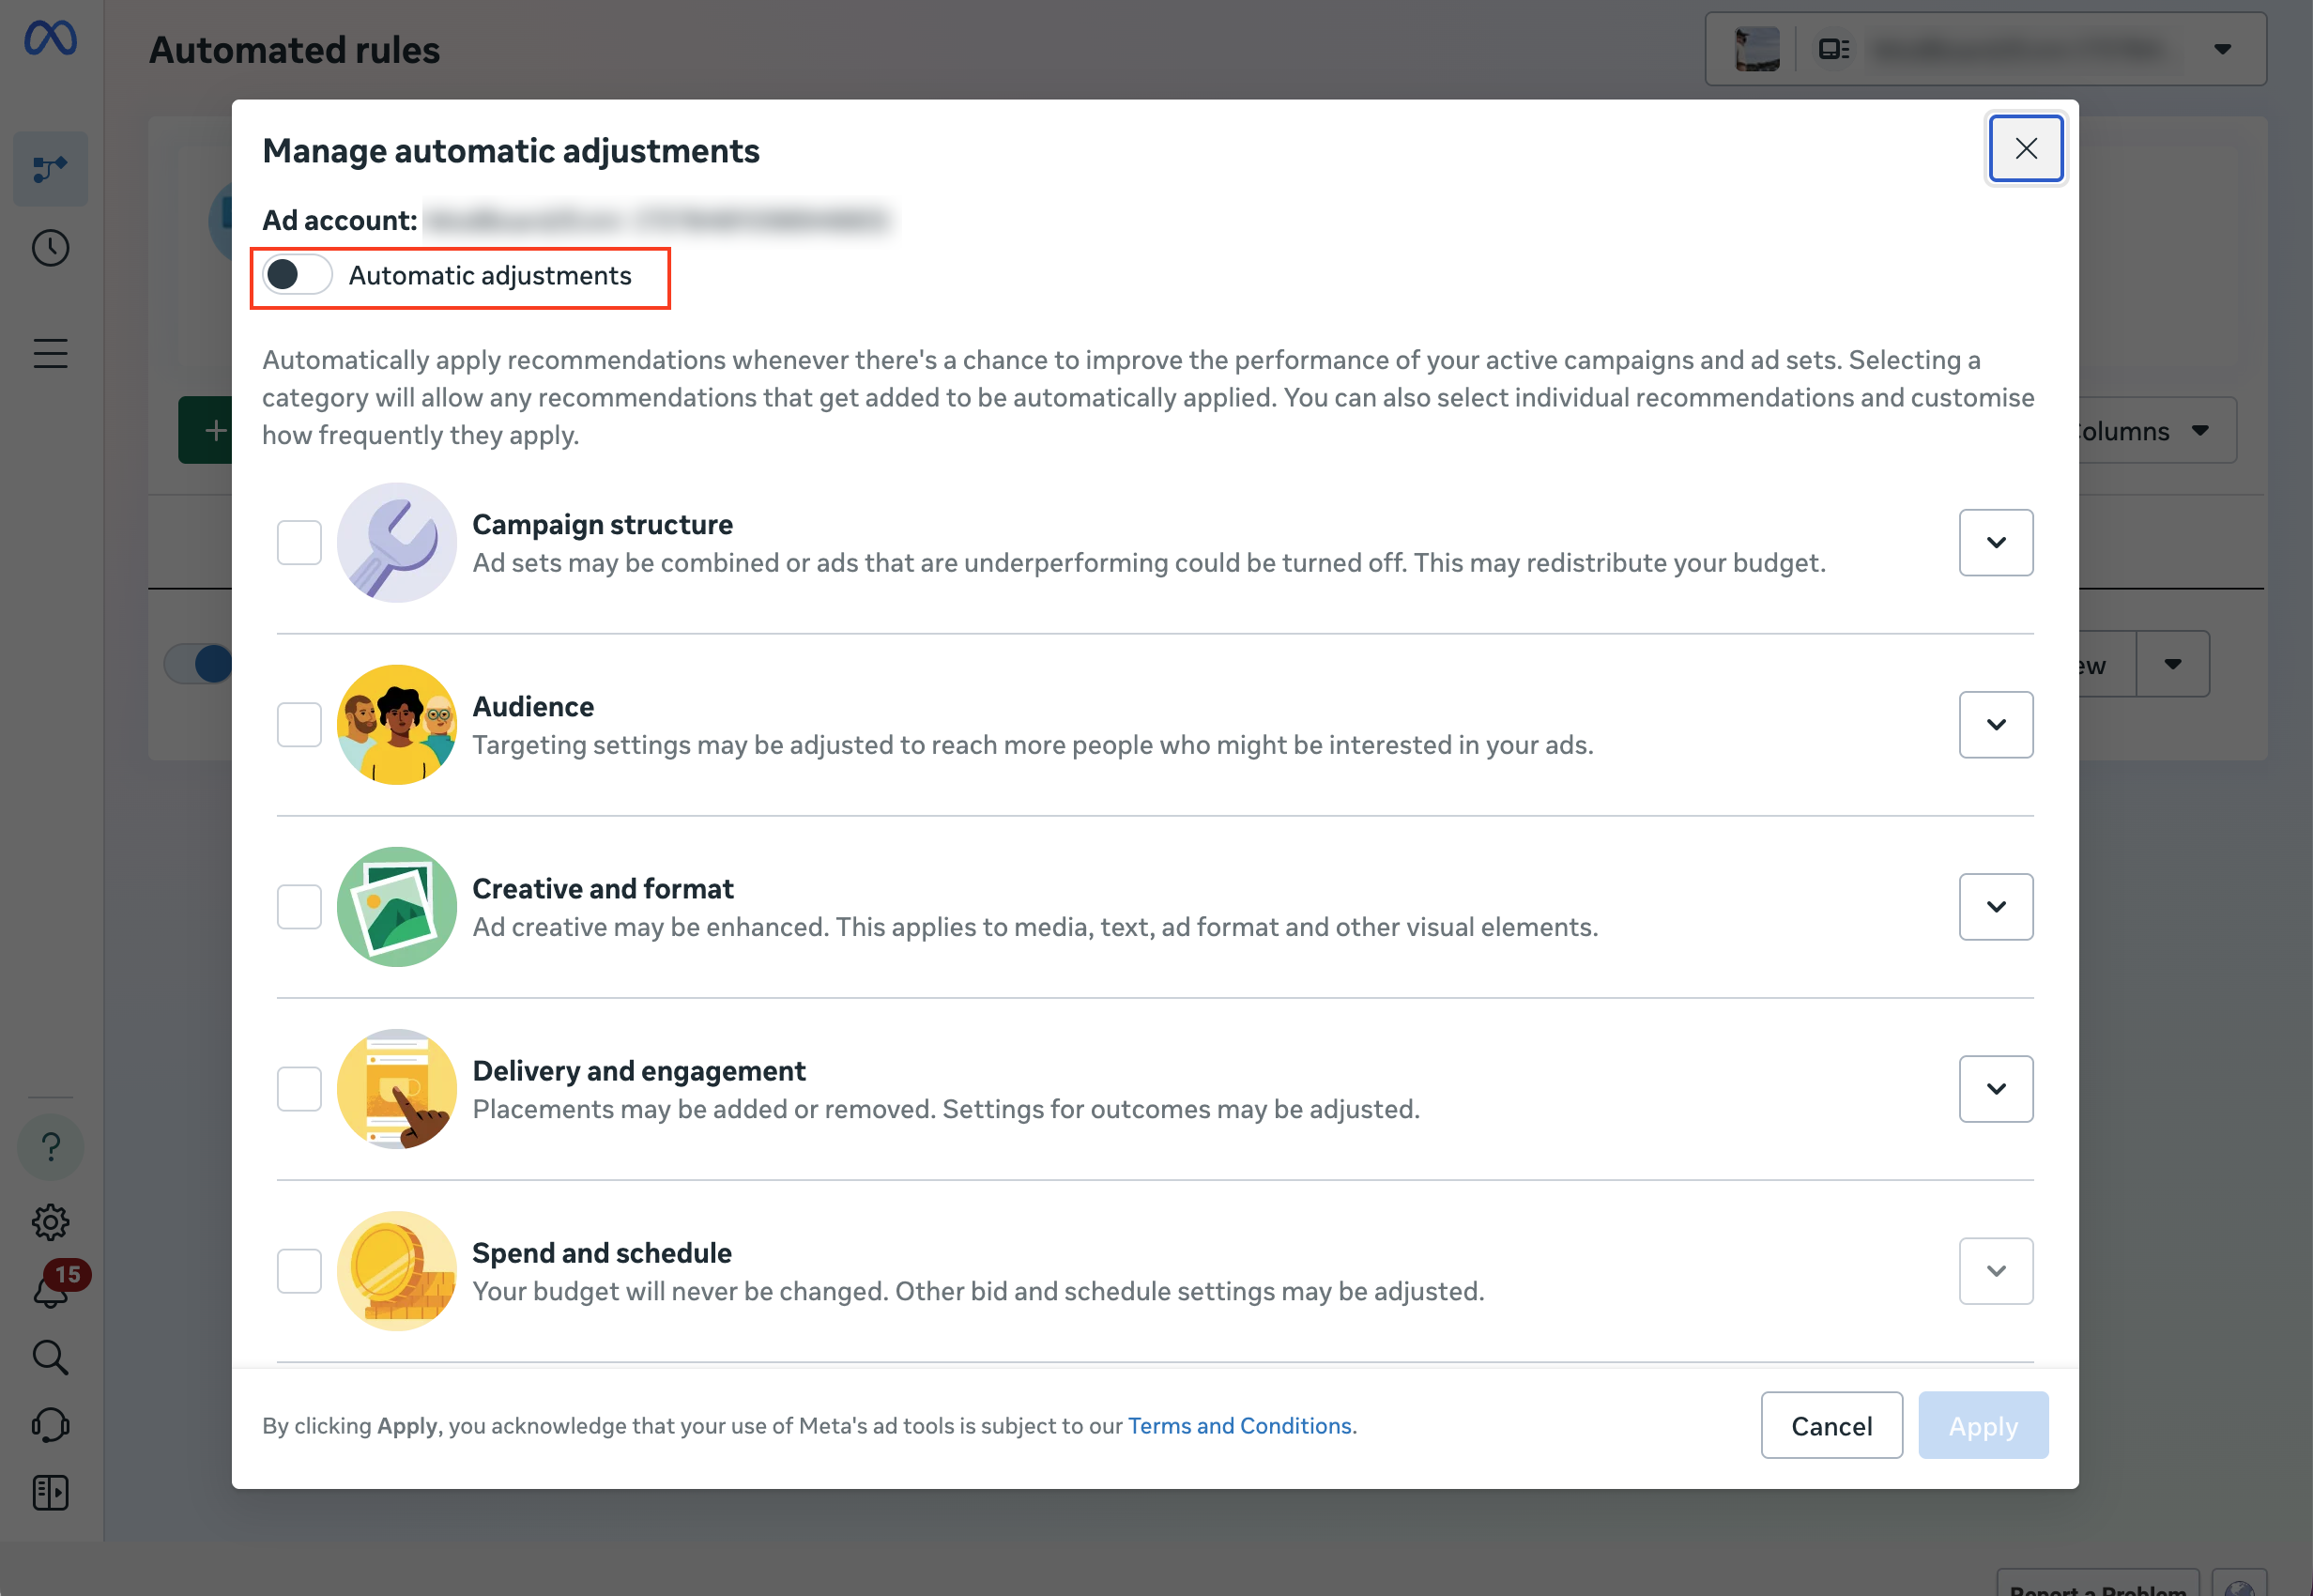
Meta legals accepted
For us to run ad campaigns there are two legal terms that must be accepted at Meta. We will send you these links as they are unique to your account.
Please check the top of each link and ensure they have been accepted - how each page looks can vary on your account so check carefully.
The account below has been accepted the terms as the accept button is faded our - no action is required,

This account below still needs to accept the terms as the button is clickable:

Domain verification
This step is optional but verifying your website domain at Meta can help increase performance. The difference is very minor but especially if you have a WodBoard website, the few clicks required below are generally worth it for the performance gain. For websites hosted outside our ecosystem we only recommend this if you have access to technical skill as it involves updating your website.
1) Head to the Meta Business Manager which can be found here
2) In the sidebar click the "Domains" option under "Brand Safety and suitability"
3) See if there is a domain in the middle column and it is verified (with a green tag) as shown in the screenshot below. If so no further action is required
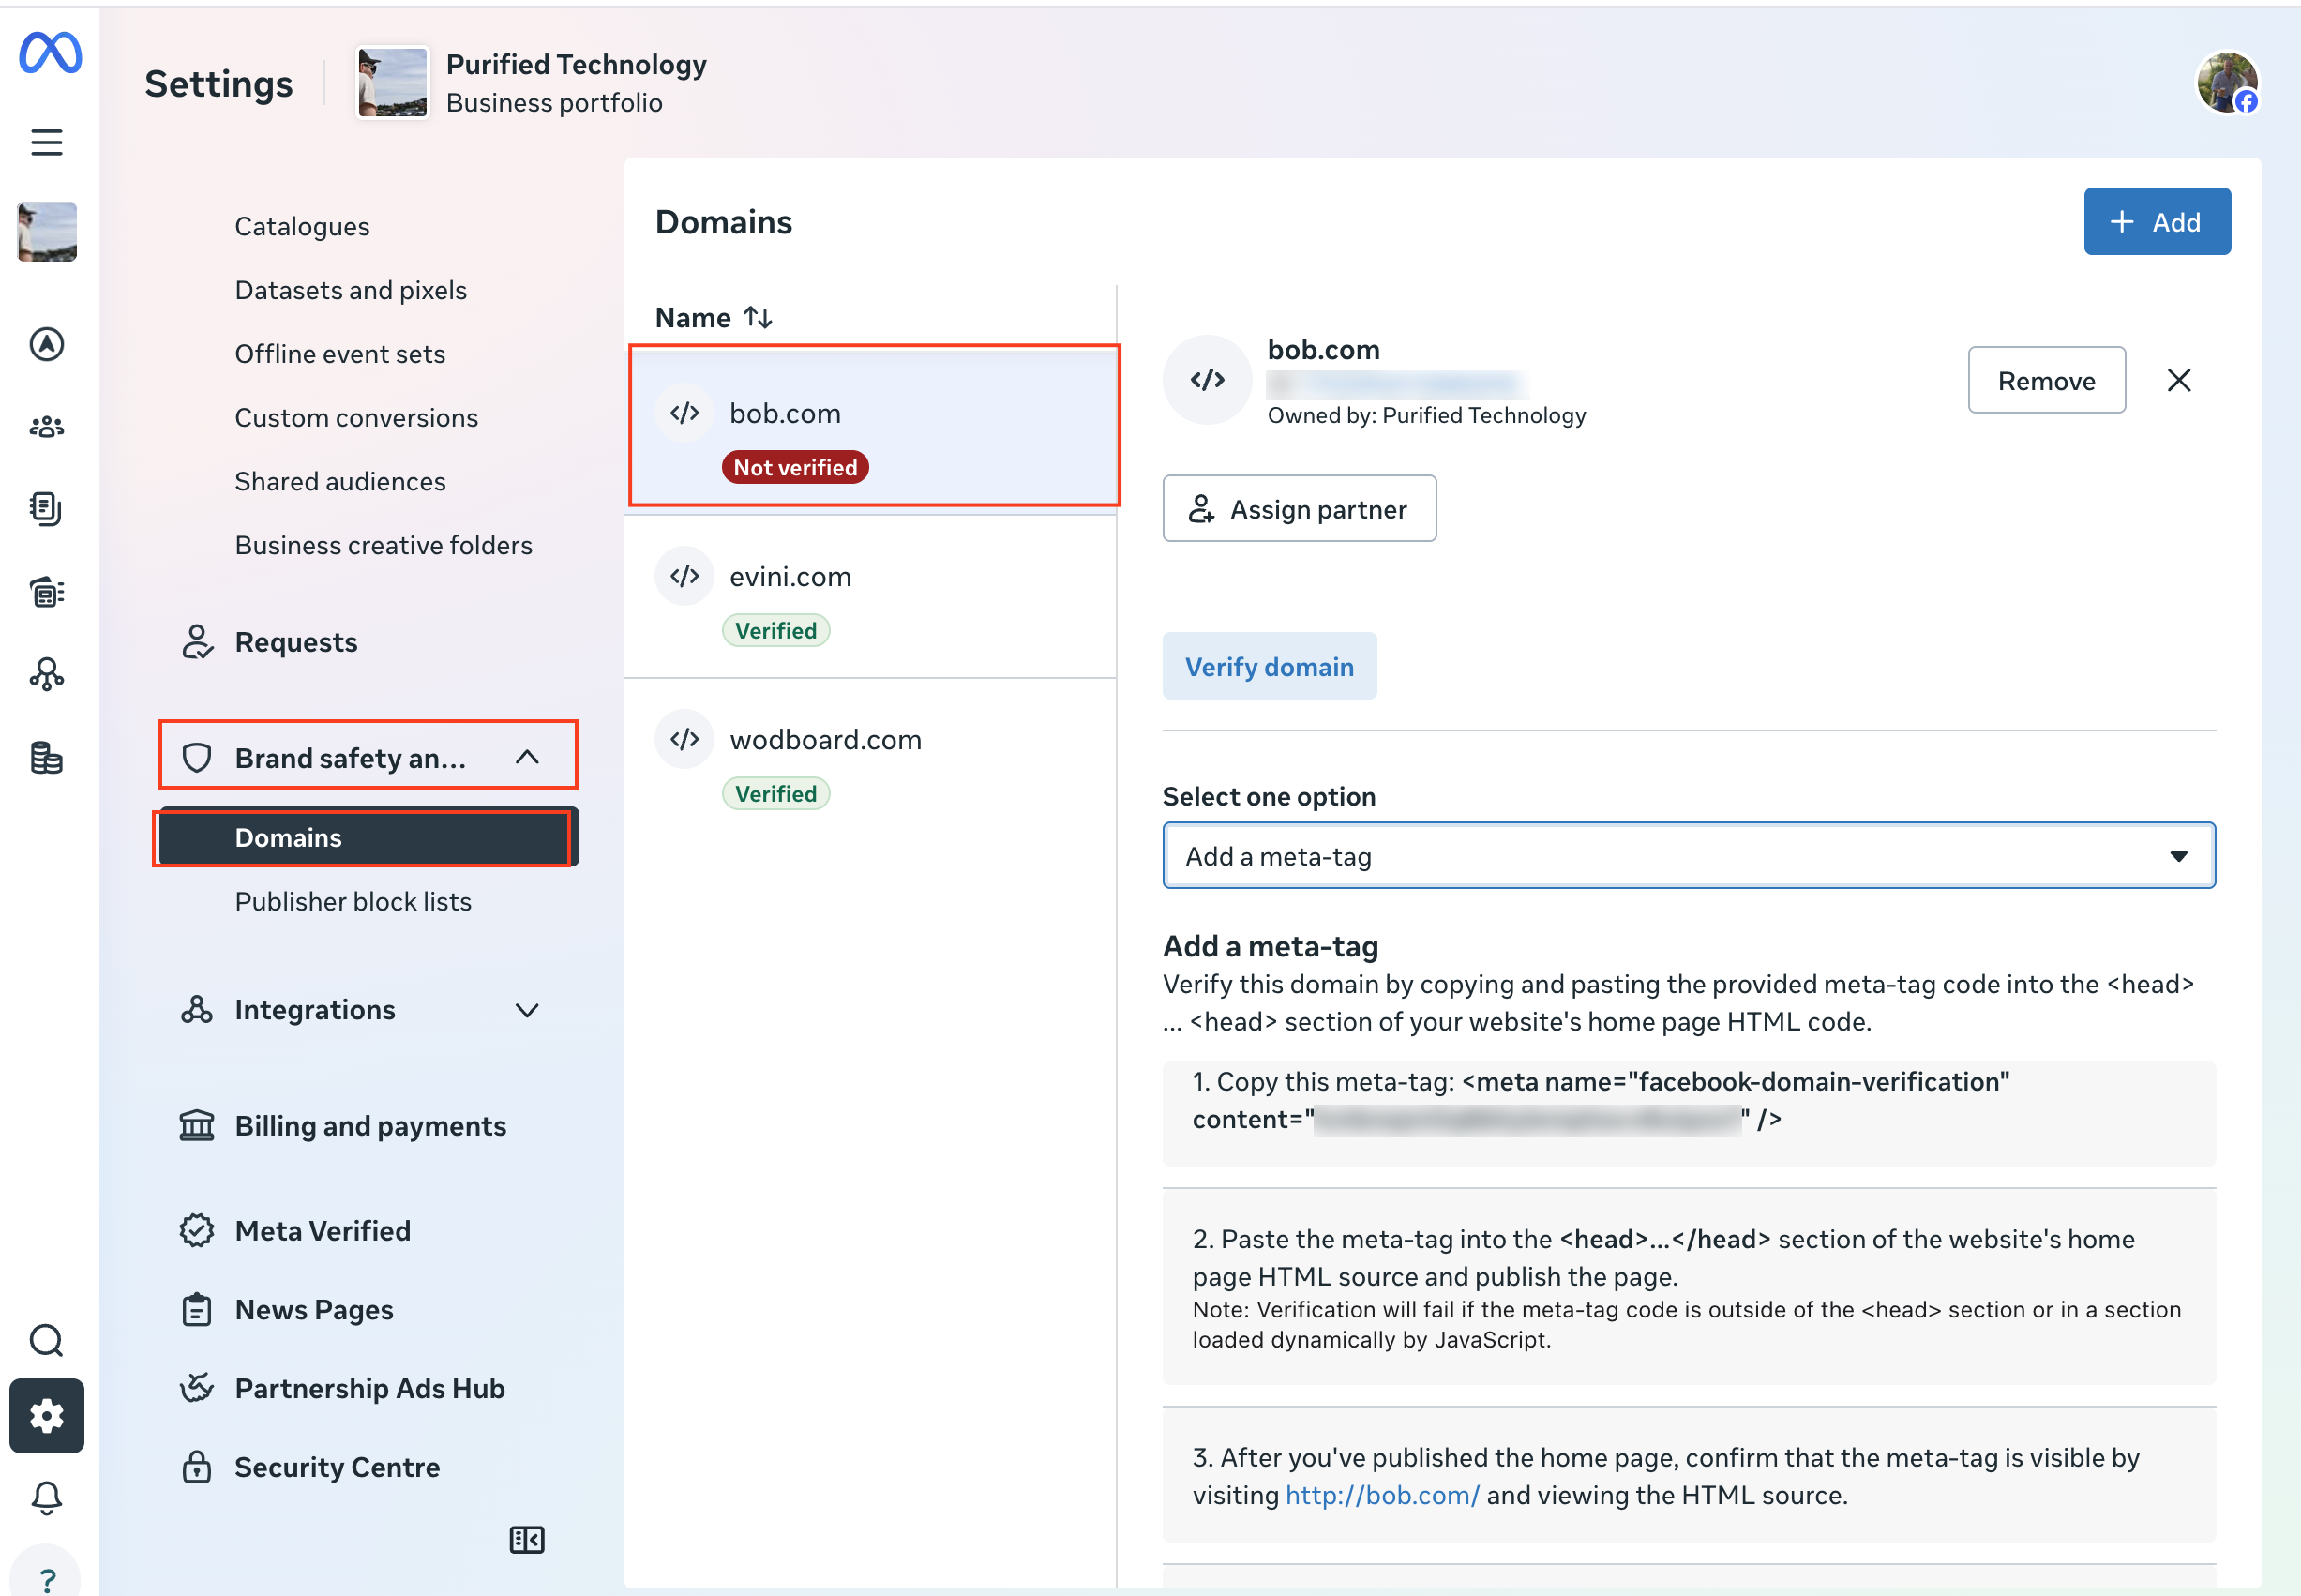
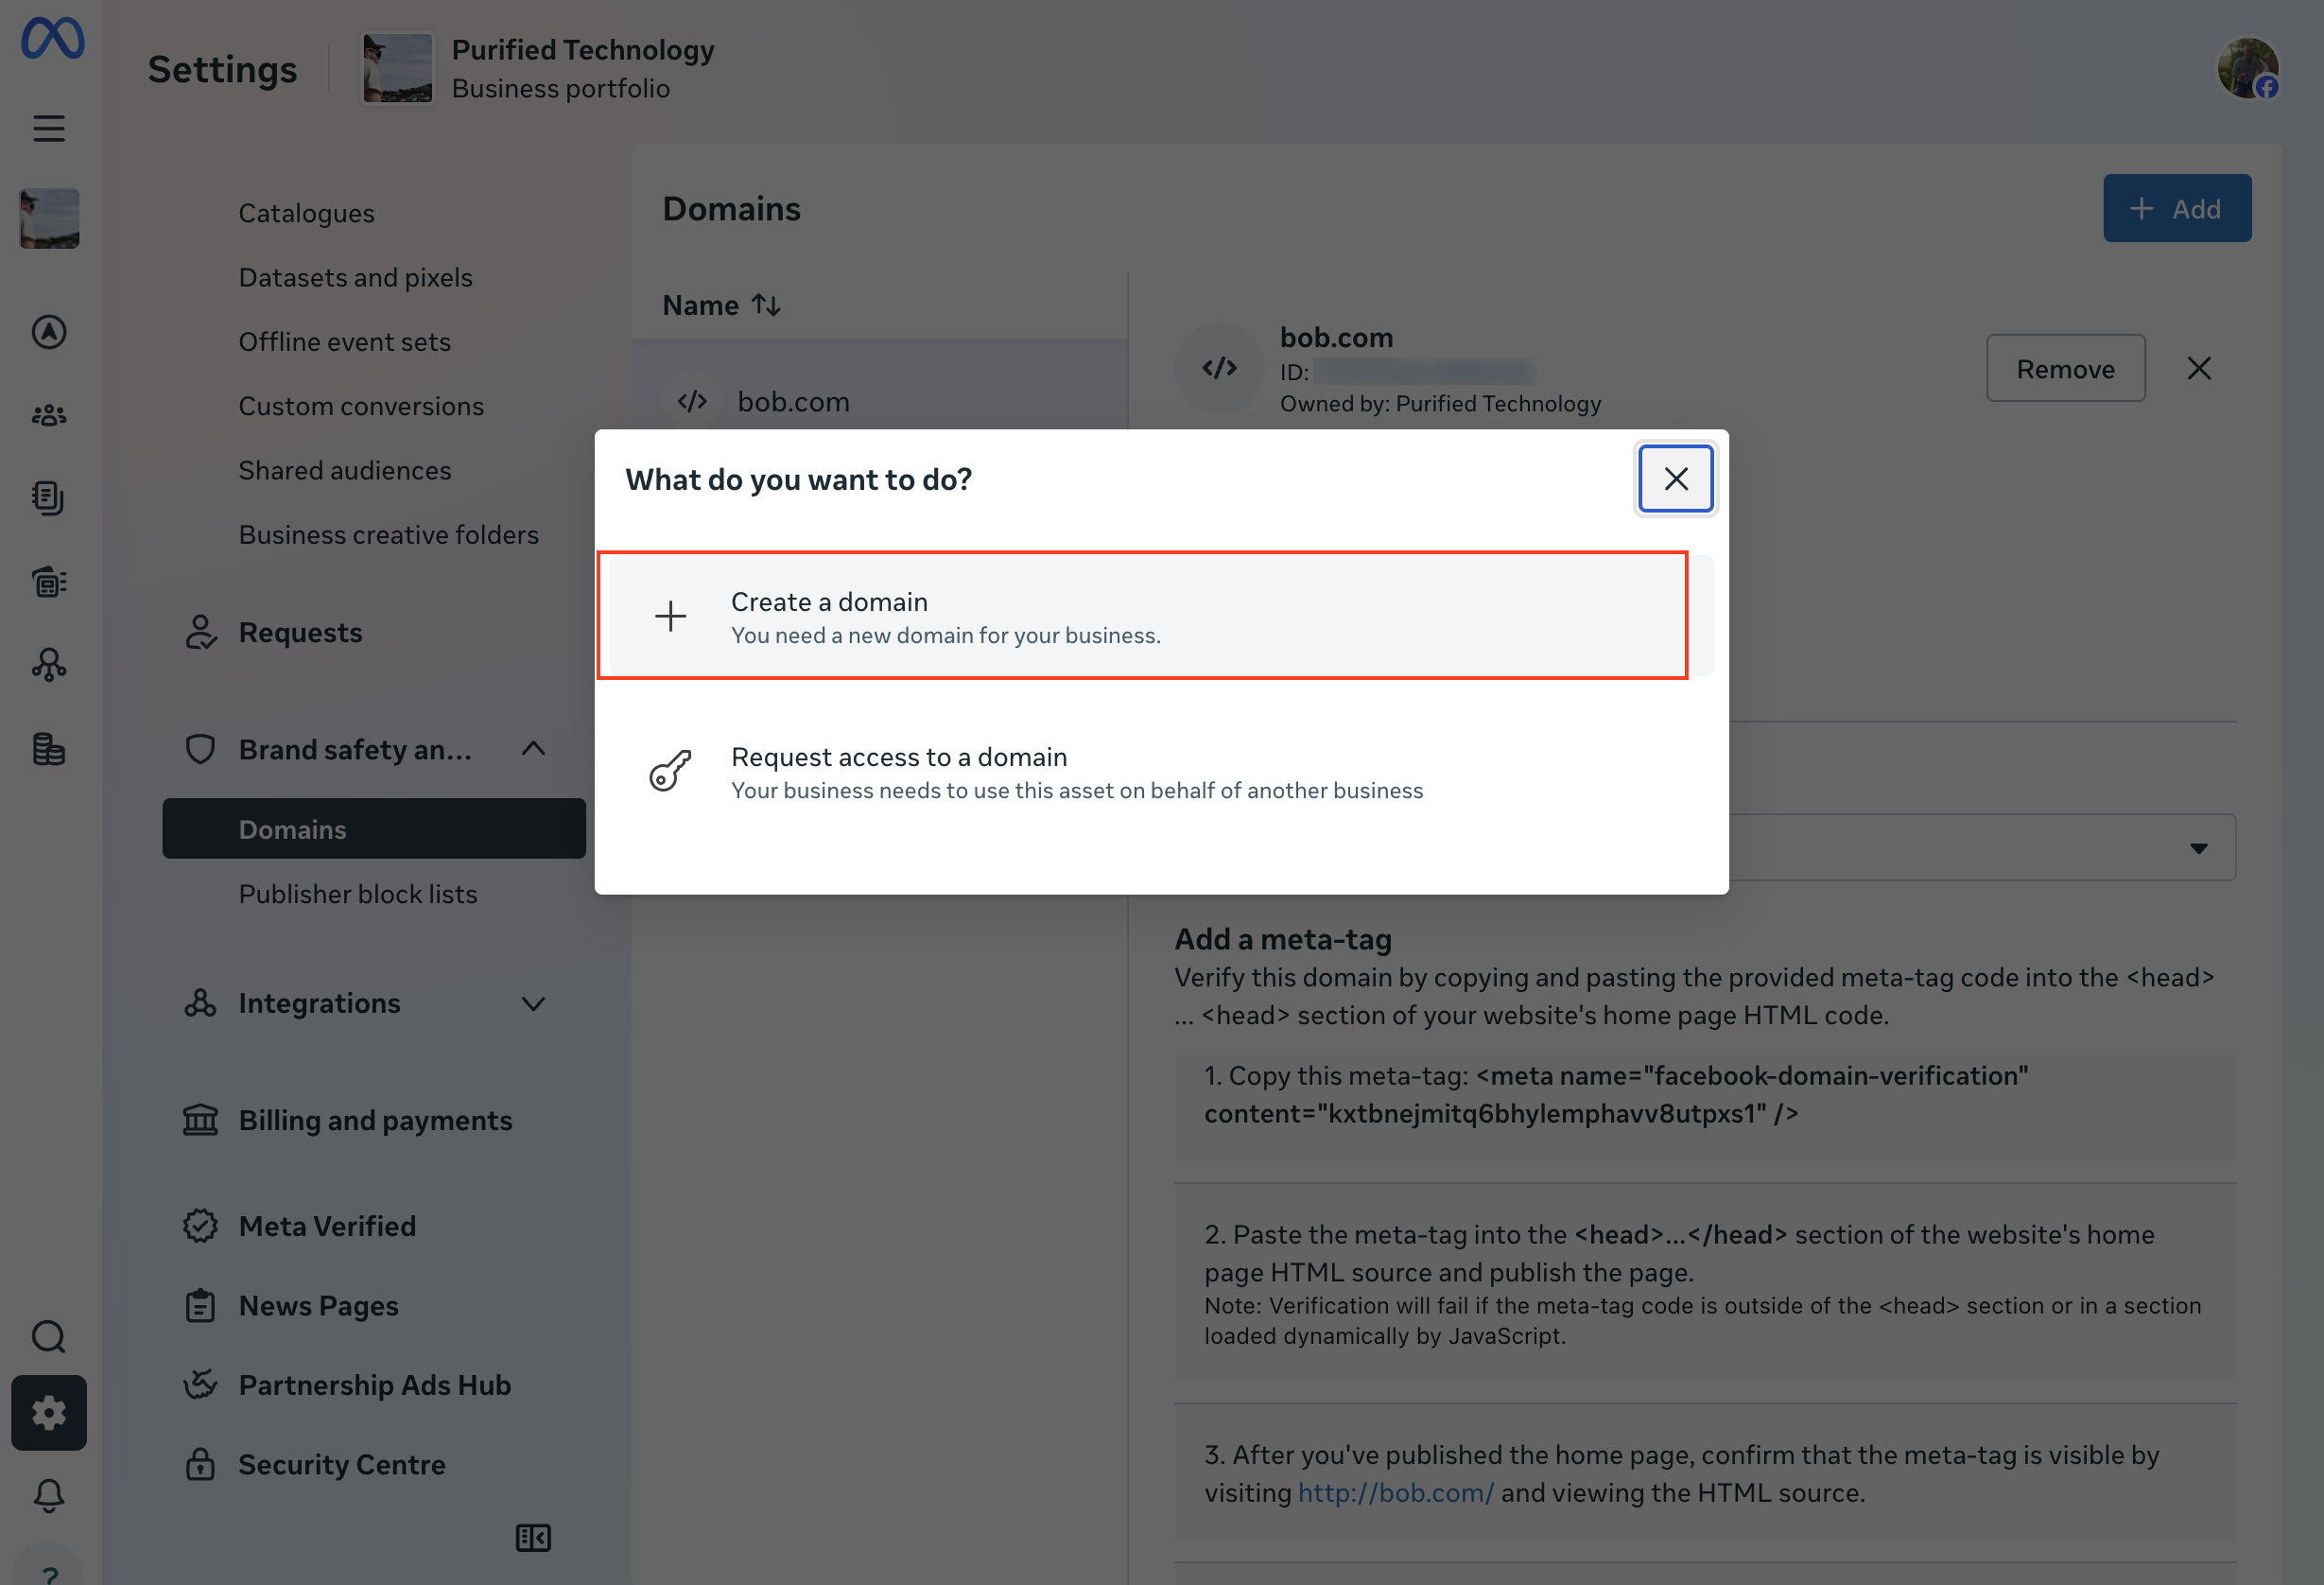
4) If not click the Add button to add your domain and choose Create a domain
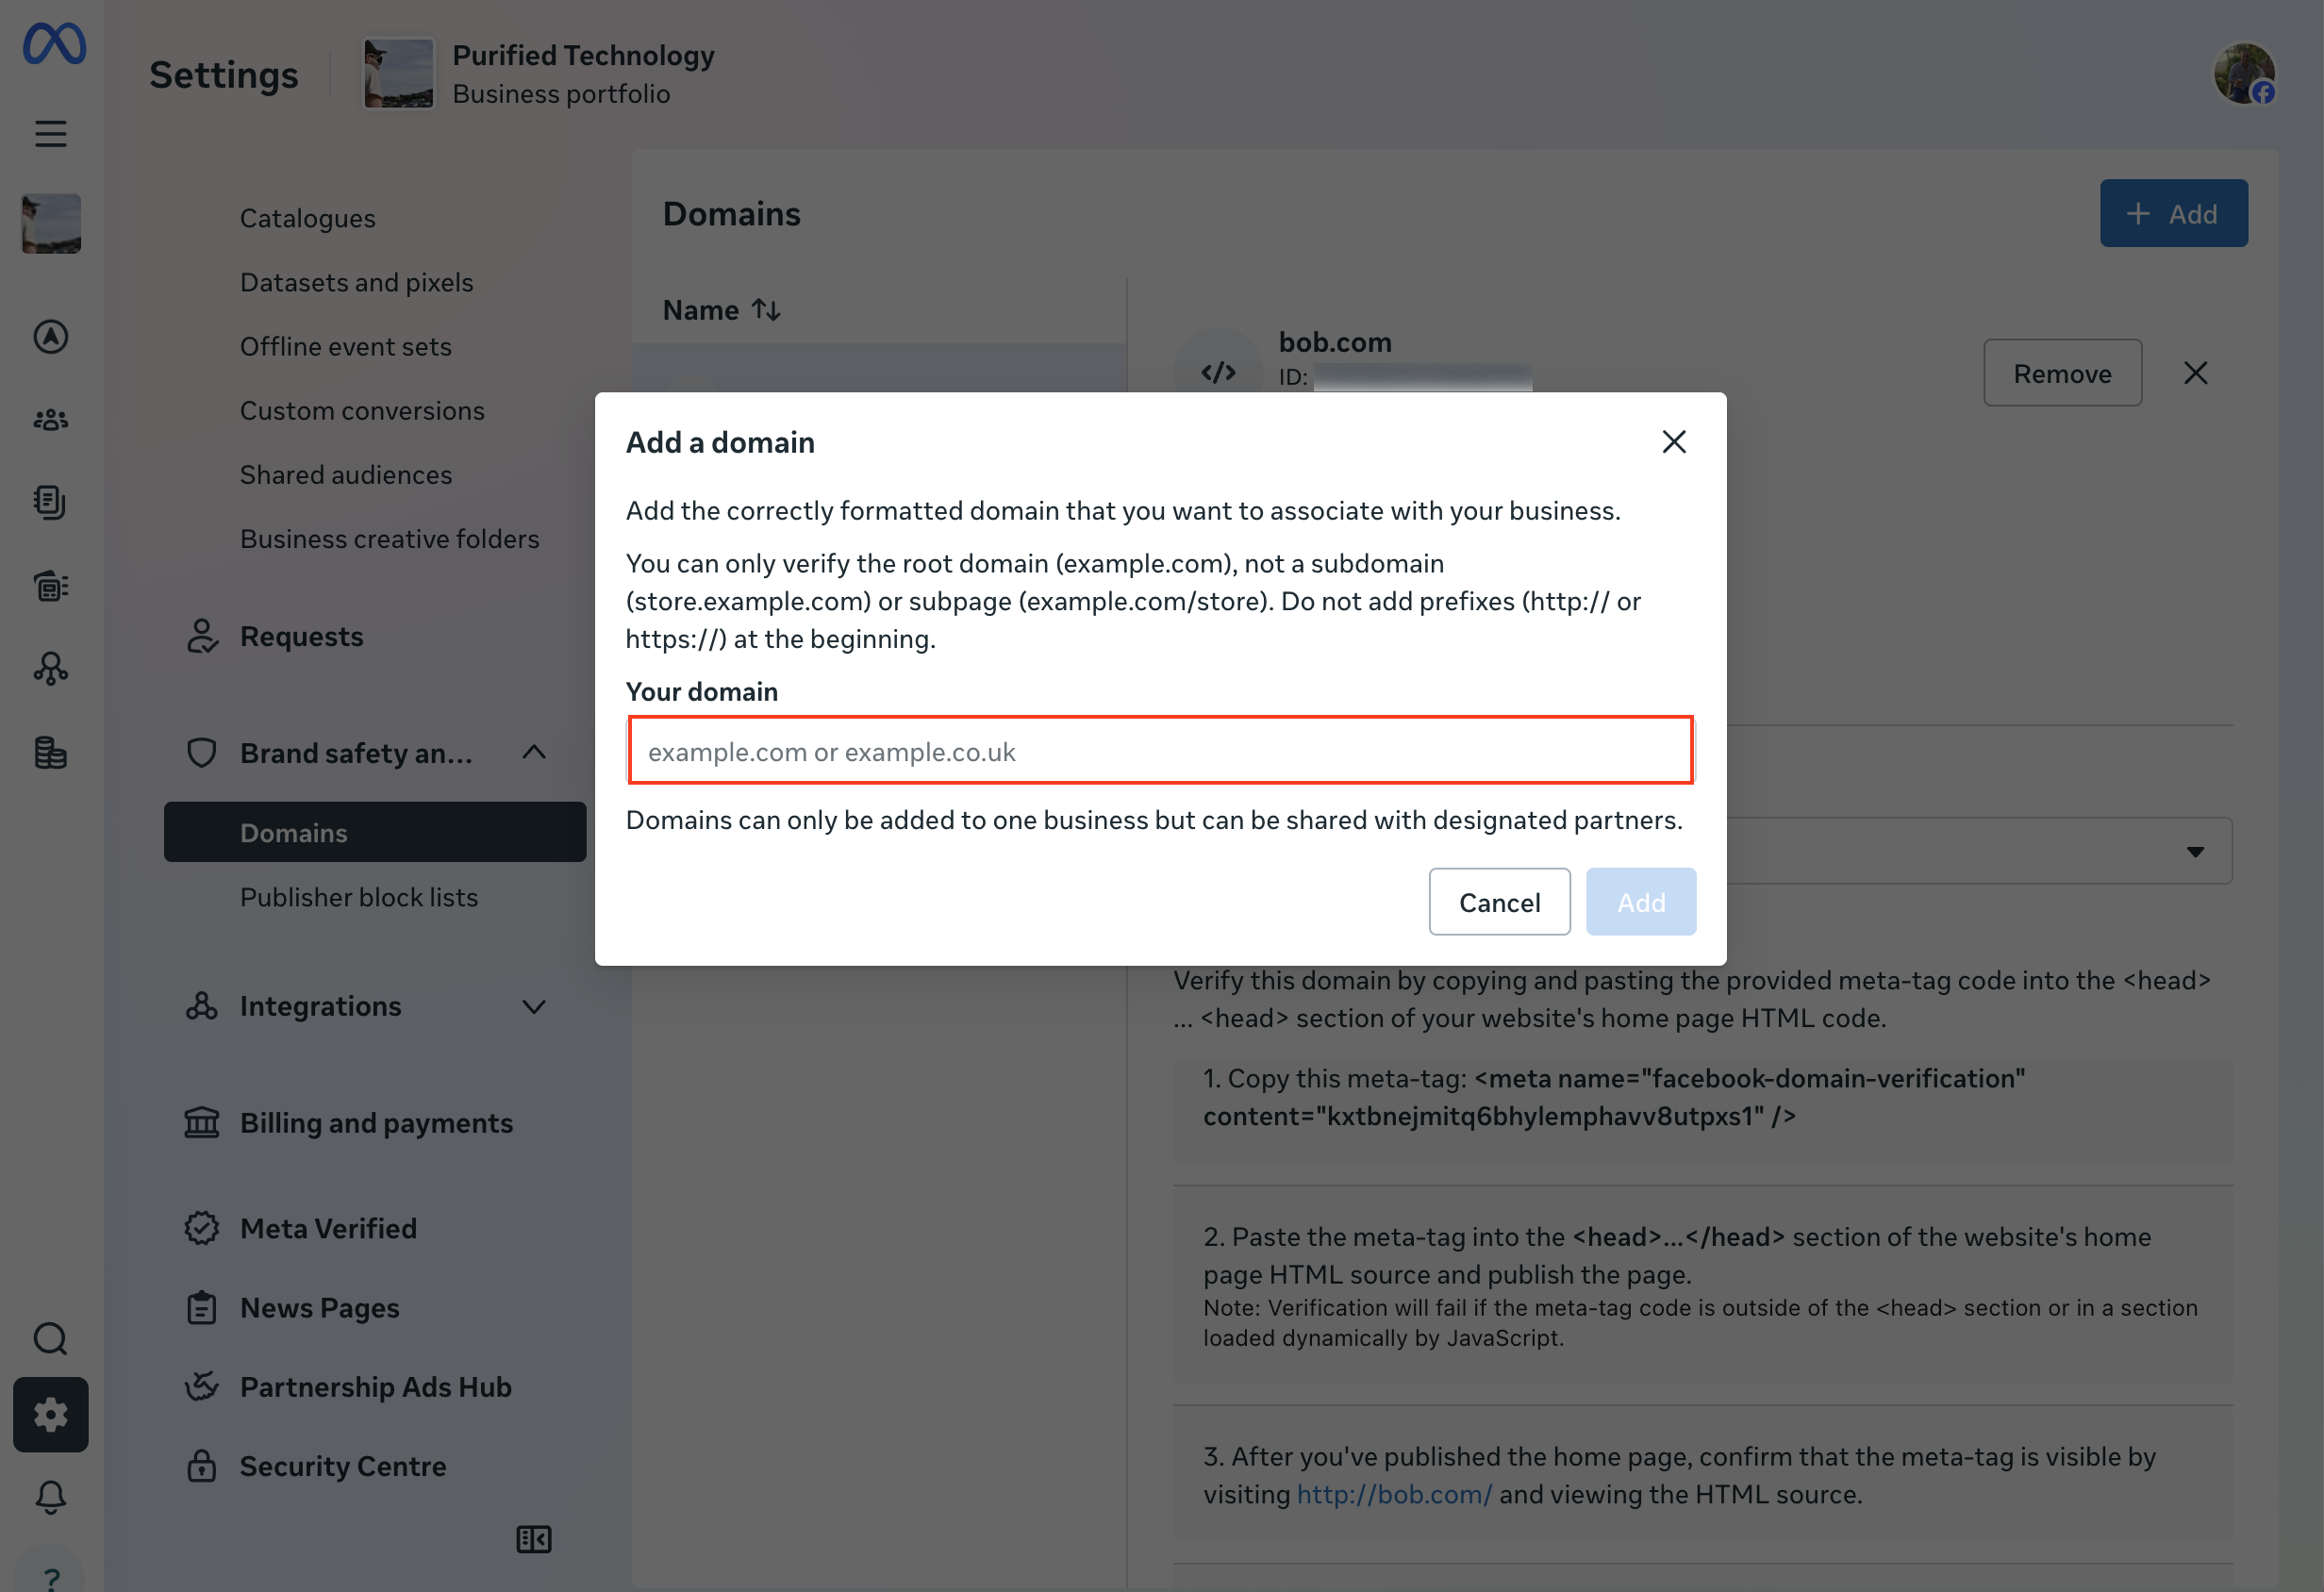
5) Enter your domain. This should be entered without the https or www part so "mygym.com" rather than "https://www.mygym.com"
6) Once added you will be redirected back to the domains page in Business Manager. If you have a WodBoard website copy the code in part 1 and email to our support team. If you have a website you host yourself copy the code and send it your developer
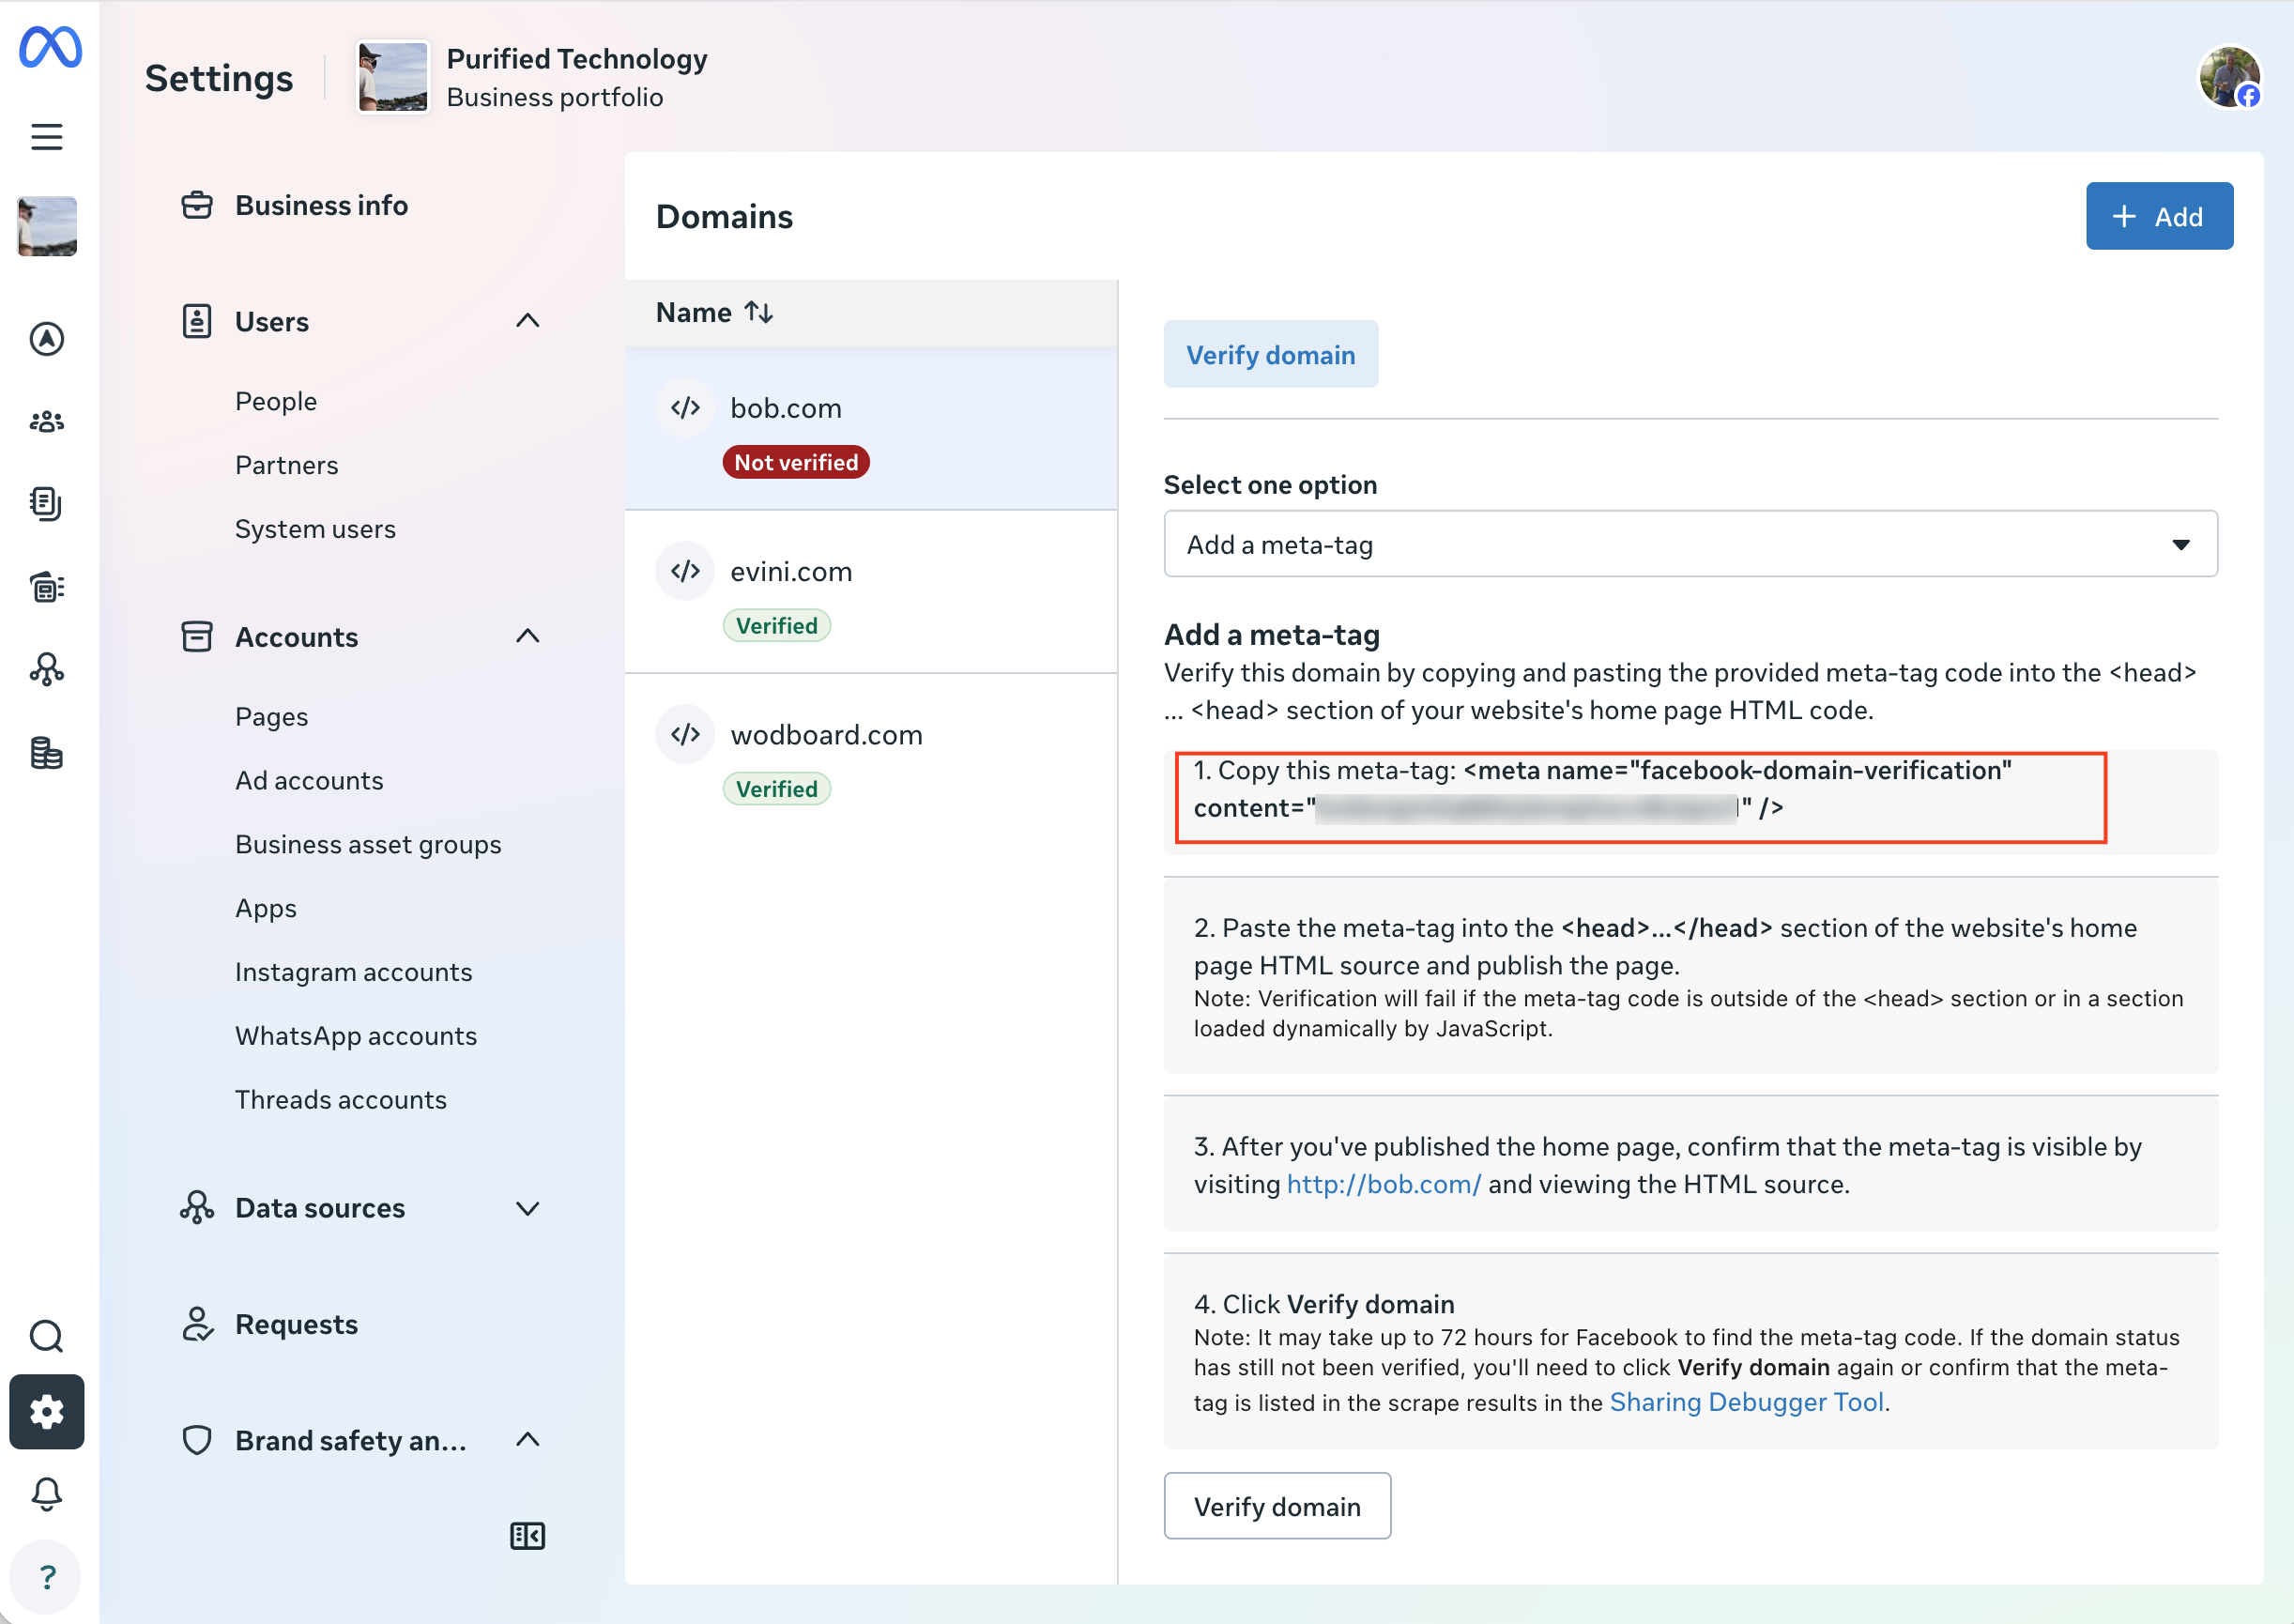
7) Once the update is made click Verify at the bottom of the page to verify the domain.
Support access
You will not need to complete this setup unless our support ask you to. On occasion we may need to check your ads account to help diagnose a question or issue. To do this you will need to give us access to your account through Facebook's partner relationship. To do this:
1) Go to the Business Manager ad account settings page which can be found here
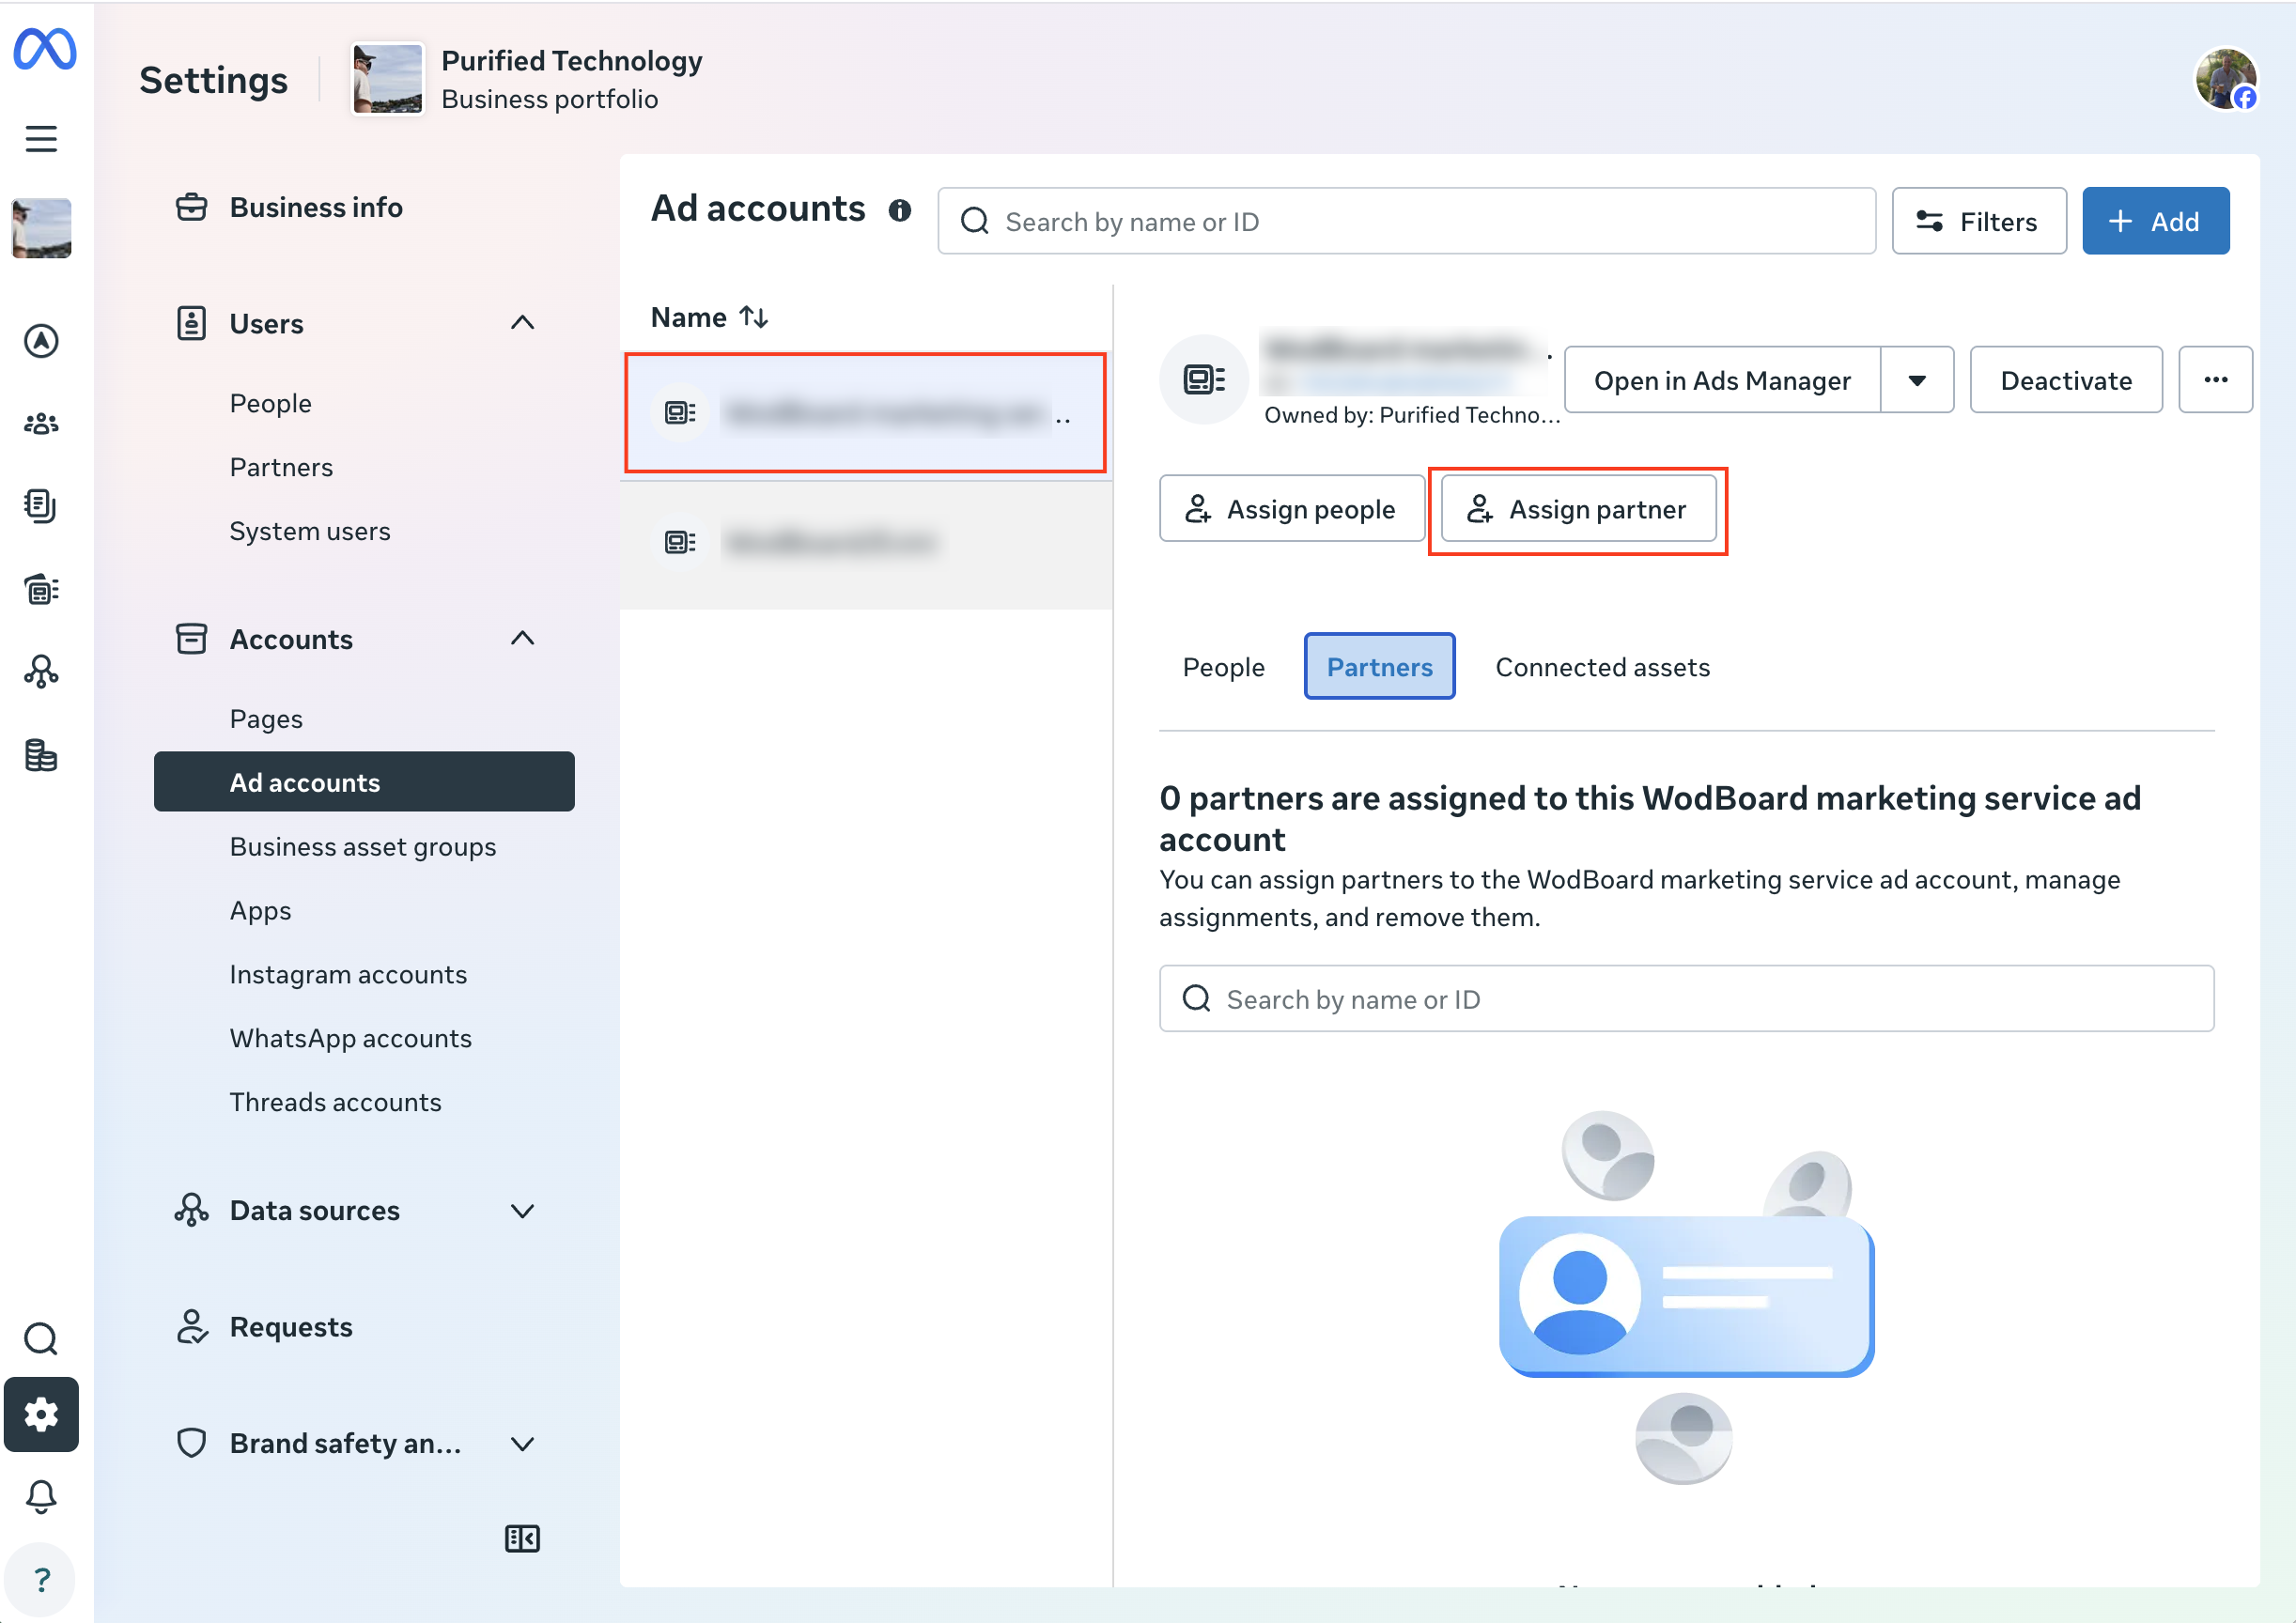
2) If you have multiple ad accounts make sure you select the correct ad account in the selection bar. Then click the Assign Partner button
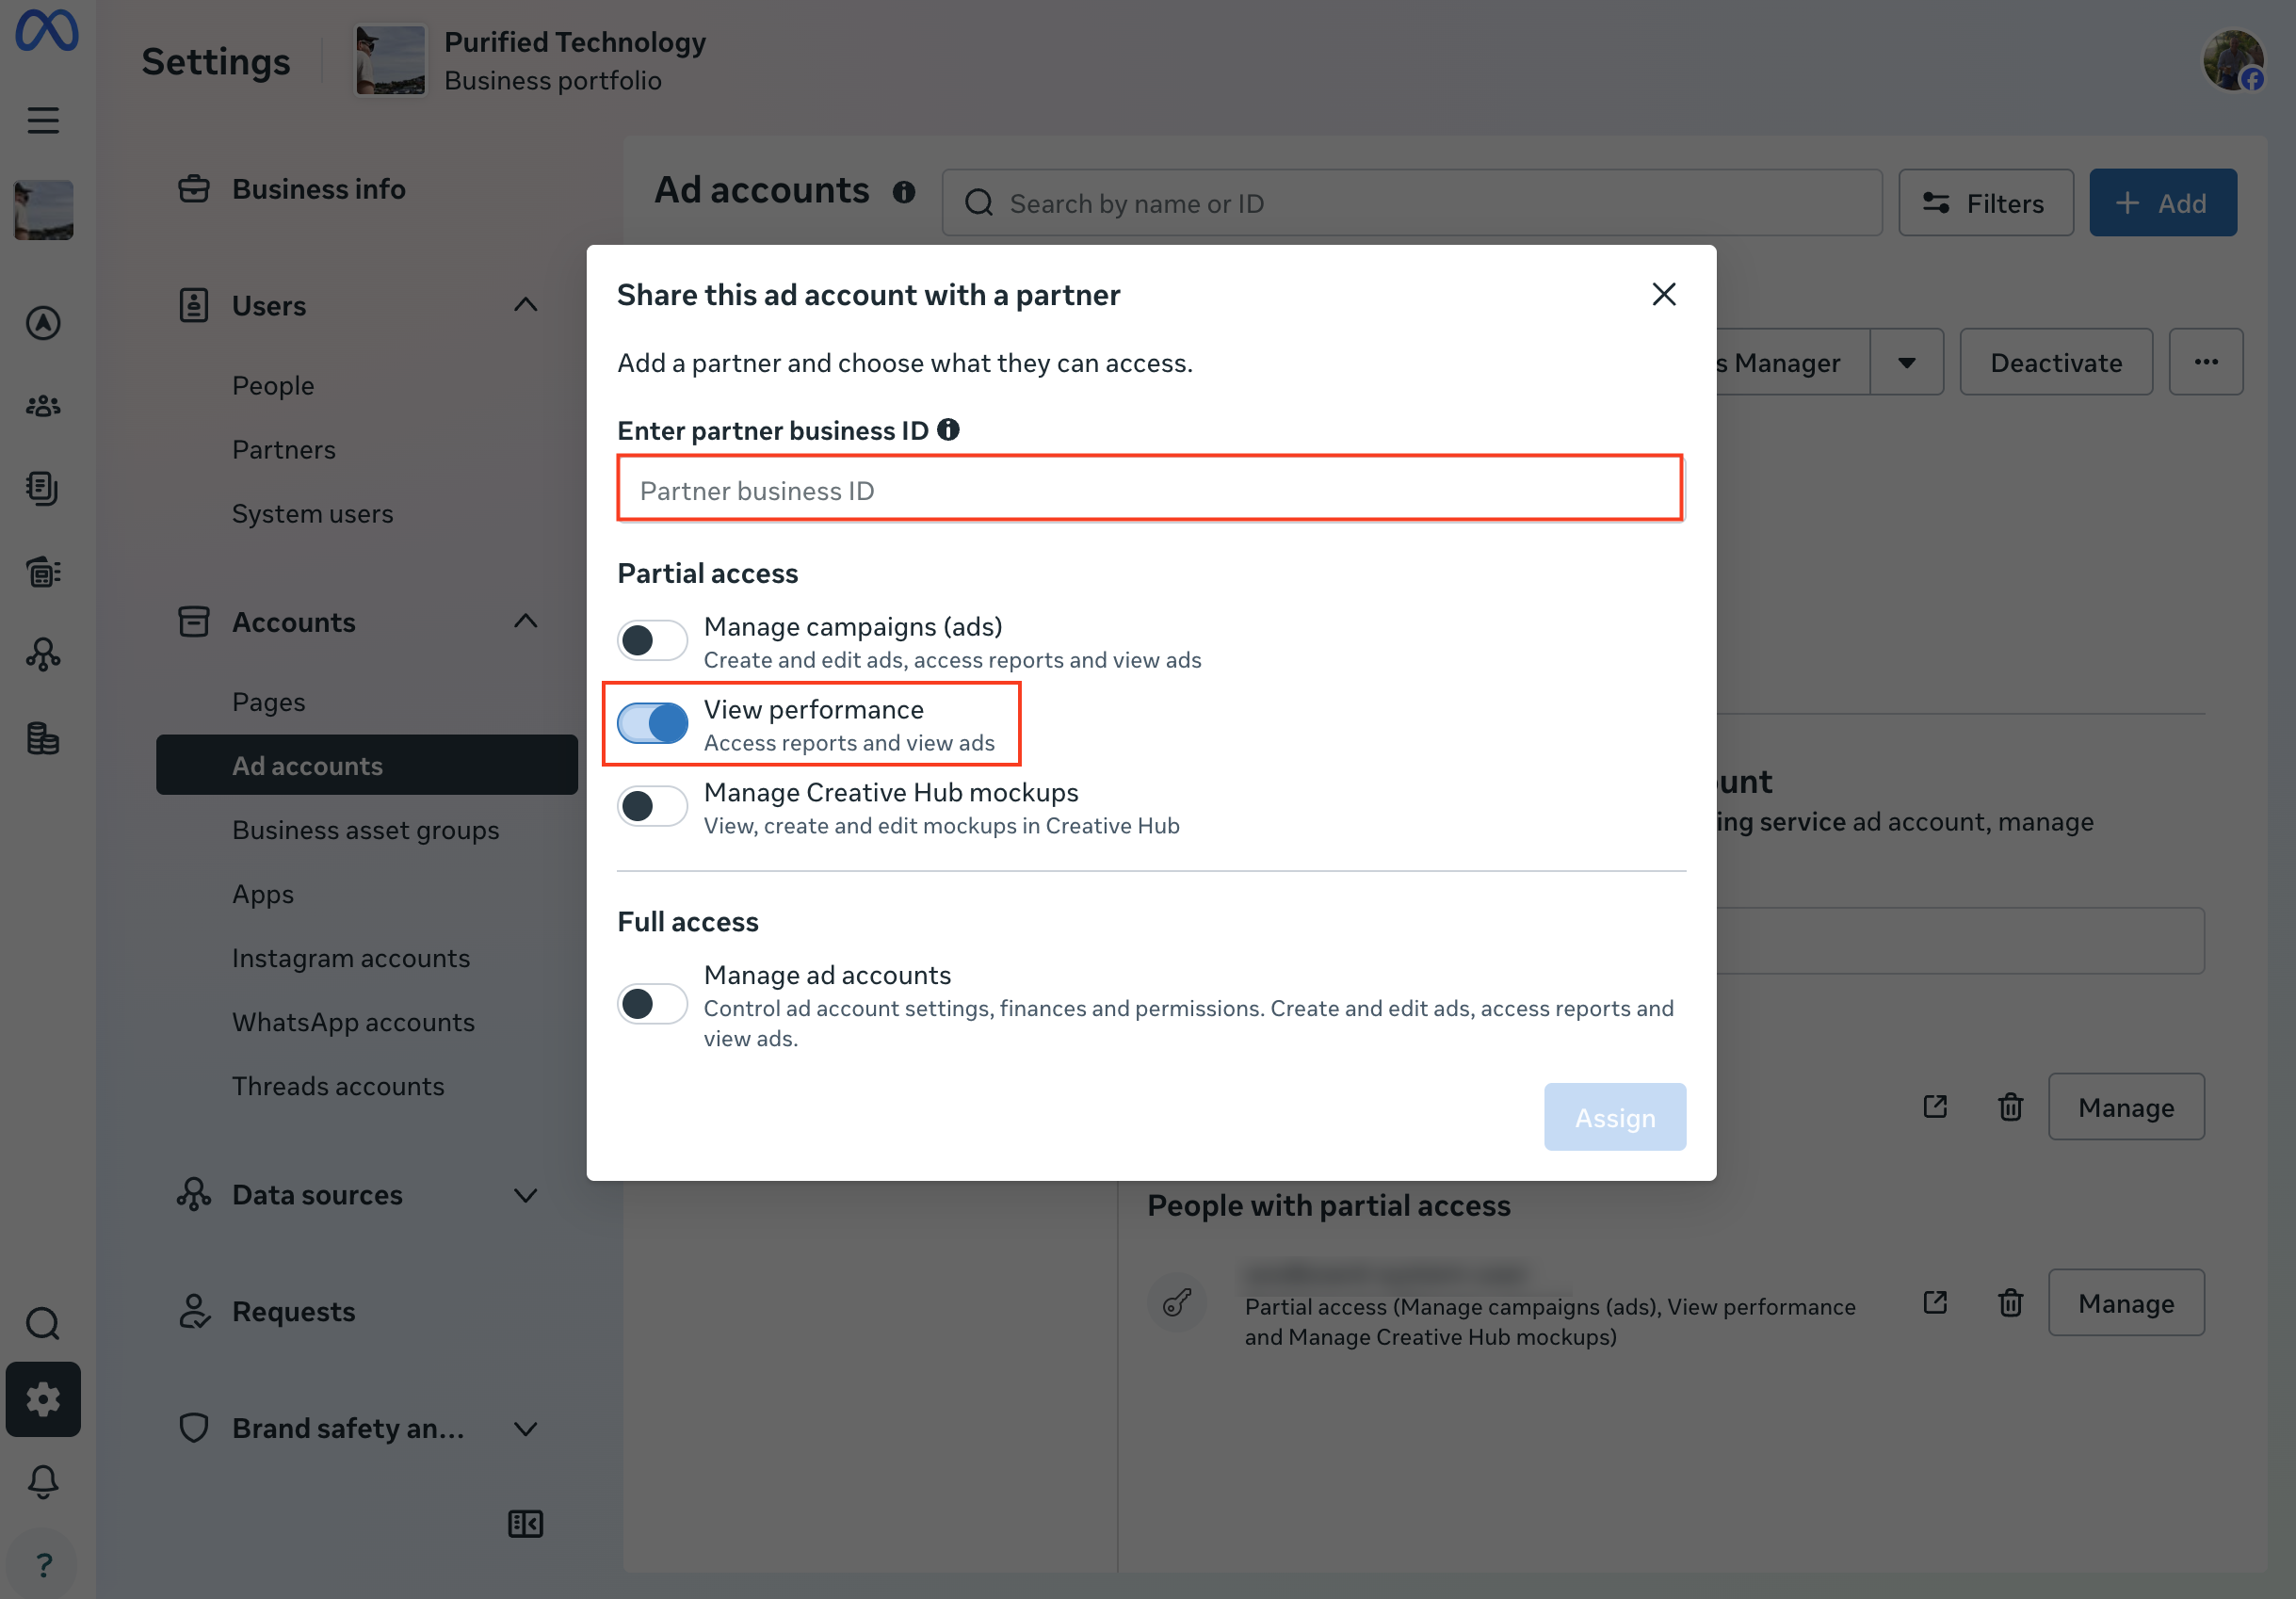
3) Enter our business id (support will provide this) and select the "View Performance" permission. Press the Assign button to complete this part of the process
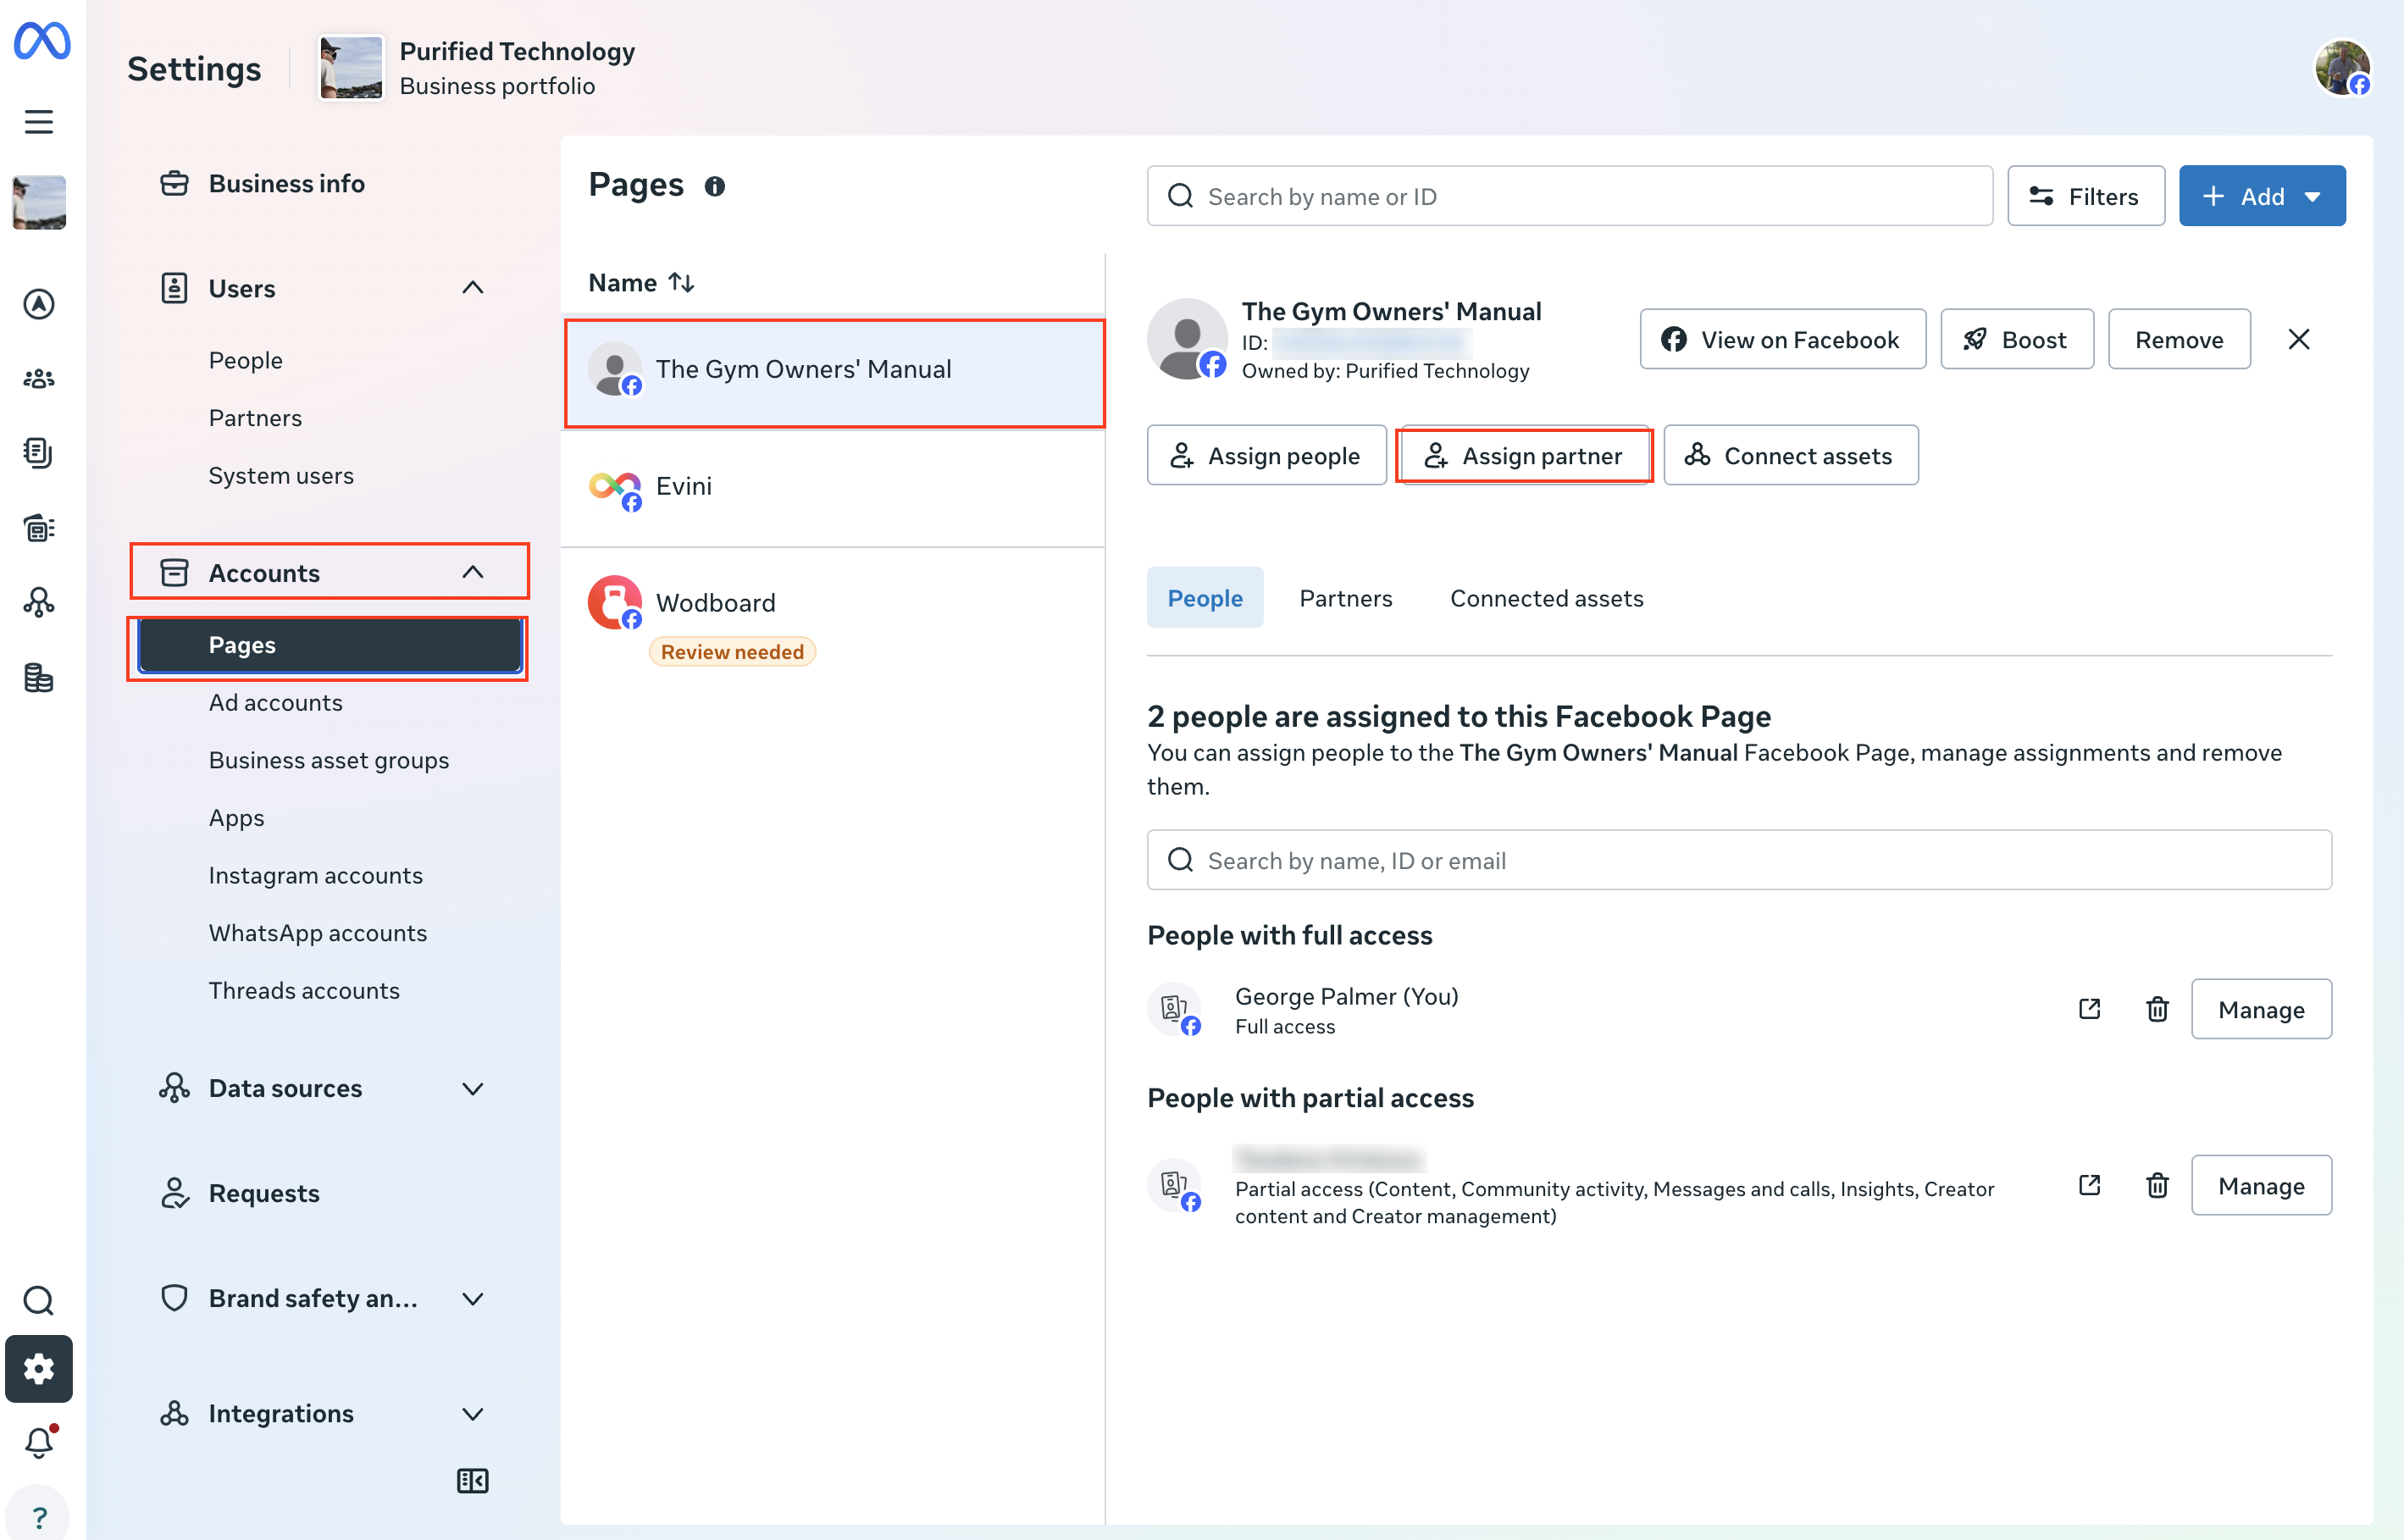
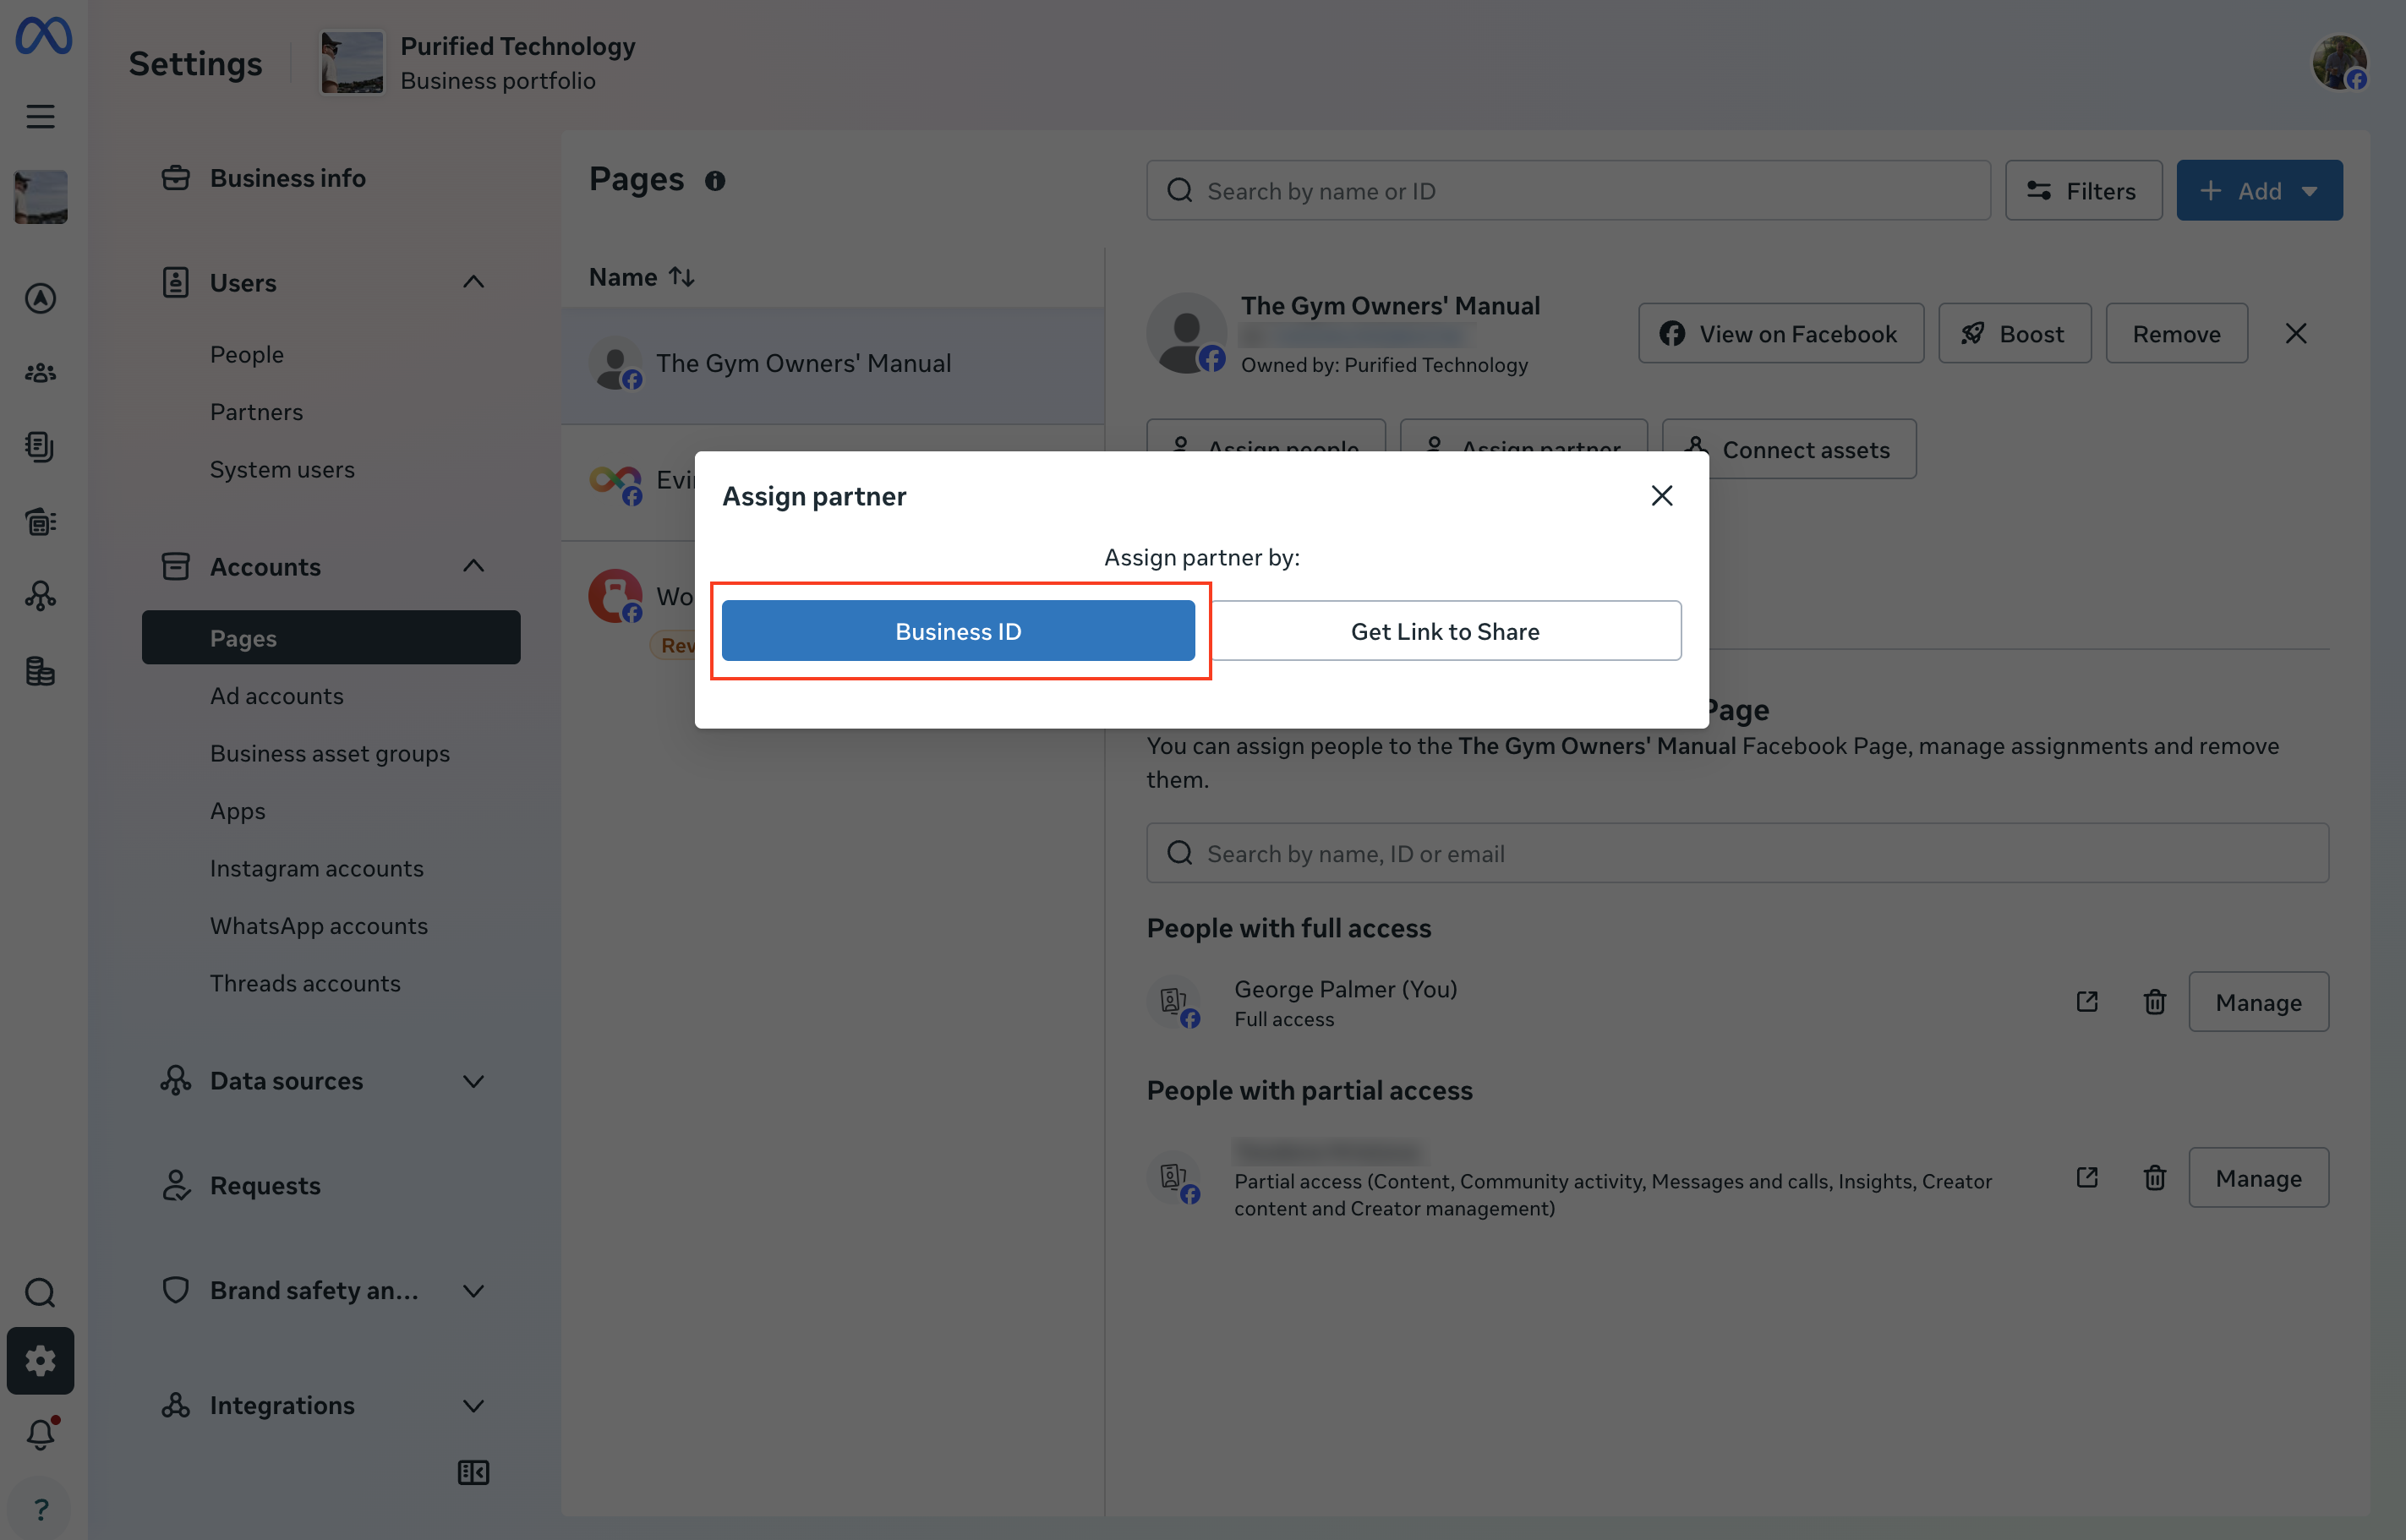
4) Head to the "Pages" section on the left which is under "Accounts" in the sidebar. Again make sure you're choosing the right account. Then click the Assign Partner button.
5) Choose the Business ID option in the popup
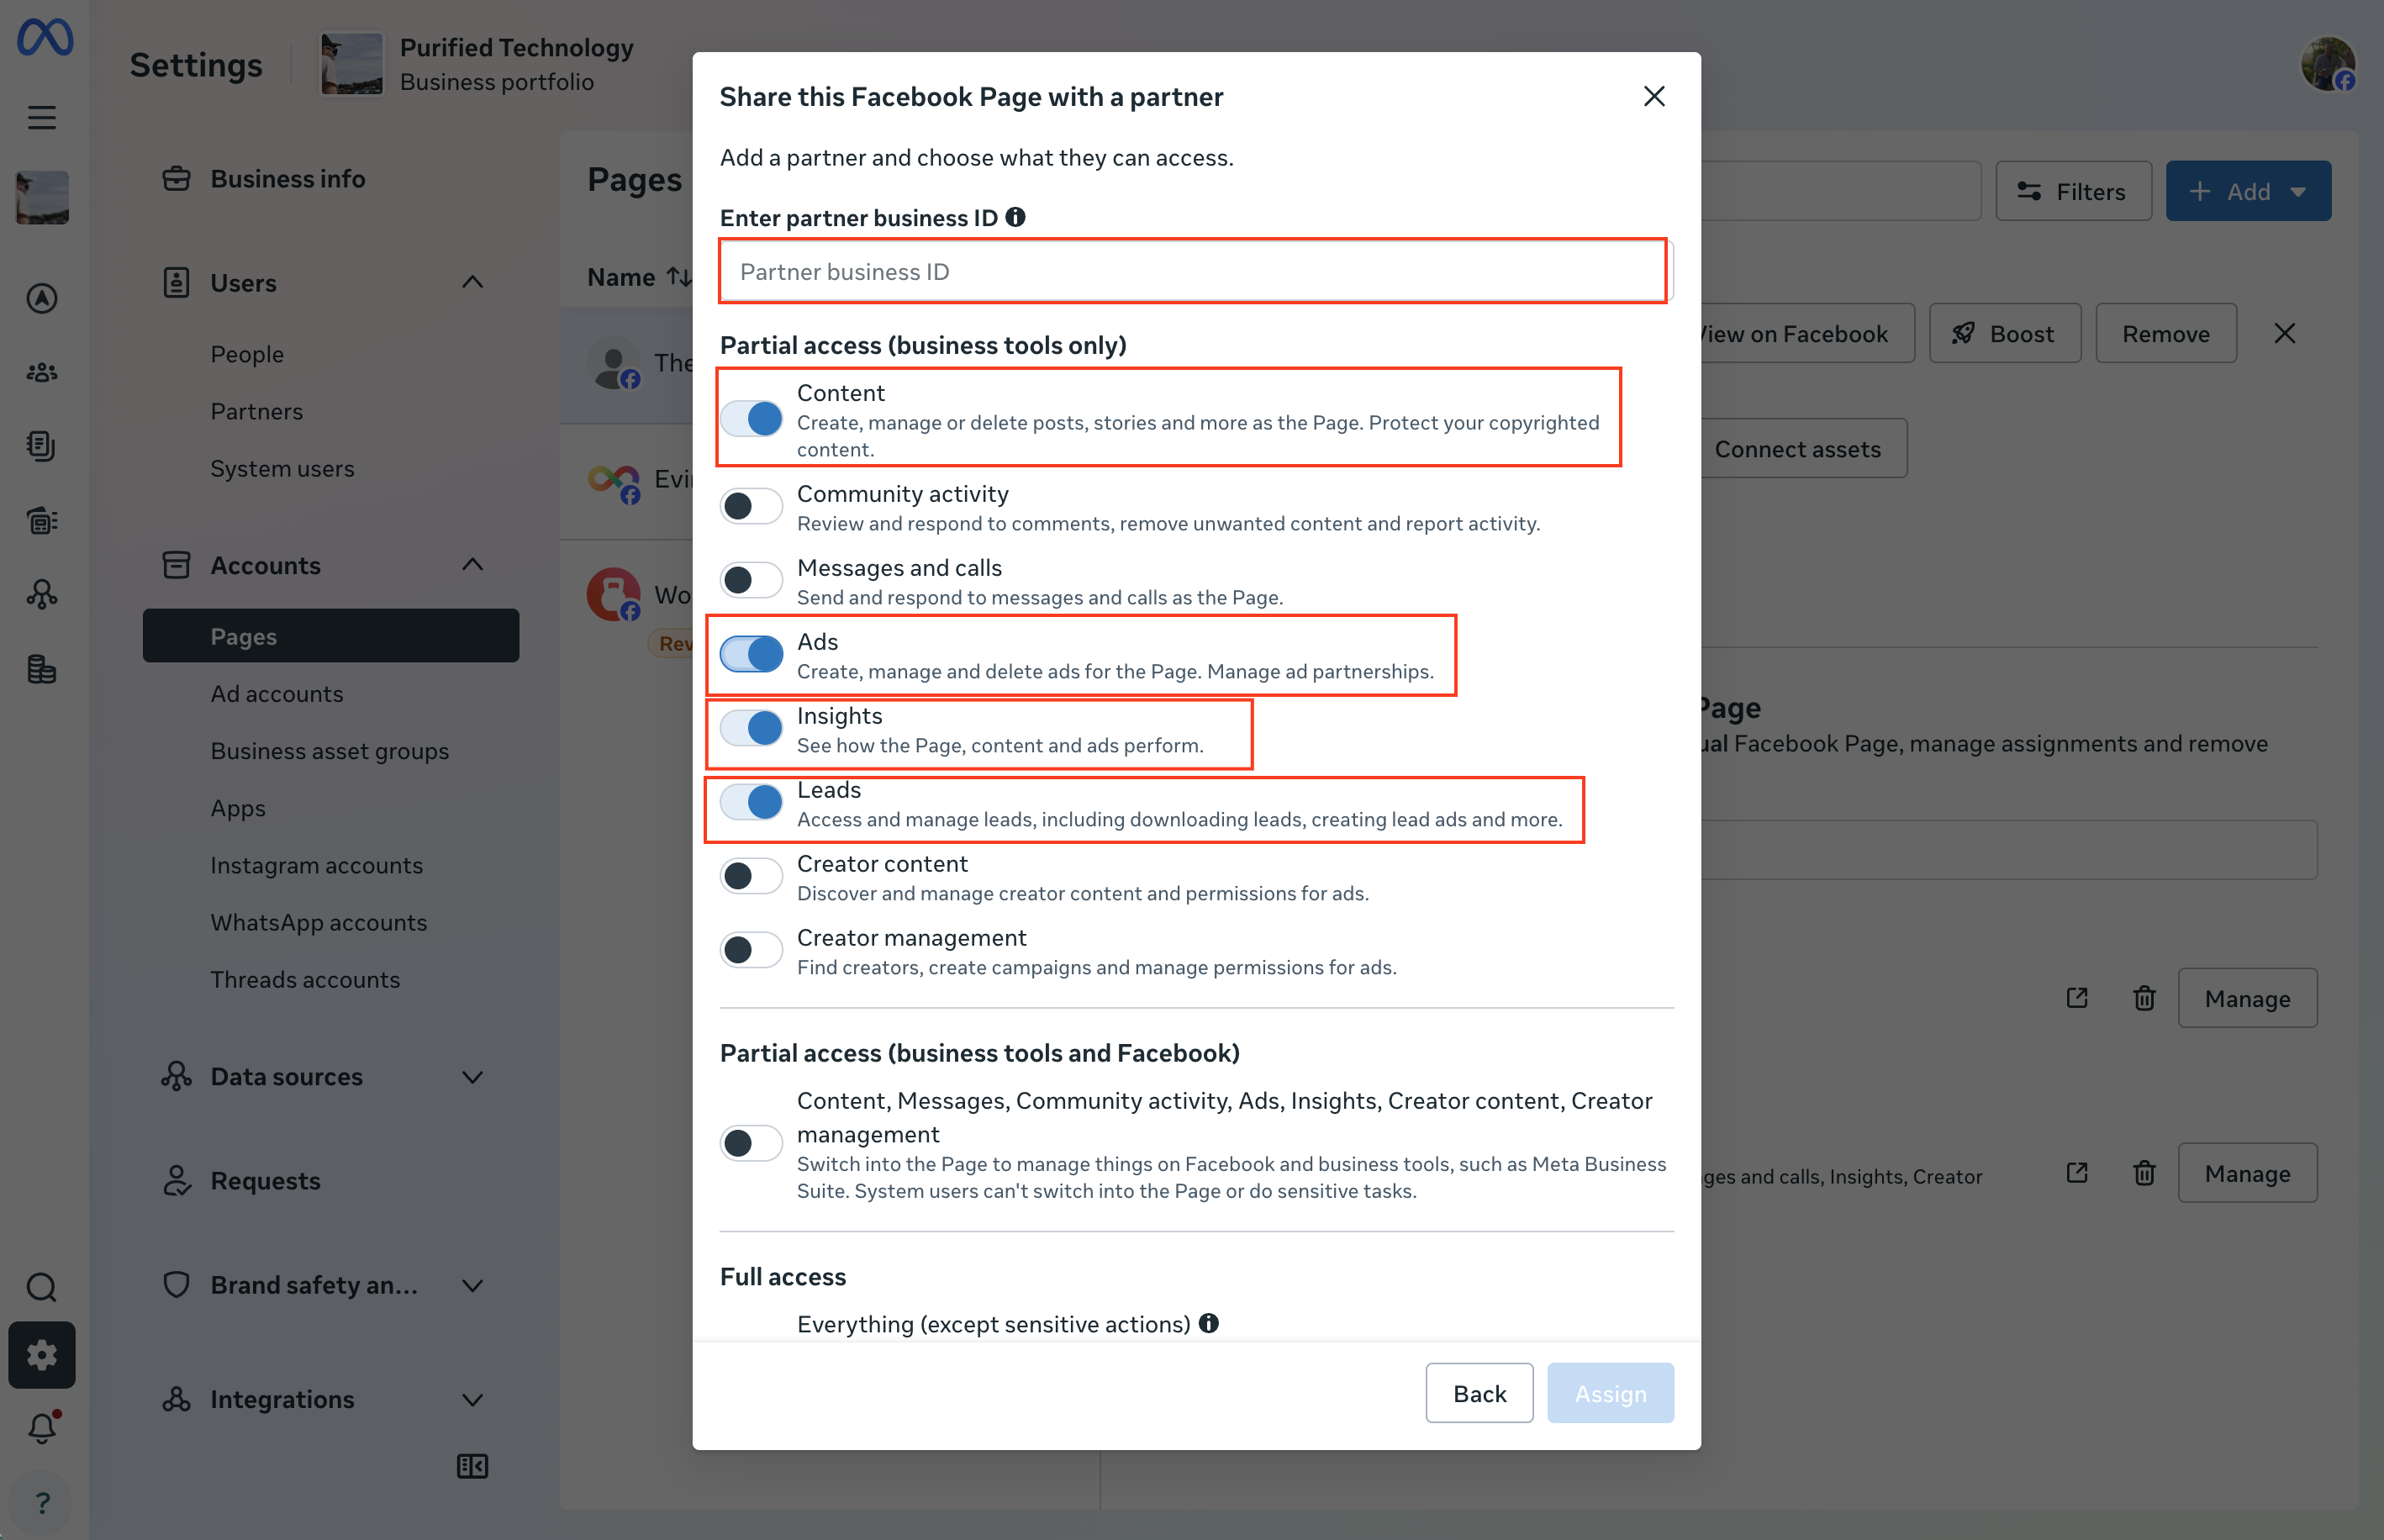
6) Enter our business id again and select the "Content", "Ads", "Insights" and "Leads" permission. Press the Assign button
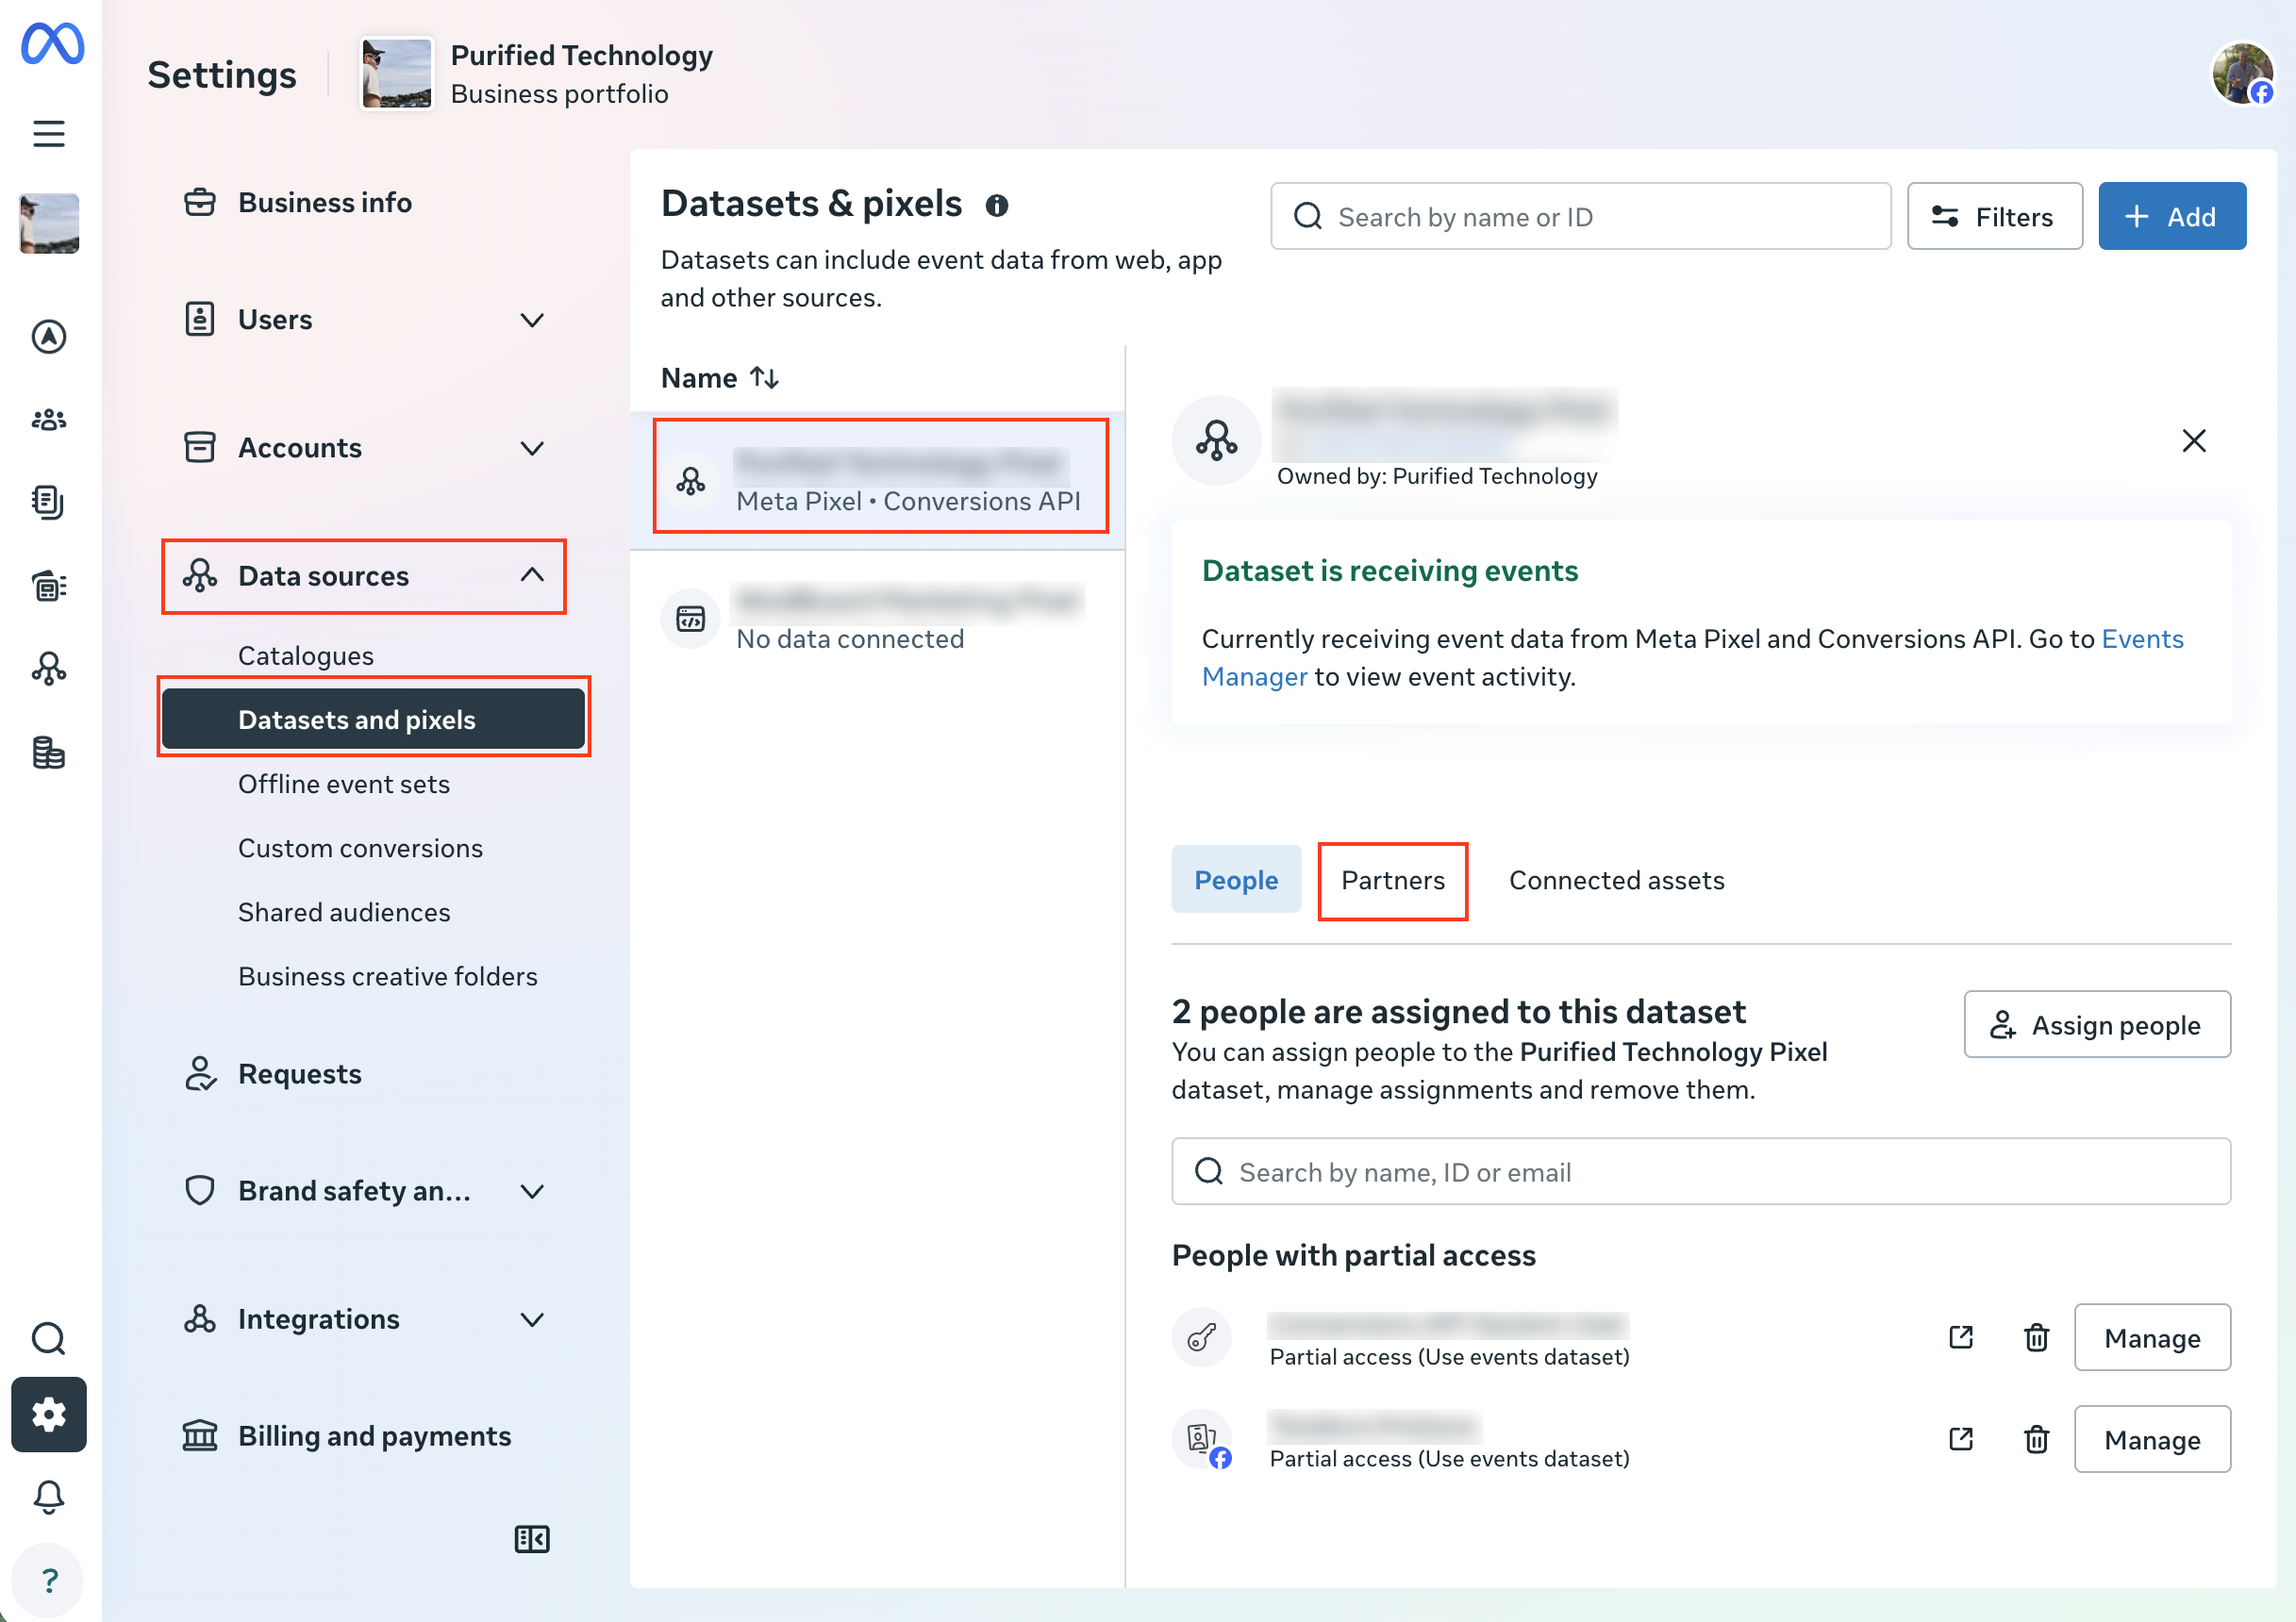
7) Head to the "Dataset and Pixels" section on the left which is under "Data Sources" in the sidebar. Again make sure you're choosing the right account. Then click the Partners tab and then Assign Partner button.
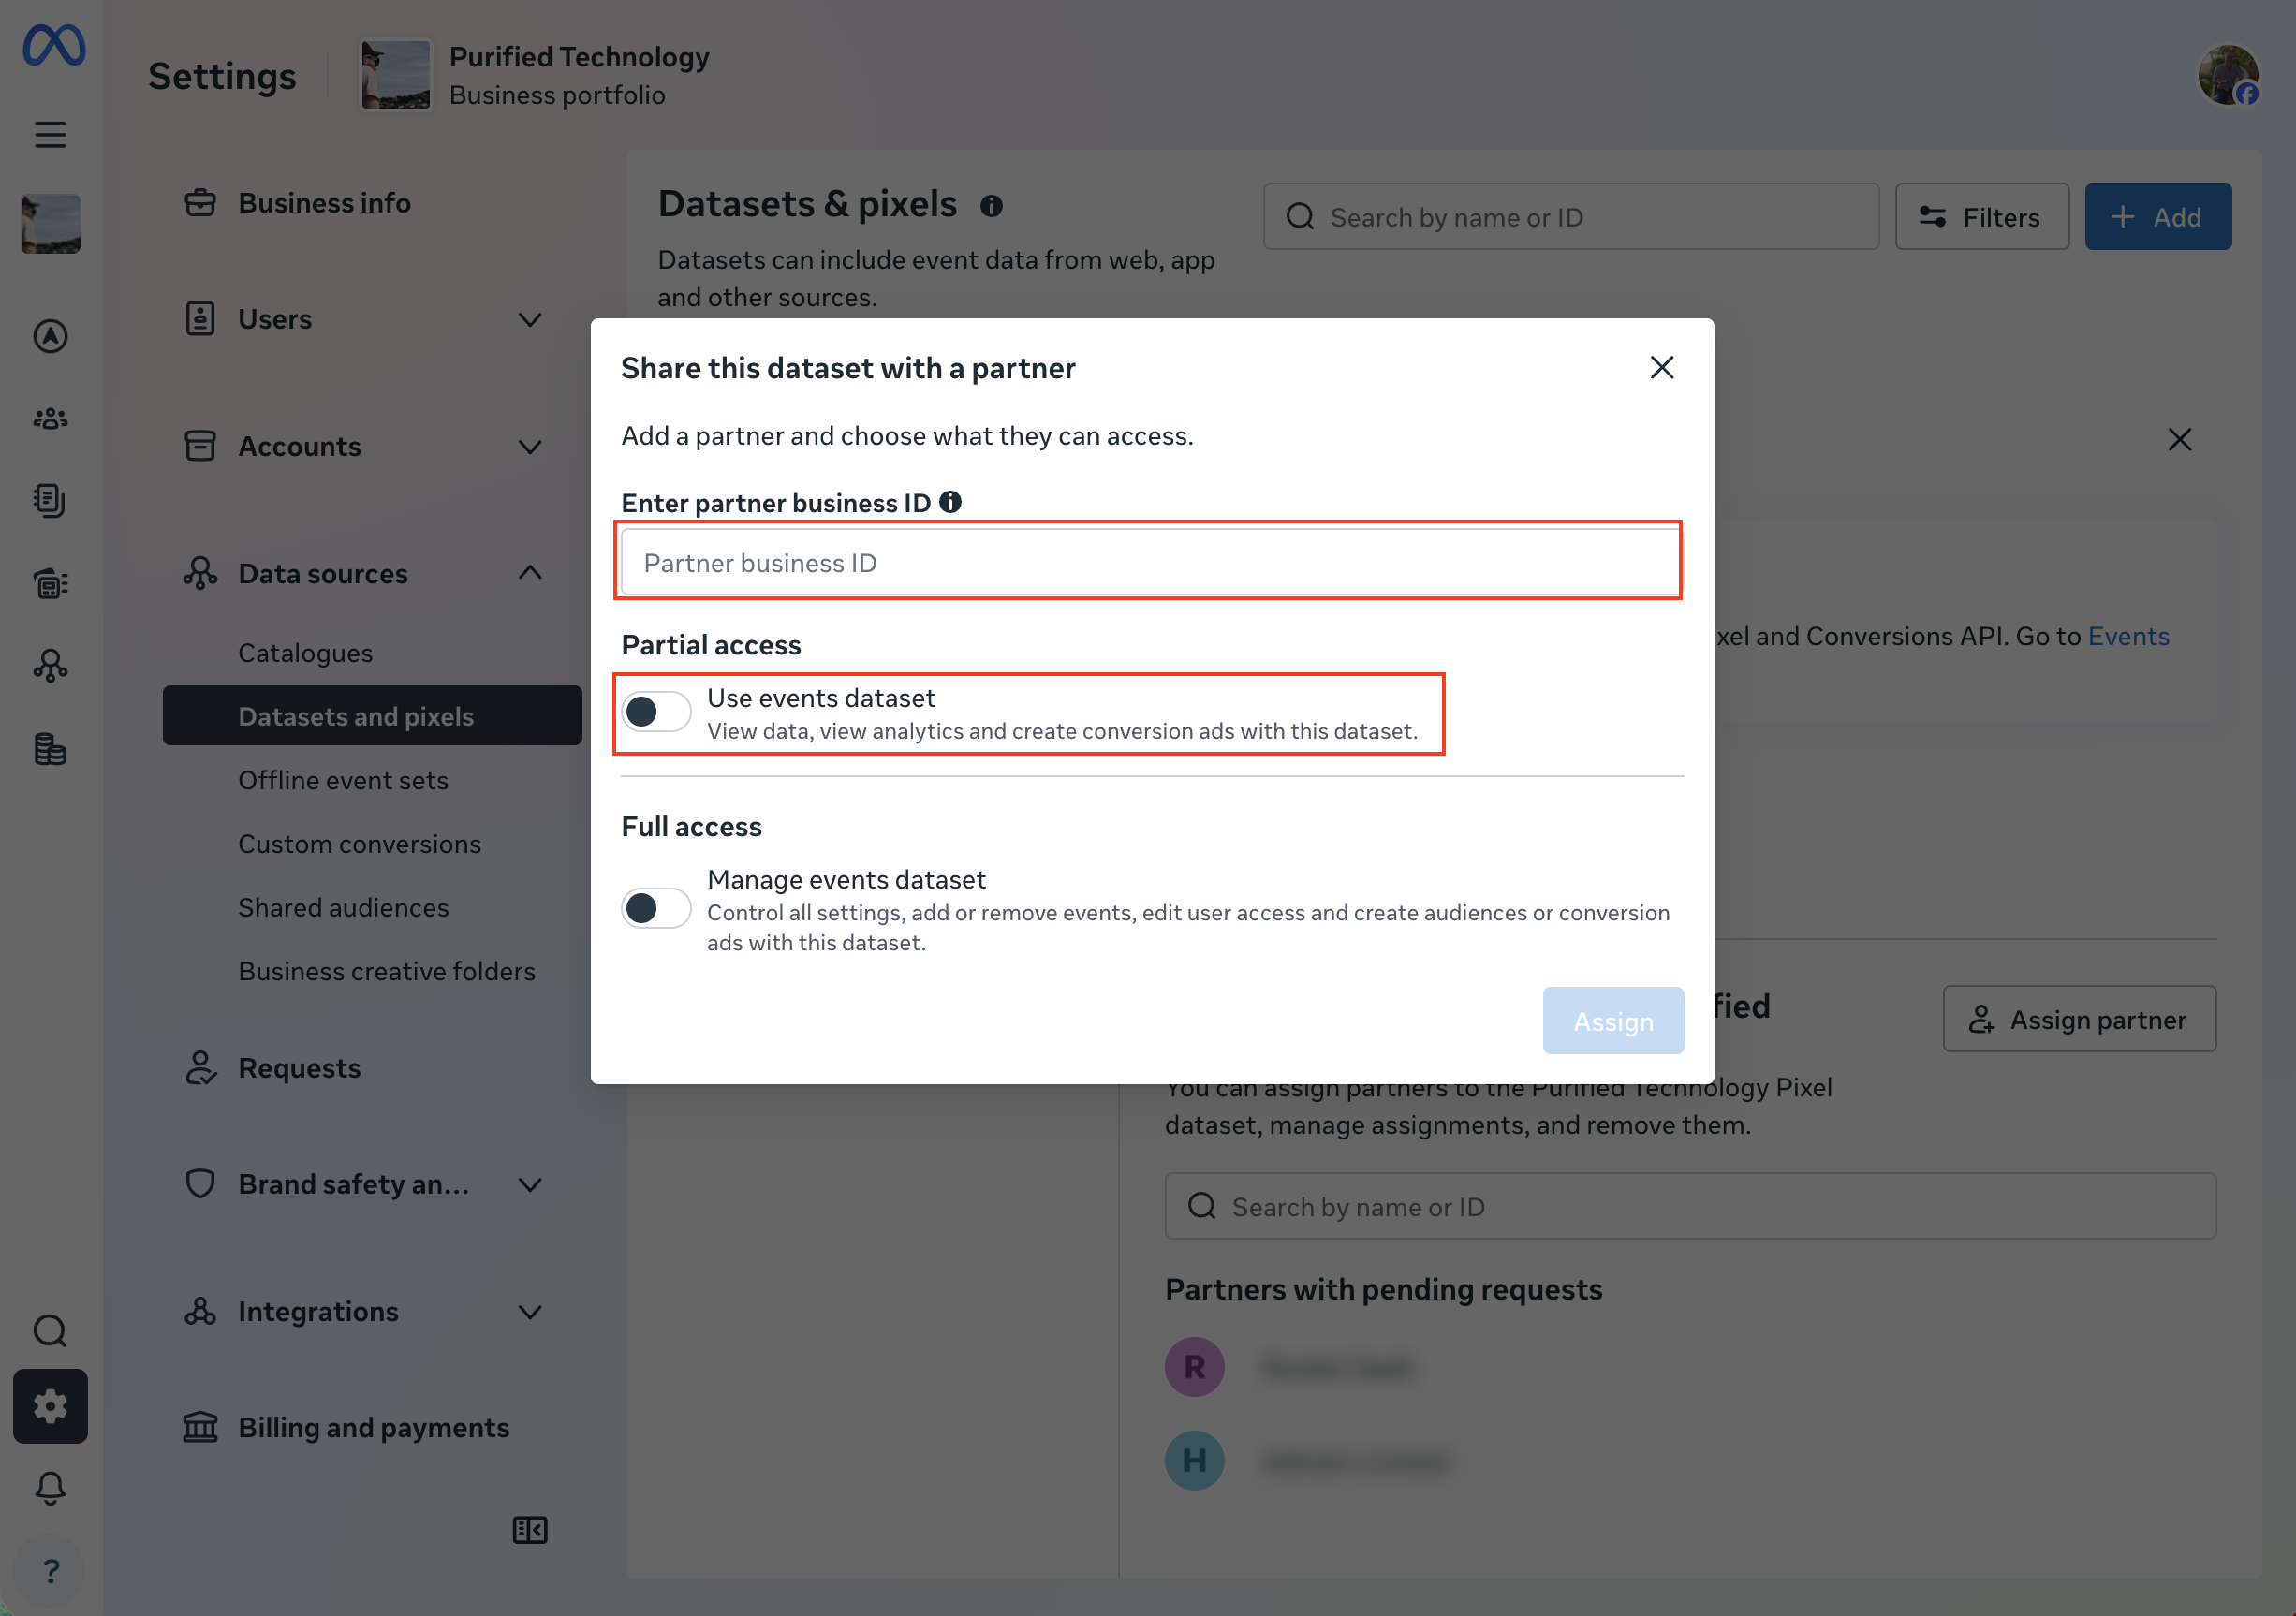
8) Enter our business id again and select the "User events dataset" permission. Press the Assign button
Removing access
To remove access from a previous ads partner you'll need to remove both human and computer access.
Remove human access
Repeat the steps in the Support access section above but rather than add a Partner, you'll need to remove a Partner. To do this click the Partners tab and click the Manage button next to a Partner. If you do not see a partner then they have been removed and you can move onto the next step.
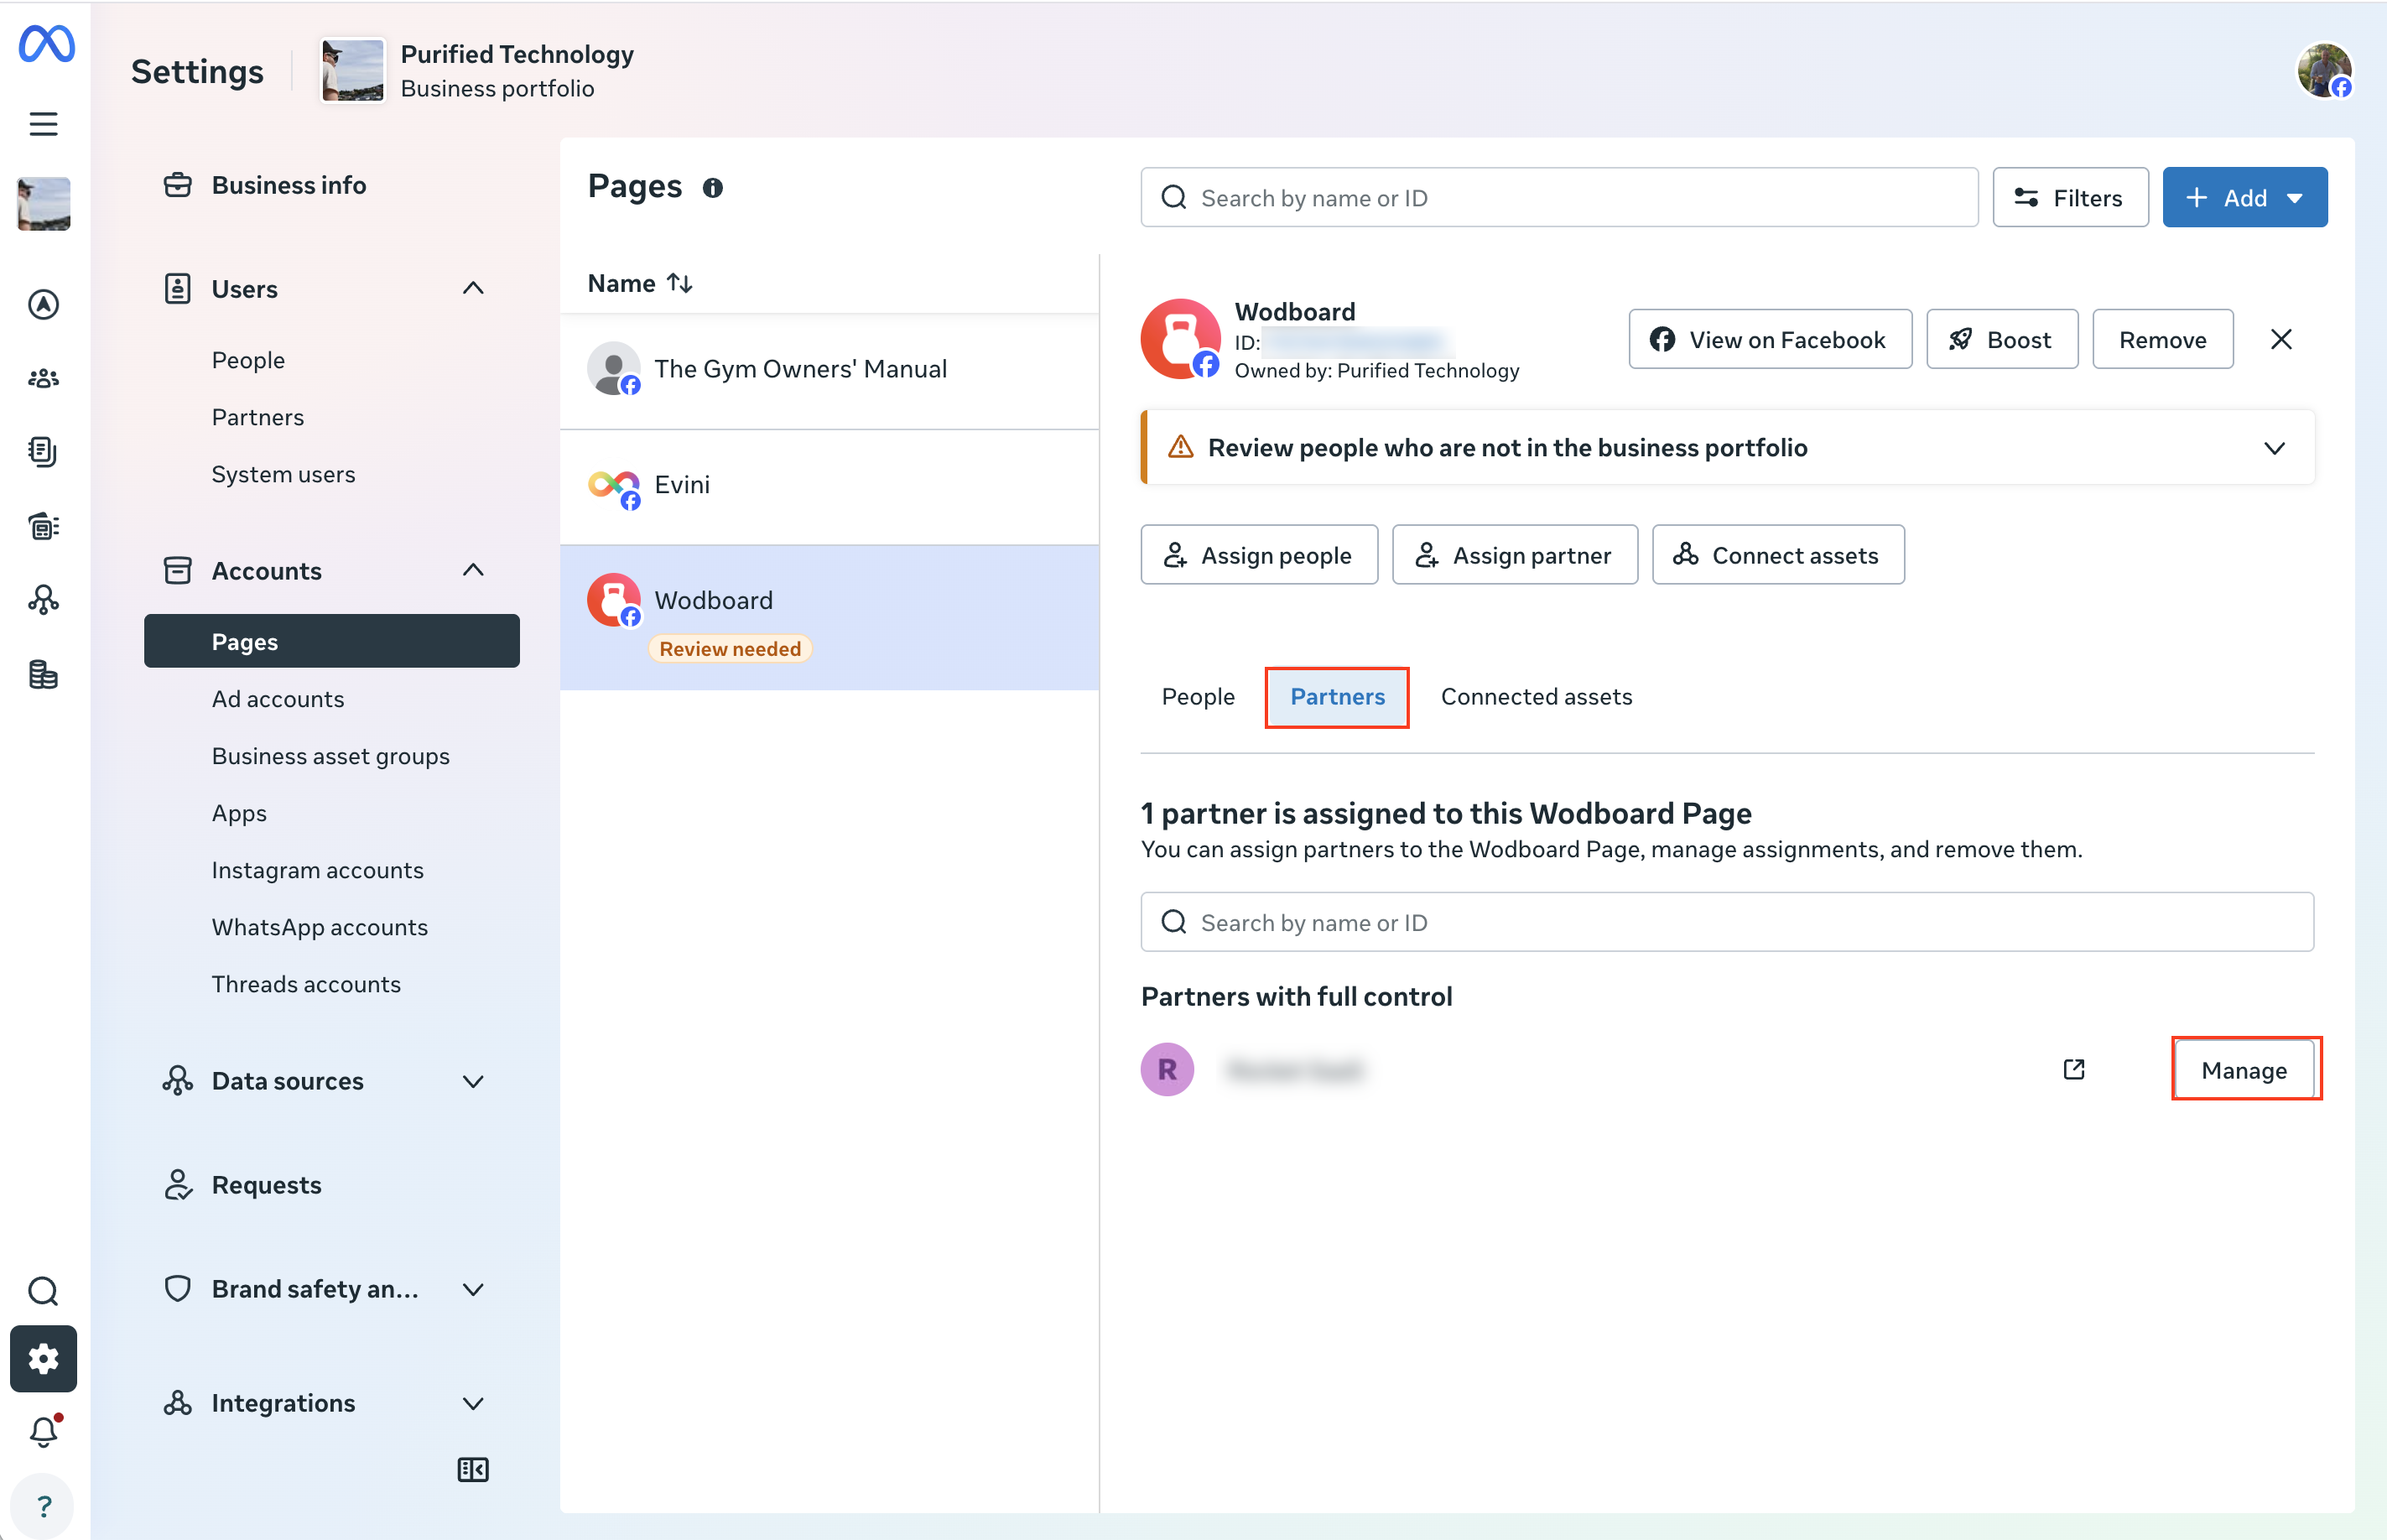
If they do have access click the "Remove Access" button as shown below.
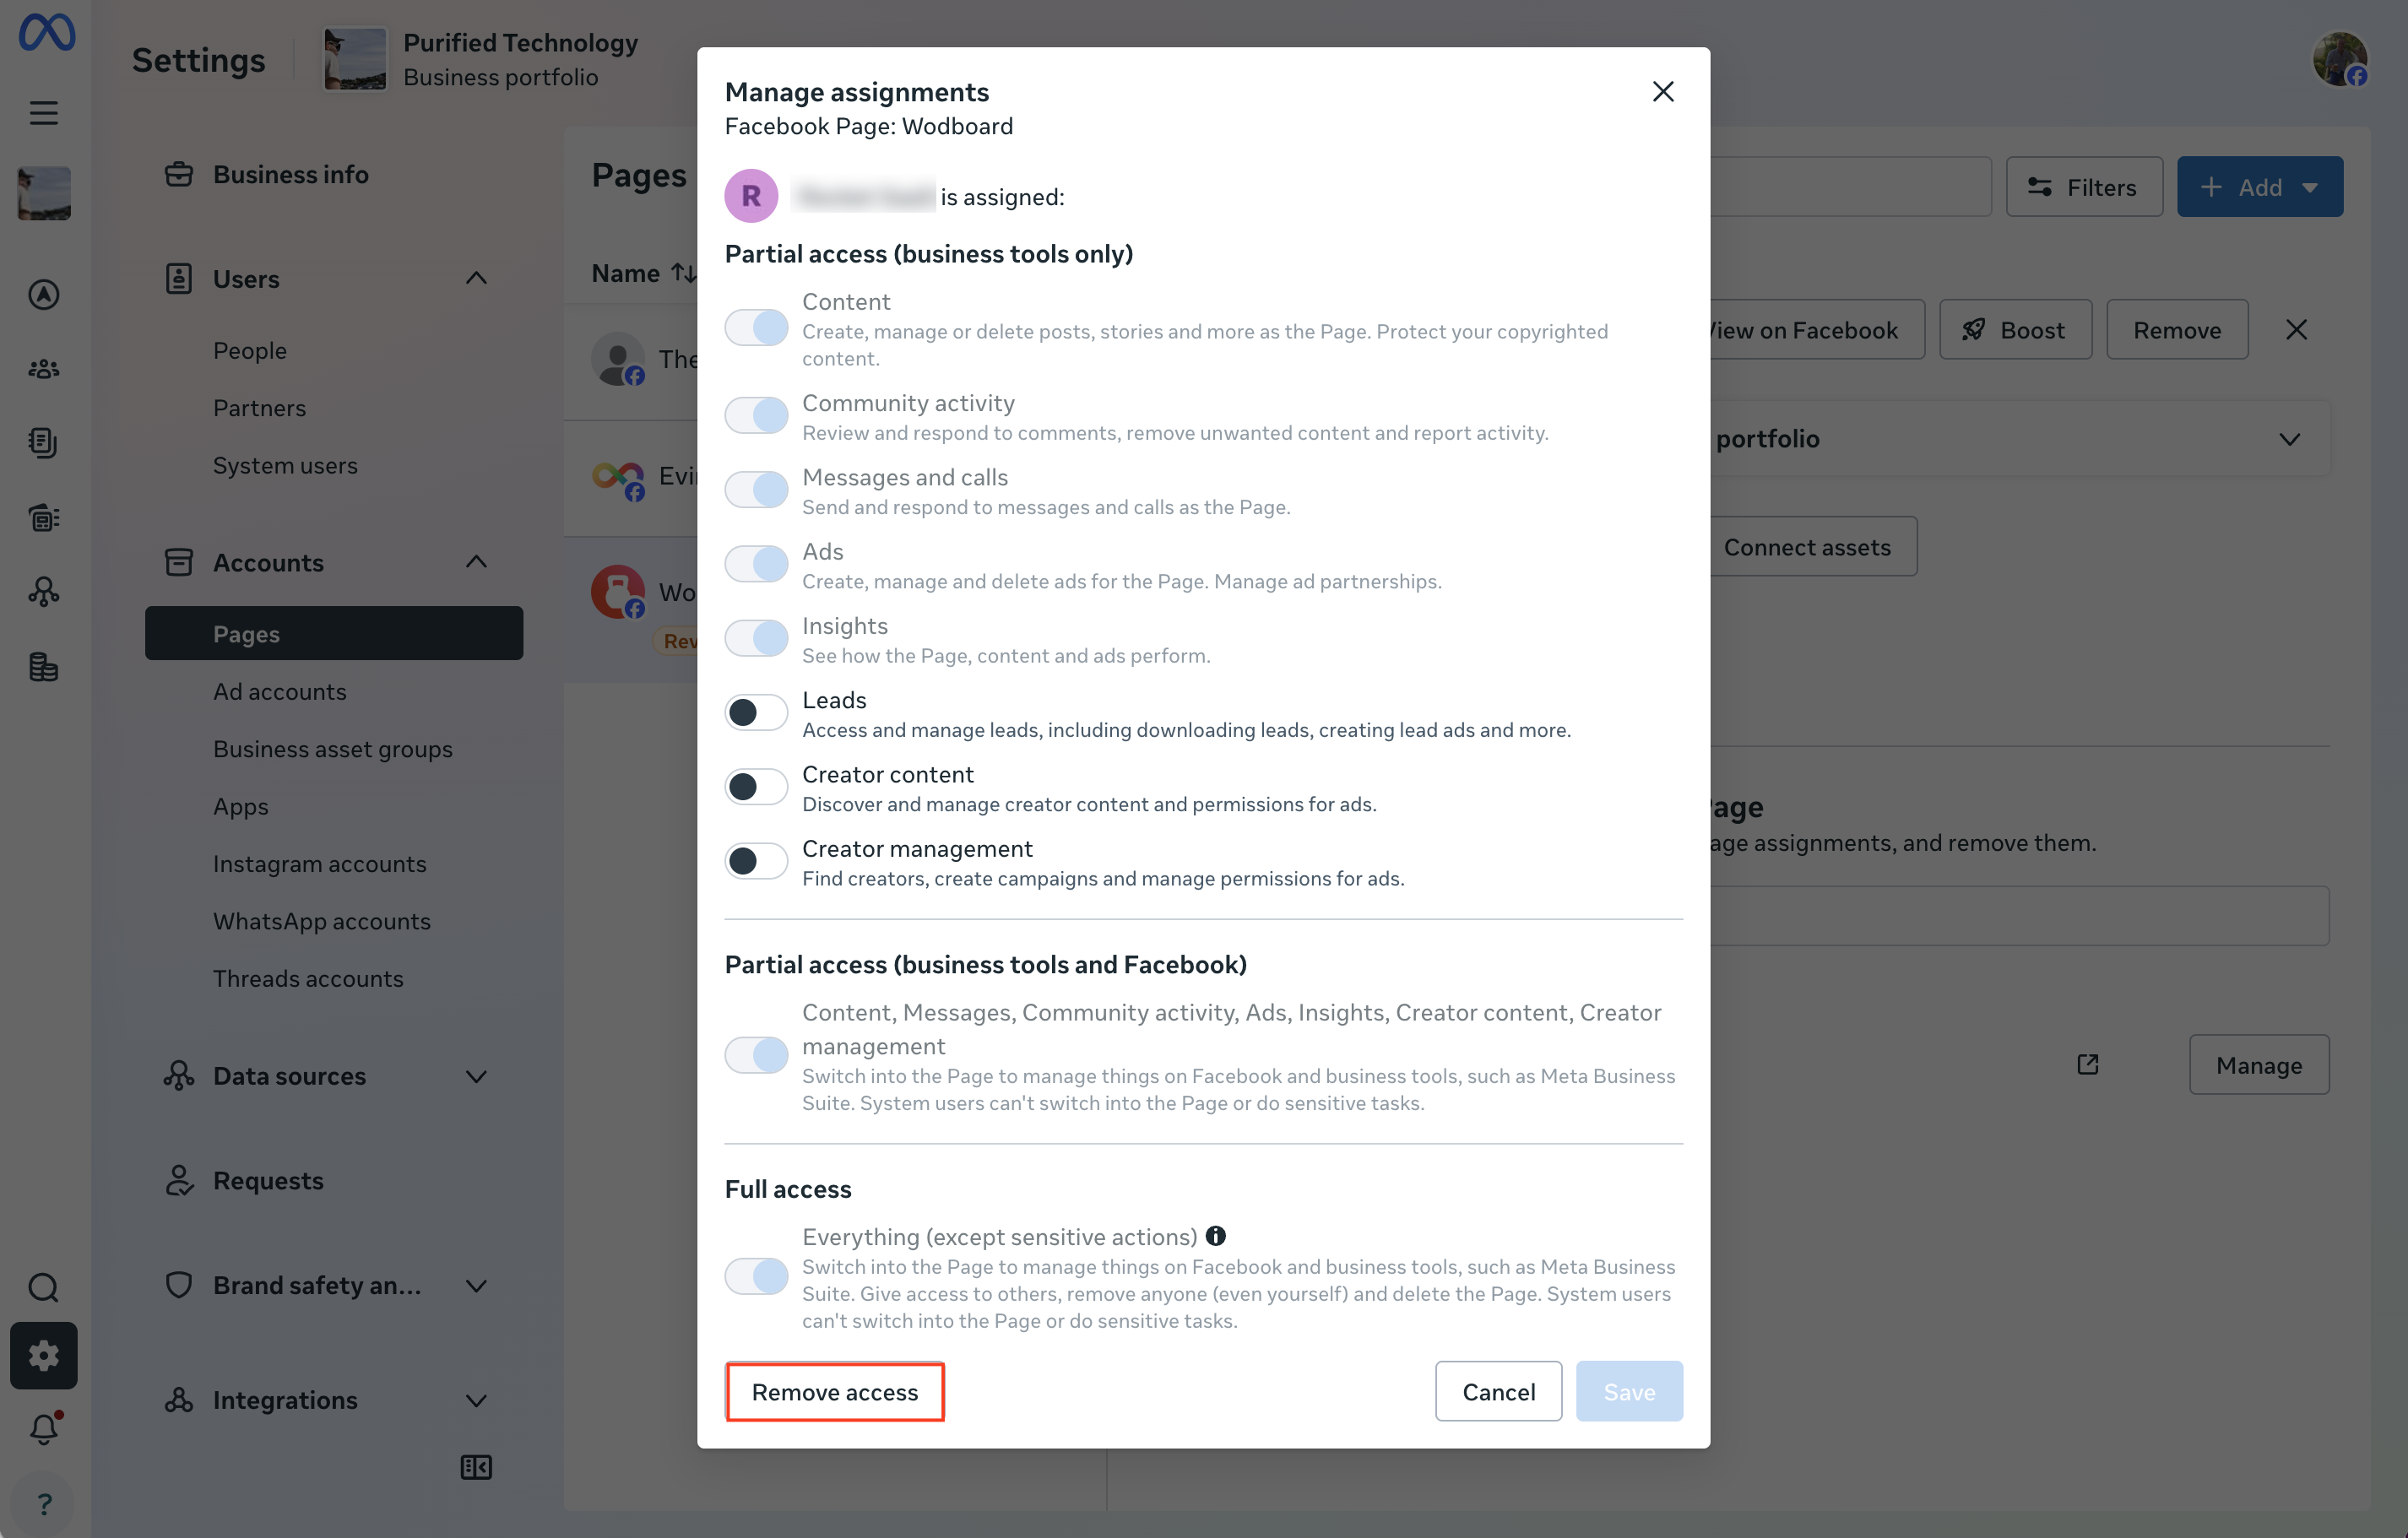
Repeat this process for 1) Ad accounts 2) Pages 3) Dataset and Pixels. How to find each section is detailed in the previous section called Support Access You should still check all three places even if the partner doesn't appear in the first one you check.
Removing computer access
To remove access for computer software there's a separate process that must be completed as well: As with human access this may have already been removed but you should still check:
1) Open up Facebook and click your profile icon and then Settings & Privacy from the dropdown. Next choose Settings and then in the sidebar Business Integrations. Look for any integrations you no longer need. Some systems use a generically named integration like "LeadConnector" which should be removed.
2) Click this link to open up the integrations in the Business Manager. Check the Connected Apps and remove any that are no longer needed (again noting there may be an app called "LeadConnector" ).
3) Finally click Lead Access in the sidebar underneath the Connected Apps page you were just on. Choose your page and click the CRMs tab. Remove any access that shouldn't be there.