
CRM Automations
Automations are one of the most powerful features of WodBoard CRM. They allow you to perform actions automatically based on what a lead or customer does, saving your team time and helping ensure every enquiry receives the right follow-up.
For example, when someone enquires about joining your gym, WodBoard can automatically send them a welcome email. If they don't book a trial, it can follow up again later.
Setup Wizard - Auto-Build Options
WodBoard provides auto-build options to help you get common automation journeys and pipelines set up quickly.
These are a useful starting point if you're new to CRM or want to avoid building every automation from scratch.
Pre-Designed Automations
WodBoard also provides pre-designed automations for common lead and customer journeys.
These can include enquiry follow-ups, trial reminders, consultation confirmations, missed appointments, post-visit follow-ups and member communications.
You can use these as a starting point and customise the messaging to match your gym.
Head to Communications -> Automations -> New Automations and select from:
- Lead - Appointment
- Lead - Trials
- Lead - General
- Customer - General
- Customer - Appointment
- Custom
Creating Custom Automations
If you'd prefer to build your own processes, you can create custom automations for both leads and existing customers.
Automations can be configured around events, conditions, delays and actions, depending on the journey you want to create.
For example:
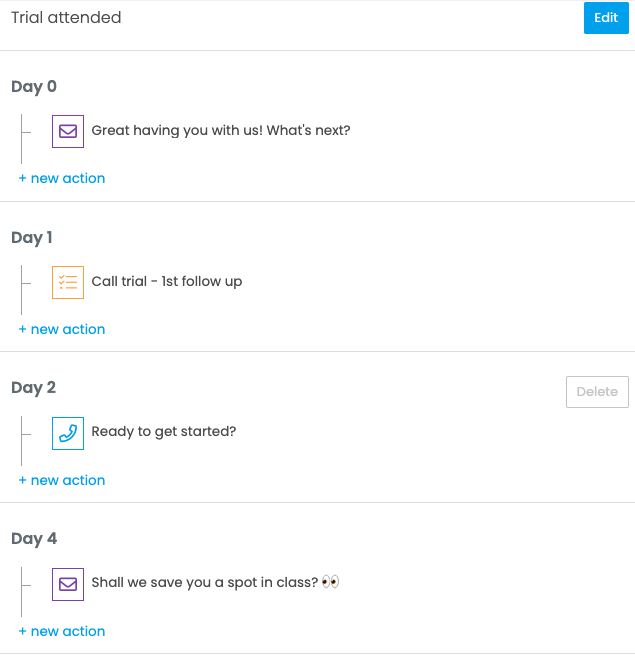
Lead submits enquiry → Welcome email sent → Task for staff to call lead → Follow-up SMS sent
Automations can also work alongside your pipelines, moving leads through states and triggering further actions.
Step 1 - Setting up the automation
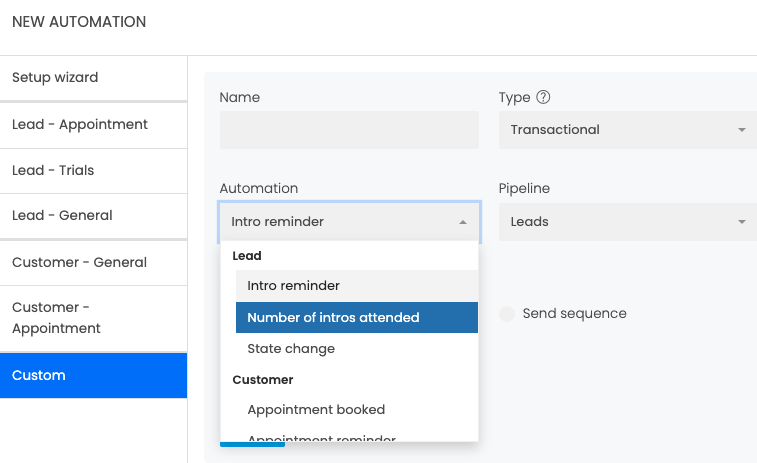
For Leads -> Custom -> Leads -> select from the following:
- Intro reminder: suitable for a trial or appointment reminder
- Number of intros attended: if you offer more than 1 free trial, use this to check in at the end
- State change: a great way to assign a state change to a pipeline. You can create an automation that will go to all of those state (eg enquiry), despite having more than 1 form.
Example - this automation would go to ALL forms with the 'enquiry' state linked to 'enquiry pipeline':
- Form - website enquiry - enquiries pipeline
- Form - meta - enquires pipeline
- Form - linked tree - enquiries pipeline
For Customers -> Custom -> Customer -> select from any of the options that work for your end goal. Example:
- New (paying) customer: Any brand new customer, no matter what they've purchased, will receive this sequence of messaging.
- No active products: Drum up business with anyone on the system that doesn't currently have a membership/pass.
- Number of attendances: Celebrate milestone achievements from class 1 attended to class 1000!
- Non attendance: Keep track of your customers that've haven't been for 'x' days.
Step 2 - Creating the automations
1. Enter when the automation should fire
2. Select the Action Type (eg. email, WhatsApp, Task)
3. Complete the Action (example below is a task)
4. '+Step' to create your next automation within the sequence

|

|

|

|
Looking for more information on how to use tasks? Click here.
Understanding Automation Variables
When creating automations, you'll come across various variables and actions that control what happens to your leads and customers.
These allow automations to use relevant customer information and carry out tasks without manual intervention.
For example:
- Convert to Account – Converts a lead into a customer account, typically as part of the process of signing up for a membership.
- State Change – Moves a lead into another state within a pipeline.
- Variables – Allow messages and automation actions to use information associated with a lead, customer or booking. Eg 'lead_name', 'event_name', 'gym_location'.